Exporting a Motion to MicroPython
Turn the motion you animated in Snakie into a ready-to-run MicroPython program and understand the code it writes
By Kevin McAleer, 5 Minutes
Page last updated November 21, 2026
Let Snakie write the loop
You’ve animated a motion and bound the servos. Snakie now has everything it needs to write the program for you.
- In Build, switch to Animate and open the Joint tracks tab
- Check your keyframes from lesson 9 are still there
- Click Export .py
A new file called motion.py opens in the editor.
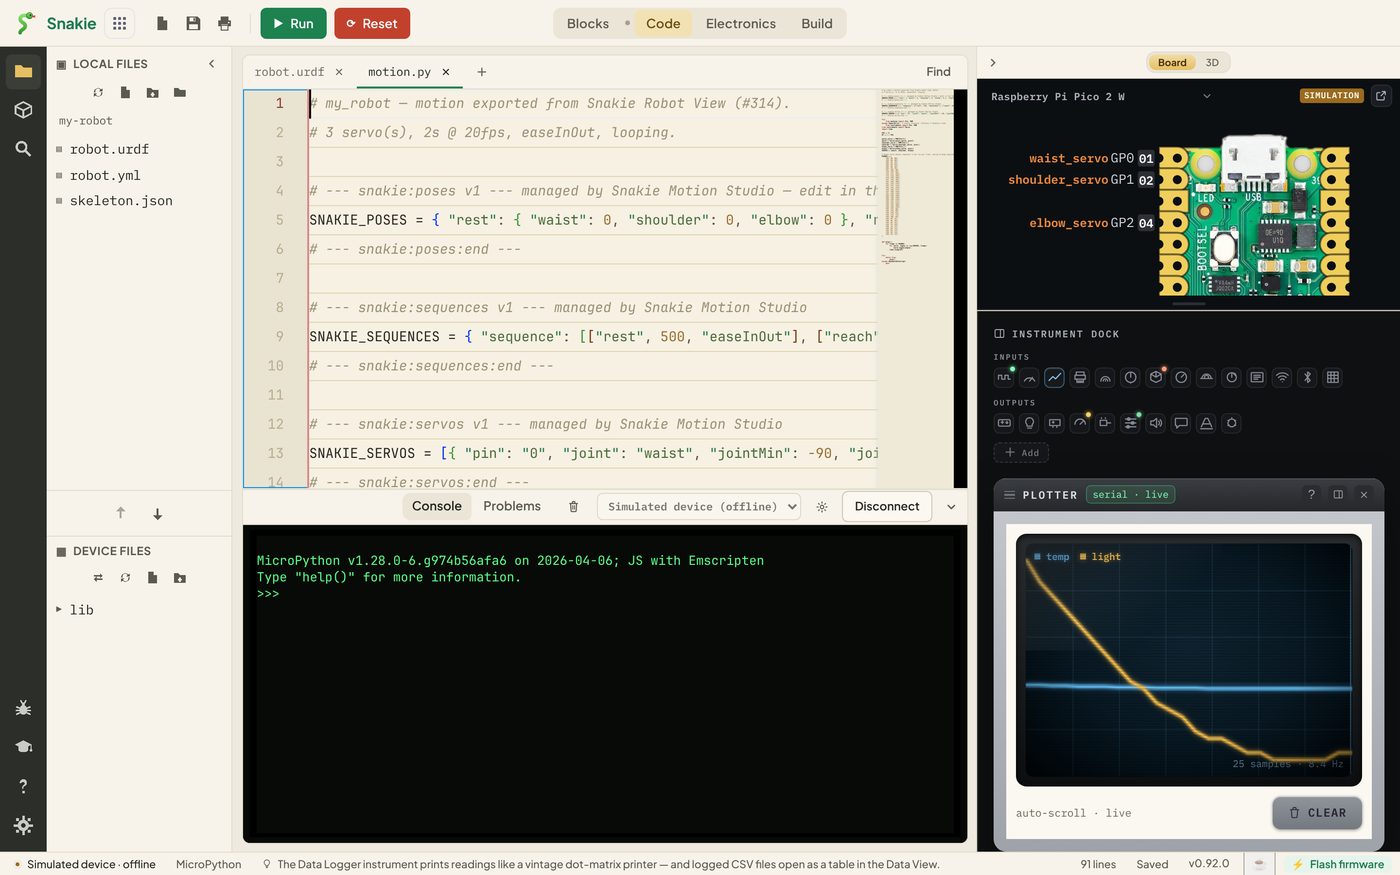
Notice the board picture on the right. It has labelled GP0, GP1 and GP2 with waist_servo, shoulder_servo and elbow_servo, read straight from the code.
What’s in the file
It has four parts. Here they are, shortened.
1. Your project data. Three blocks marked “managed by Snakie” hold your poses, your Timeline sequence and your servo bindings.
# --- snakie:poses v1 --- managed by Snakie Motion Studio
SNAKIE_POSES = { "rest": { "waist": 0, "shoulder": 0, "elbow": 0 }, ... }
# --- snakie:poses:end ---
Leave those alone. Snakie rewrites them each time you export. Everything outside the markers is yours and is kept.
2. The servos. One per binding, named after its joint.
waist_servo = PWM(Pin(0))
waist = Servo(waist_servo, pin=0)
shoulder_servo = PWM(Pin(1))
shoulder = Servo(shoulder_servo, pin=1)
elbow_servo = PWM(Pin(2))
elbow = Servo(elbow_servo, pin=2)
SERVOS = (waist, shoulder, elbow)
This is why good joint names mattered back in lesson 2.
3. The frames. One row for every step of the motion, with a servo angle for each servo.
FPS = 20
DT = 1 / FPS

FRAMES = (
    (90, 90, 90),
    (90, 90, 91),
    (91, 91, 92),
    (92, 93, 94),
    ...
)
Two seconds at 20 frames a second is 40 rows. The easing is already worked into the numbers: look how the first few rows barely change, then the steps get bigger.
4. The player.
def play():
    for frame in FRAMES:
        for servo, angle in zip(SERVOS, frame):
            servo.angle(angle)
        time.sleep(DT)


try:
    while True:
        play()
except KeyboardInterrupt:
    pass
For each row, set every servo, wait one frame, and move on. That’s the “lots of small steps” loop from the end of the last lesson.
Run it
Press Run with the simulated device connected and switch to Build. The arm now moves smoothly through rest, reach and tuck, over and over, exactly as it did when you pressed play on the joint tracks.
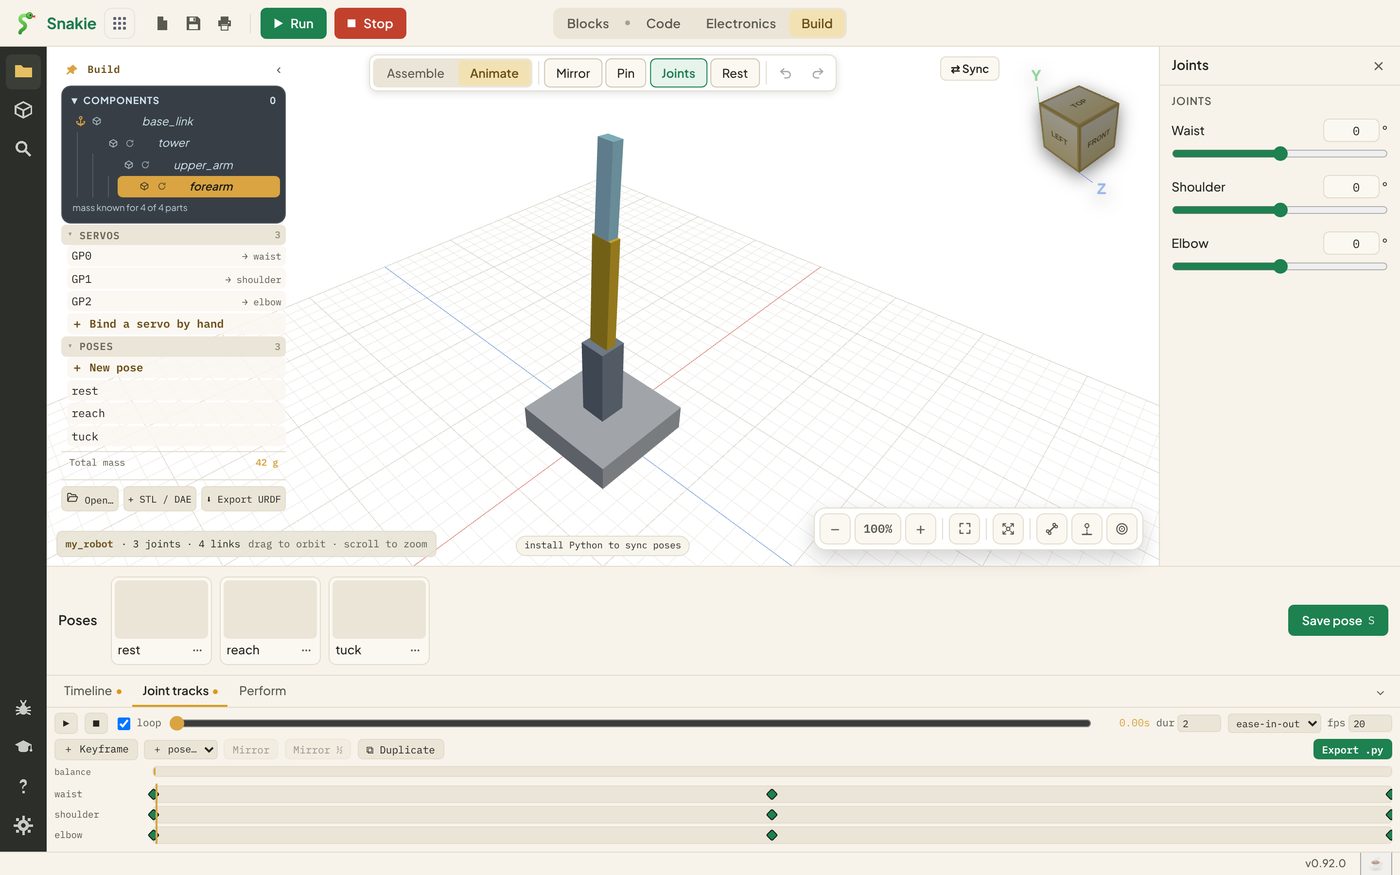
Press Stop when you’ve seen enough.
To put it on a real robot, save motion.py, connect your Pico, upload the file and run it. The servo angles are already converted using your bindings, including any you inverted.
Make it yours
The generated file is a starting point. Some ideas:
- Call
play()once when a button is pressed, in place of the endless loop - Change
DTto play the same motion faster or slower - Play
reversed(FRAMES)to run the motion backwards - Export a second motion to another file and import both
When you change the animation, export again. Your own code outside the marked blocks survives.
Try it Yourself
- Export the motion and run it on the simulated device
- Count the rows in
FRAMES. Does it match duration times fps? - Change the fps box on the joint tracks to
10, export again and compare - Edit the loop at the bottom so the motion plays three times and then stops
Common Issues
Problem: The file says 0 servo(s) at the top and has no frames.
Solution: Put keyframes on the Joint tracks and use Export .py there.
Why: The export is built from the joint tracks. A motion that only exists as blocks on the Timeline tab has no keyframes to bake.
Problem: Export .py is greyed out. Solution: Bind at least one servo to a joint. Why: With no bindings there are no servos to write code for.
Problem: One joint isn’t in the exported code. Solution: Bind a servo to it and export again. Why: Joints with no servo are previewed on screen but left out of the code. Snakie adds a comment at the top of the file to tell you.
Check your understanding
Quick quiz 1 of 3
Where does the exported motion come from?
Quick quiz 2 of 3
A 3 second motion at 20 fps has how many frames?
Quick quiz 3 of 3
Which part of motion.py should you leave alone?
You can use the arrows ← → on your keyboard to navigate between lessons.
Comments