Joining Blocks
Use Snakie's joint tool to snap one block onto another and choose how the joint moves
By Kevin McAleer, 5 Minutes
Page last updated November 21, 2026

A better way to place parts
In the last lesson you placed the tower by working out an offset. That’s fine for one block. For an arm, where each piece hangs off the end of the last, there’s a faster tool: Add a joint. You click a spot on one block, then a spot on another, and Snakie brings them together.
Make the upper arm
- Click Add a box
- Set L
80, W16, H8 - Pick an orange colour
- Name the joint
shoulder - Set Offset Z to
100so the block floats above the tower where you can reach it - Click OK, then rename the block to
upper_arm
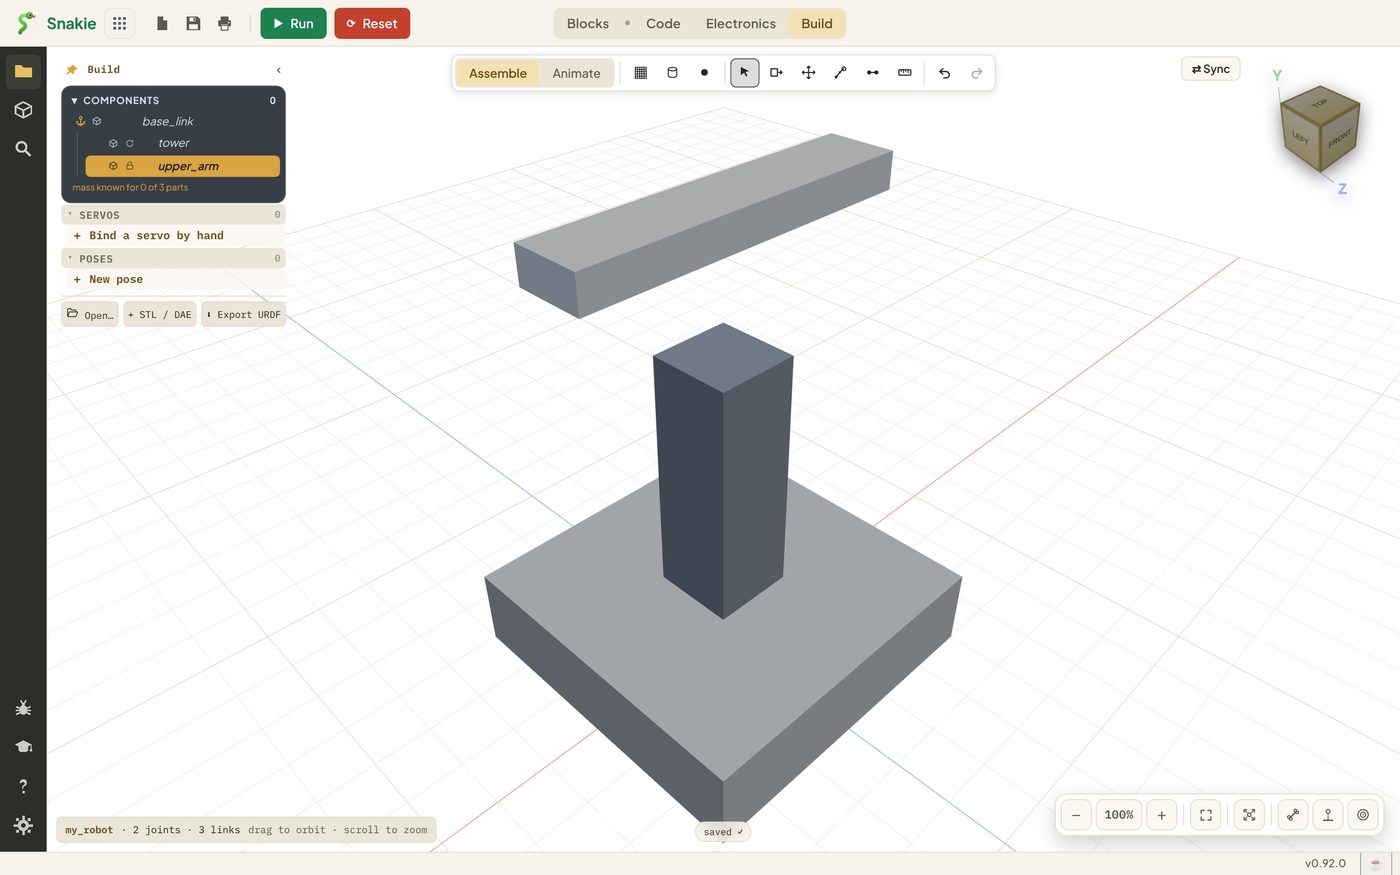
It’s attached to the base for now, and it’s the wrong way up for an arm. The joint tool fixes both.
Snap it on
- Click Add a joint in the toolbar. The Add Joint panel opens
- Click the top face of the tower. That’s the parent, the part that stays put
- Click one end face of the upper arm. That’s the child, the part that moves
As you move over a block, Snakie highlights the nearest snap point: a face centre, an edge or a corner. When both are picked, the arm jumps into place for a preview, standing on its end on top of the tower.
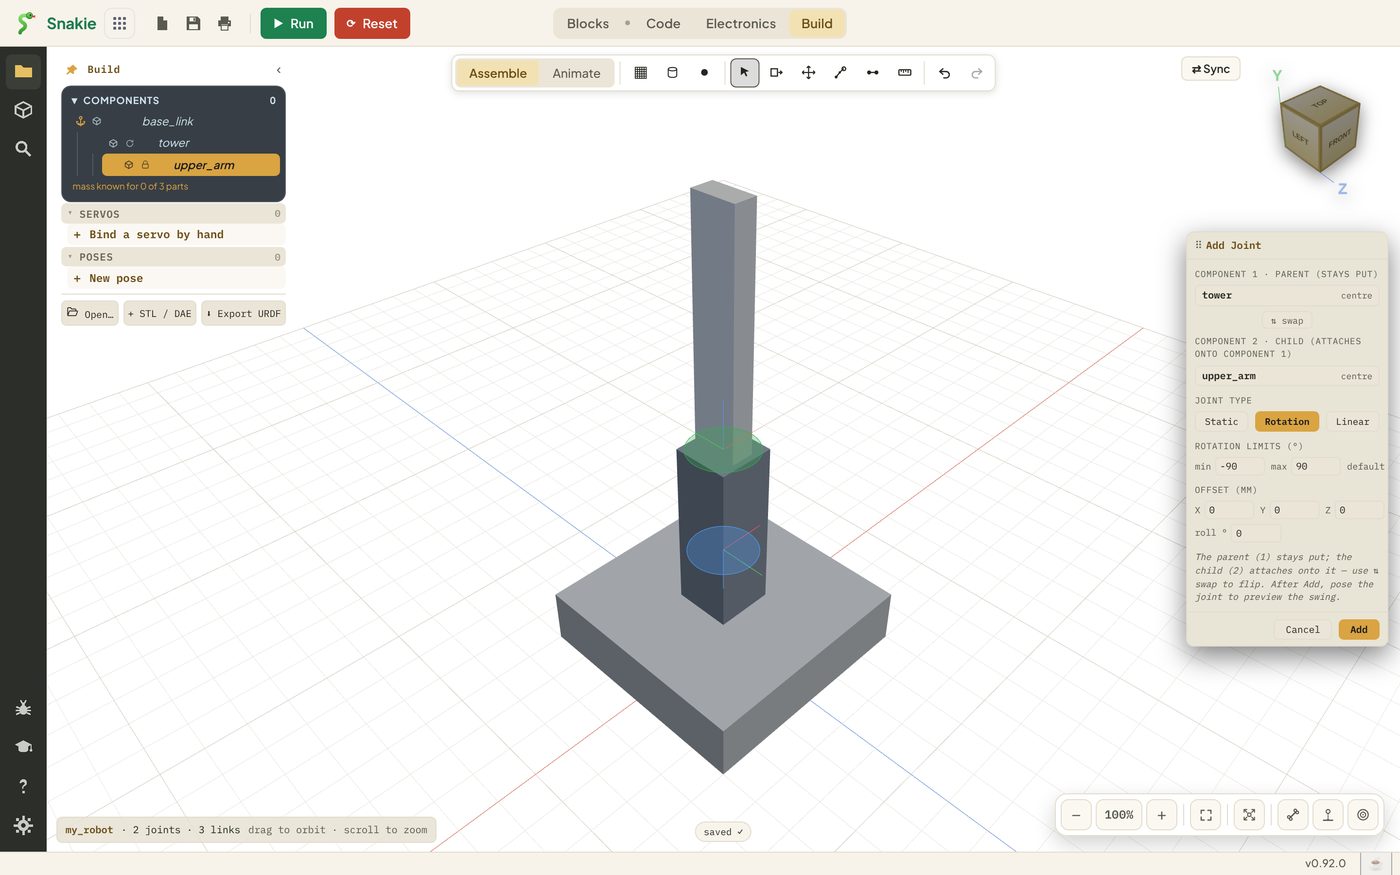
The panel now shows both parts, each with the word centre because you picked the centres of two faces. If you clicked them the wrong way round, swap flips parent and child.
Choose how it moves
Under Joint type there are three choices.
| Type | What it does | Example |
|---|---|---|
| Static | Glued in place | A sensor bolted to a chassis |
| Rotation | Turns about an axis, between two limits | An elbow |
| Linear | Slides along a line | A drawer or a lift |
Choose Rotation and click Add.
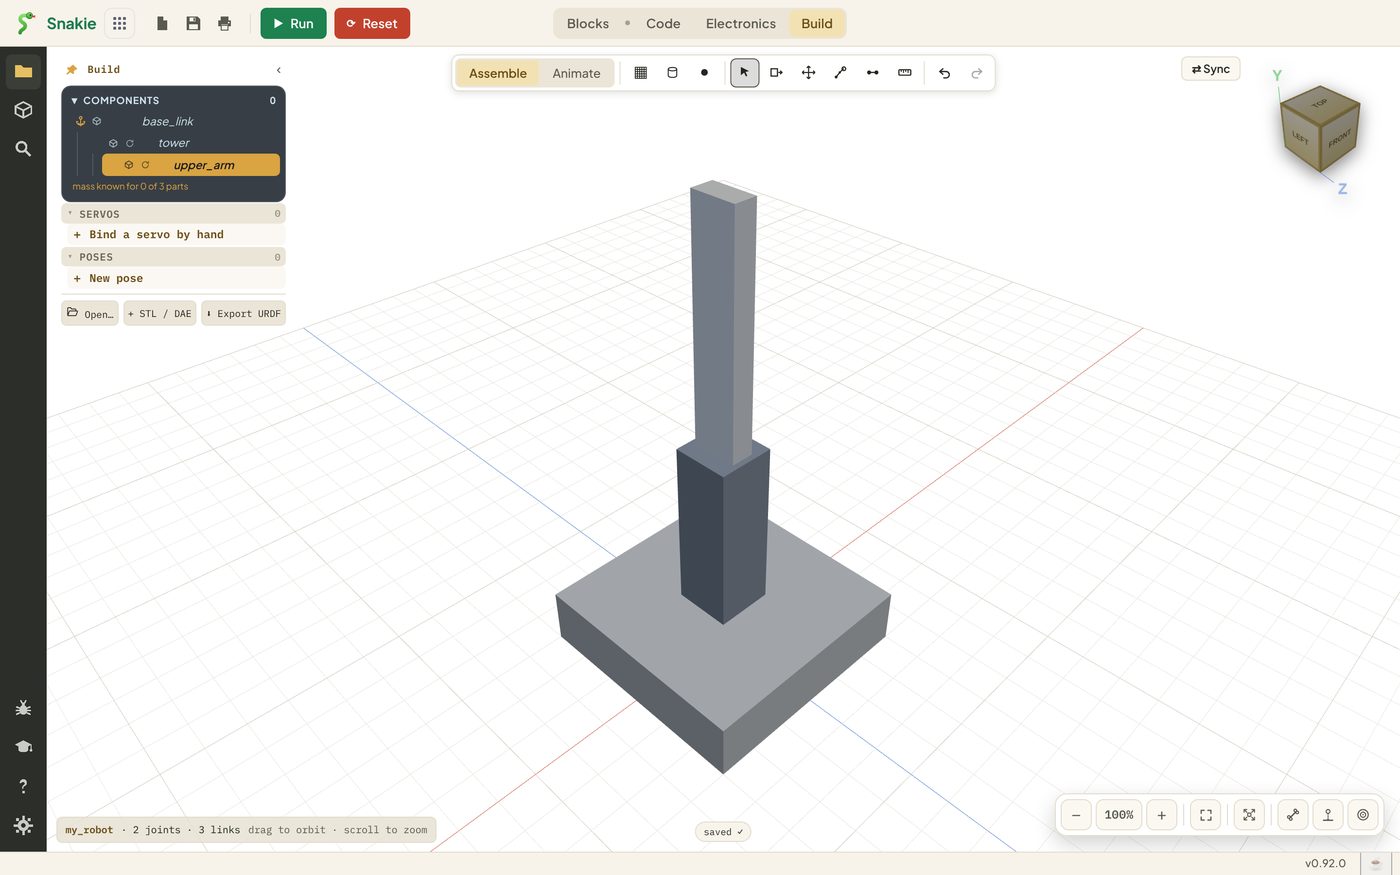
The Offset and roll boxes in the panel nudge the child after it has snapped. Leave them at zero today.
Point the hinge the right way
A joint made with this tool turns around the line that goes straight through the two faces you clicked, like a wheel on an axle. For our arm that would spin the upper arm on the spot. A shoulder needs to swing over instead.
- Right-click
upper_armin the Components list and choose Edit joint “shoulder”… - Next to Axis, click Y
- Click OK
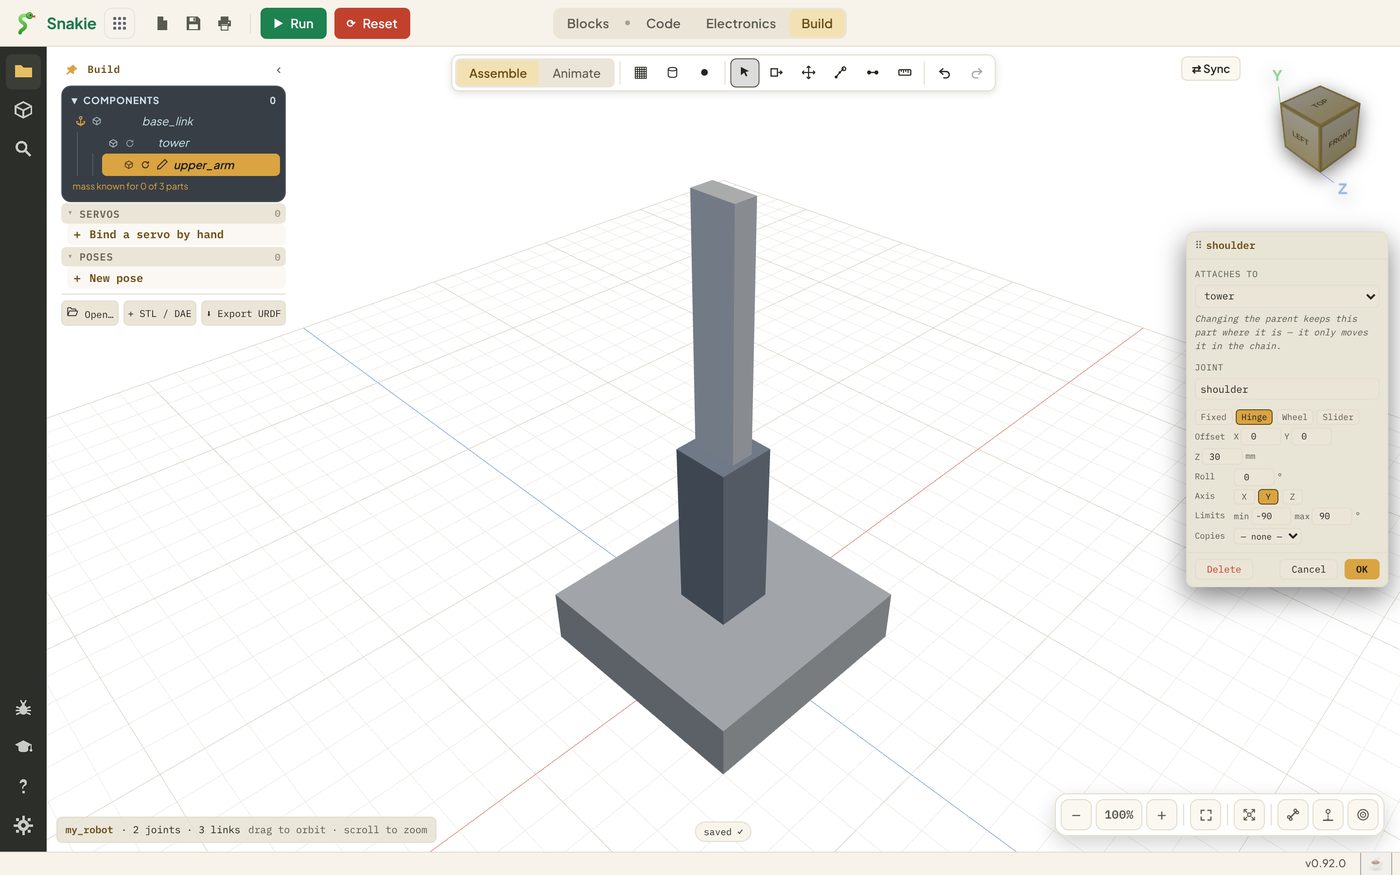
You’ll see it swing in lesson 6. If a joint ever turns the wrong way, this is the box to change.
Add the forearm
Same steps again.
- Add a box: L
60, W12, H8, a green colour, joint nameelbow, Offset Z200. Rename itforearm - Add a joint: click the top end of the upper arm, then an end face of the forearm
- Choose Rotation and click Add
- Edit the joint and set Axis to Y
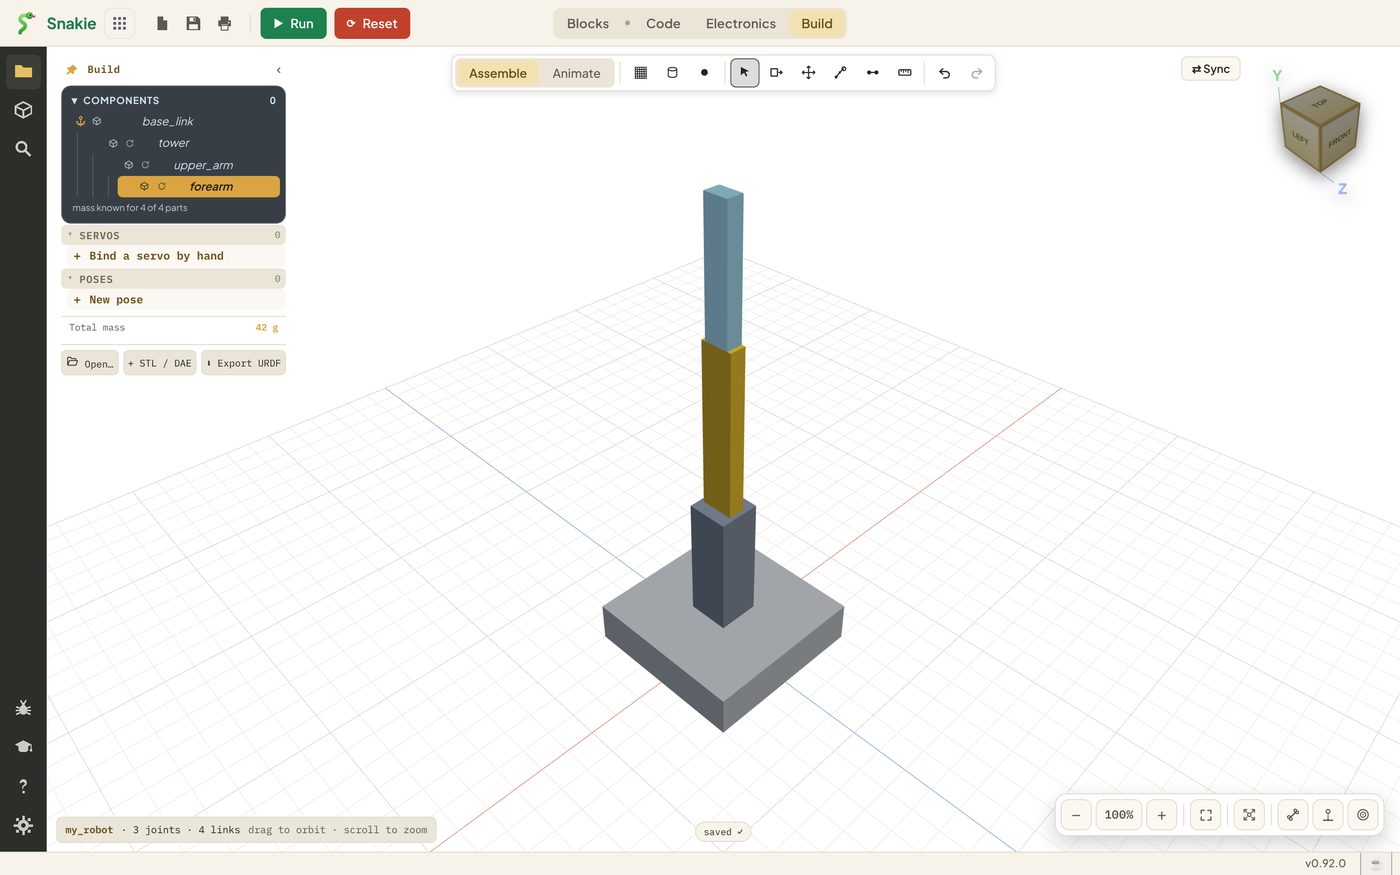
Look at the Components list. Each part is indented under the part it hangs from: base, tower, upper arm, forearm. That’s called the chain, and it’s why moving the shoulder will carry the forearm along with it.
Try it Yourself
- Build the upper arm and forearm
- Check the status chip in the bottom left. It should read 3 joints · 4 links
- Click each part in the Components list. Snakie selects it and zooms to it
- Hover over the small icon beside each name. It tells you the joint type
Common Issues
Problem: I can’t click the block I want because it’s inside another one. Solution: Give it an Offset Z big enough to float clear before using the joint tool. Why: You can only click what you can see.
Problem: The arm snapped on sideways. Solution: Click Cancel and pick again, aiming at the middle of the small end face. Why: The joint lines up the two faces you click, so clicking a long side lays the arm flat against the tower.
Problem: Parent and child are the wrong way round. Solution: Click swap before Add. Why: The first click is always the part that stays put.
Check your understanding
Quick quiz 1 of 3
In the joint tool, which part do you click first?
Quick quiz 2 of 3
Which joint type is glued in place?
Quick quiz 3 of 3
The shoulder spins on the spot when it should swing over. What do you change?
You can use the arrows ← → on your keyboard to navigate between lessons.
Comments