The Build Workspace
Tour Snakie's Build workspace, start a new robot and meet the three files that describe it
By Kevin McAleer, 4 Minutes
Page last updated November 21, 2026

Where robots get built
Snakie has four workspaces along the top of the window: Blocks, Code, Electronics and Build. Click Build.
If your project has no robot in it yet, Snakie shows its demo arm and a card that says Start your own robot.
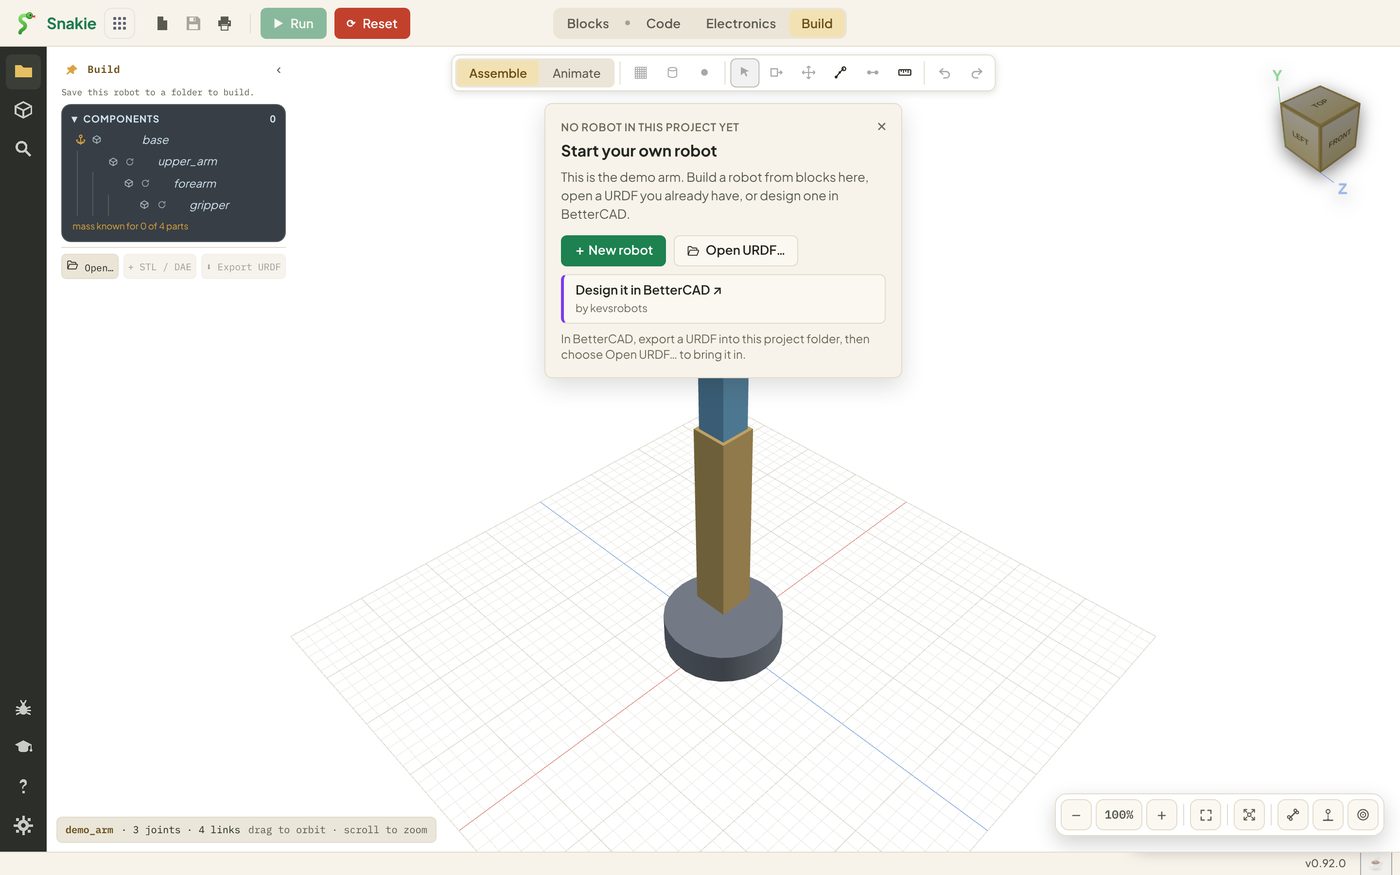
The card gives you three ways in:
| Button | What it does |
|---|---|
| + New robot | Starts an empty robot in a folder you choose |
| Open URDF… | Opens a robot somebody has already described |
| Design it in BetterCAD | Opens Kev’s CAD app, where you can design real parts and export them as a robot |
We’ll use + New robot now and come back to the other two in lesson 13.
Start a new robot
- Click + New robot
- Choose an empty folder for the project. Make a new one called
desk-arm - If the browser asks, allow Snakie to edit files in that folder
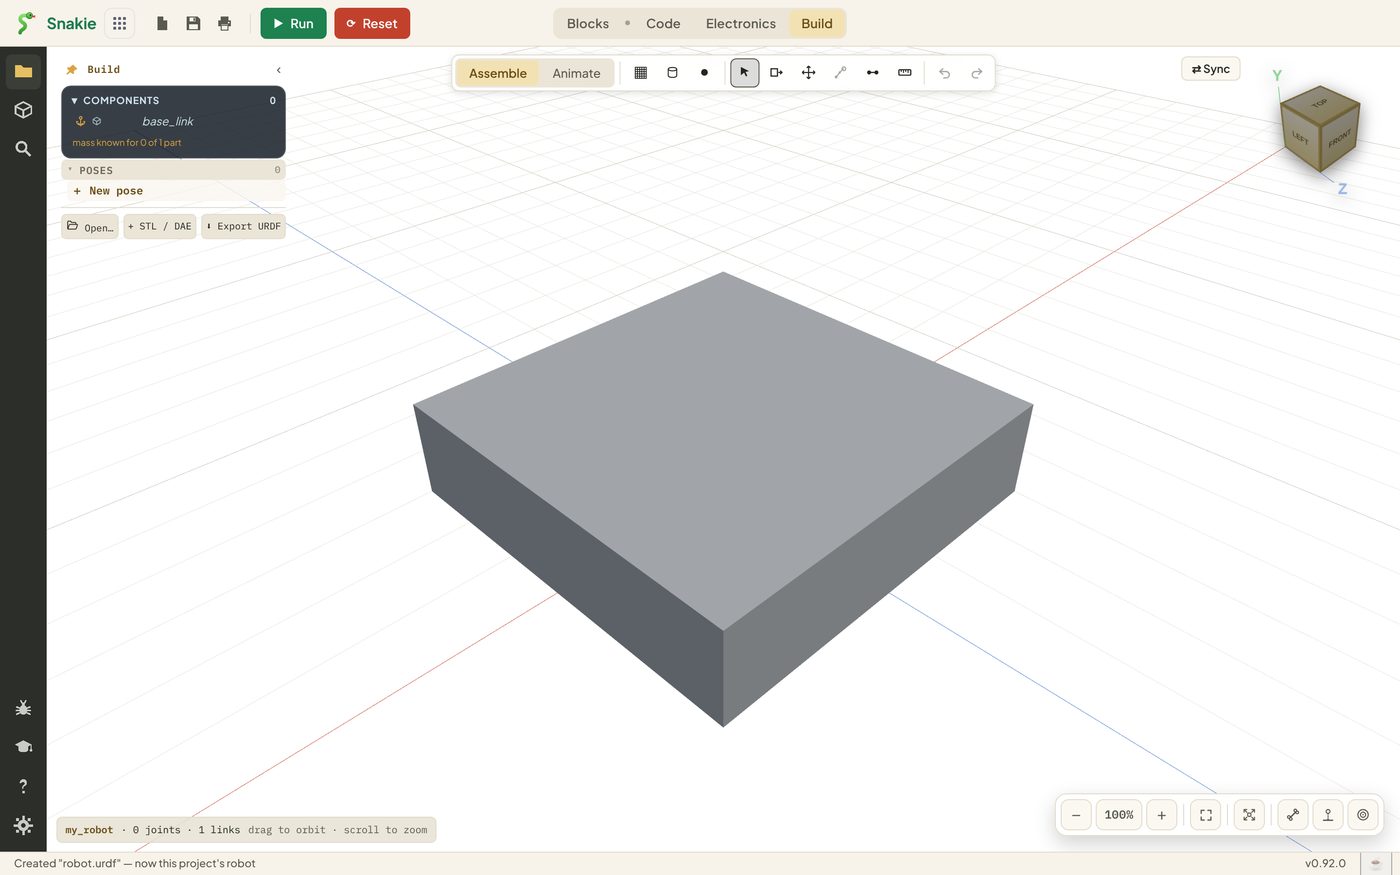
Snakie drops a grey slab on the floor. That’s your robot’s base.
Finding your way around
- The 3-D view fills the middle. Drag to orbit, scroll to zoom
- The view cube in the top right shows which way is up. Click a face to look straight at that side
- The toolbar along the top switches between Assemble (build the robot) and Animate (move it), and holds the tools for each
- The Build panel on the left lists the robot’s Components, its Poses, and later its Servos
- The view buttons in the bottom right zoom, fit the robot to the screen and turn on helpers such as the exploded view
- The status chip in the bottom left counts joints and links
A link is robot language for one rigid piece. A joint connects two links. Your new robot has one link and no joints.
Positions are typed as X, Y and Z. X and Y run across the floor, and Z points straight up from it.
The three files
Look at your folder in the Code workspace and you’ll find Snakie has written three files.
| File | What’s in it |
|---|---|
robot.urdf |
The robot’s shape: every link, every joint, sizes and colours |
robot.yml |
The project: which servo drives which joint, your poses and your motions |
skeleton.json |
A summary of the joints that Snakie keeps up to date for other tools |
URDF stands for Unified Robot Description Format. It’s the standard way to describe a robot, used by ROS and most robot simulators. You never have to write it by hand here. Every click in the Build workspace edits robot.urdf for you, and a small saved badge appears at the bottom of the view each time.
Try it Yourself
- Start a new robot in a folder called
desk-arm - Orbit right round the base, then click Zoom to fit in the bottom right to bring it back to the middle
- Switch to the Code workspace and open
robot.urdf. Find the line that sets the base’s size. It’s in metres - Come back to Build
Common Issues
Problem: Nothing happens when I click + New robot. Solution: Use the desktop app, or Chrome or Edge on a computer. Why: Snakie needs to save the robot’s files in a folder, and not every browser lets a web page do that.
Problem: I can see an arm already, and I didn’t build it. Solution: That’s the demo arm. Click + New robot on the card to start your own. Why: Snakie shows the demo whenever the project has no robot in it.
Check your understanding
Quick quiz 1 of 3
What is a link?
Quick quiz 2 of 3
Which file describes the robot’s shape?
Quick quiz 3 of 3
Which axis points up from the floor?
You can use the arrows ← → on your keyboard to navigate between lessons.
Comments