Joint Tracks and Keyframes
Take fine control of a robot motion in Snakie with joint tracks, keyframes, easing and live pose controls
By Kevin McAleer, 5 Minutes
Page last updated November 21, 2026
A second way to animate
The Timeline thinks in whole poses. The Joint tracks tab thinks in joints. Each joint gets its own row, and you place keyframes on it: marks that say “be at this angle at this time”. Snakie fills in the movement between them.
It’s the same idea used in film animation and game engines. It takes a little longer than dropping pose blocks, and it gives you exact control over timing. It’s also the tab that writes code, which is why we need it.
Click Joint tracks.
The controls
Along the top row:
- Play and stop, and a loop tick box
- The scrubber: a long slider for the current time. Drag it and the robot follows
- dur: the length of the whole motion in seconds
- An easing menu:
ease-in-outorlinear - fps: how many steps per second the motion is cut into when it’s exported
On the second row:
- + Keyframe marks every joint’s current angle at the current time
- + pose… does the same using one of your saved poses
- Duplicate copies the keyframes at the current time a little later
- Export .py writes the code. That’s lesson 12
Build the motion with poses
We’ll make a two-second motion: rest, reach, tuck, and back round.
- Drag the scrubber to the far left, 0.00s
- Open + pose… and choose
rest - Drag the scrubber to the middle, 1.00s
- Open + pose… and choose
reach - Drag the scrubber to the far right, 2.00s
- Open + pose… and choose
tuck
Three columns of diamonds appear, one diamond for each joint at each time.
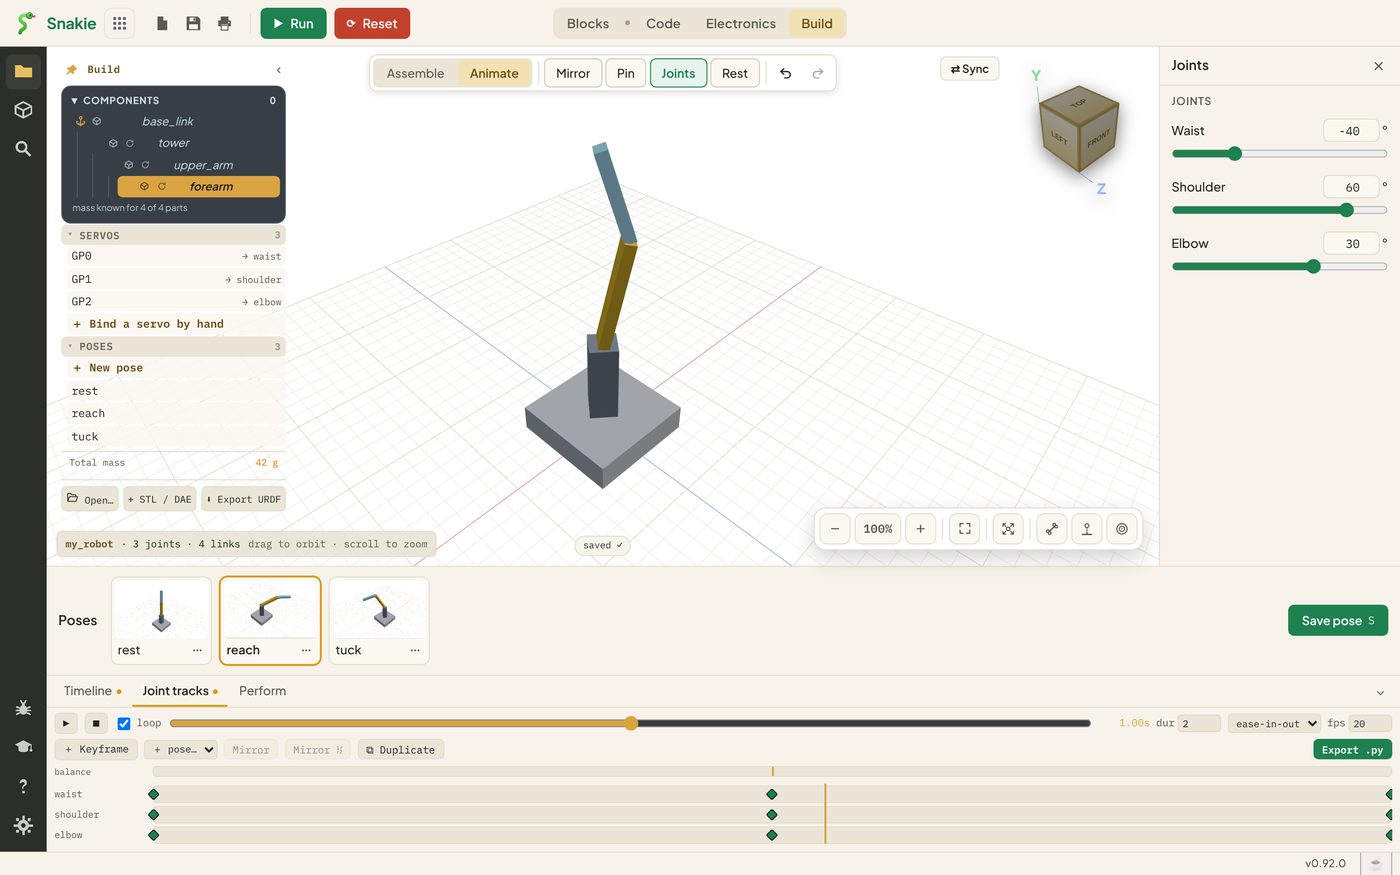
Press play. The scrubber sweeps along and the arm moves through the three poses.
If you gave your parts a mass in lesson 5, there’s a balance row above the joints. It marks moments in the motion where the weight shifts.
Why per-joint keys are useful
Because every joint has its own row, they don’t all have to move at once.
- Drag a diamond sideways to change when that joint arrives
- Put a keyframe on only one joint by posing just that joint, then pressing + Keyframe at a new time
- Click a diamond to select it, then delete it to let the joint glide straight through
That’s how you get natural movement. A real arm doesn’t start every joint at the same instant. Let the shoulder lead and the elbow follow a moment later, and the same three poses suddenly look alive.
Easing and frame rate
Easing is how speed changes during a move.
| Easing | Feels like | Good for |
|---|---|---|
ease-in-out |
Gentle start, gentle stop | Almost everything |
linear |
Constant speed, sudden stops | Conveyor belts, scanning sensors |
fps only matters when you export. At 20 fps a two-second motion becomes 40 steps. More steps are smoother and make a longer program. 20 is plenty for hobby servos.
Perform: mix poses with a slider
The third tab, Perform, makes live controls. Click + Control, give it a name, click two or more poses in order and choose Create control.
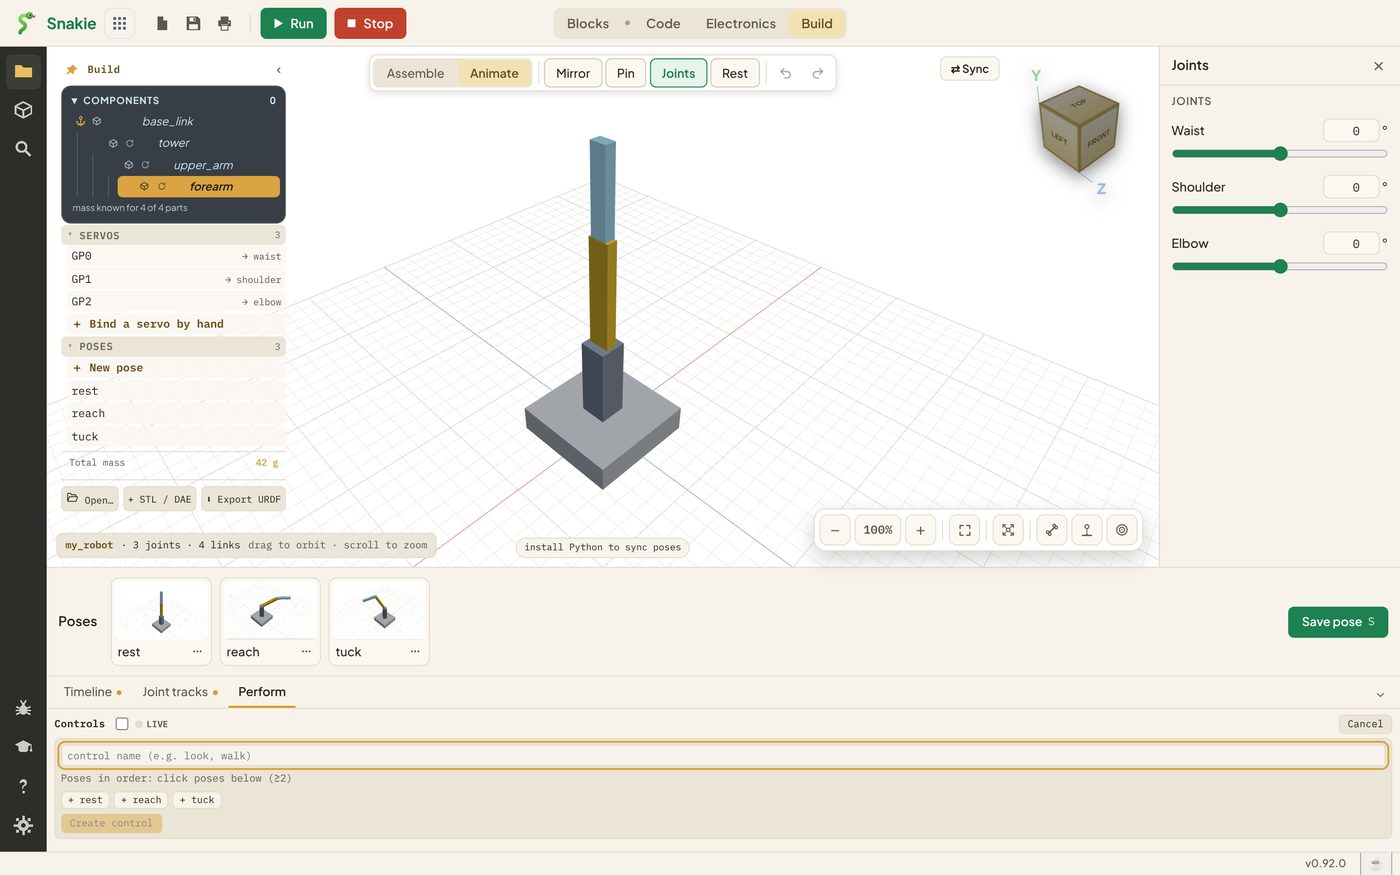
You get a slider that blends from one pose to the next as you drag it. A control built from tuck and reach becomes a single “reach out” slider. It’s a quick way to puppeteer a robot by hand.
Try it Yourself
- Build the three-pose motion on the joint tracks and play it
- Switch the easing to
linearand play it again. Which looks more like a real arm? - Drag the middle
elbowdiamond a little to the right so the elbow arrives late - Make a Perform control called
reach_outfromtuckandreach
Common Issues
Problem: Both poses landed at the same time and one replaced the other. Solution: Move the scrubber before adding each pose. Why: Keyframes are placed at the scrubber’s current time.
Problem: The Timeline and Joint tracks show different motions. Solution: That’s expected. Treat them as two separate motions. Why: The Timeline stores a list of poses. Joint tracks store keyframes. Changing one doesn’t rewrite the other.
Problem: Export .py is greyed out. Solution: Bind a servo to a joint first. That’s the next lesson. Why: The exported code drives servos, so Snakie needs to know which servo moves which joint.
Check your understanding
Quick quiz 1 of 3
What is a keyframe?
Quick quiz 2 of 3
Where does a new keyframe go?
Quick quiz 3 of 3
What does fps change?
You can use the arrows ← → on your keyboard to navigate between lessons.
Comments