Building a Motion
String poses into a looping motion on Snakie's timeline and preview it with play, loop and onion skin
By Kevin McAleer, 4 Minutes
Page last updated November 21, 2026

Poses in a row
A motion is poses played one after another, with the robot gliding between them. The Timeline tab at the bottom of Animate mode is where you line them up.
Add poses to the timeline
- Click the
restcard so the arm is in that pose - Click + Add pose, or press K
- Click
reach, then + Add pose - Click
tuck, then + Add pose - Click
reach, then + Add pose again
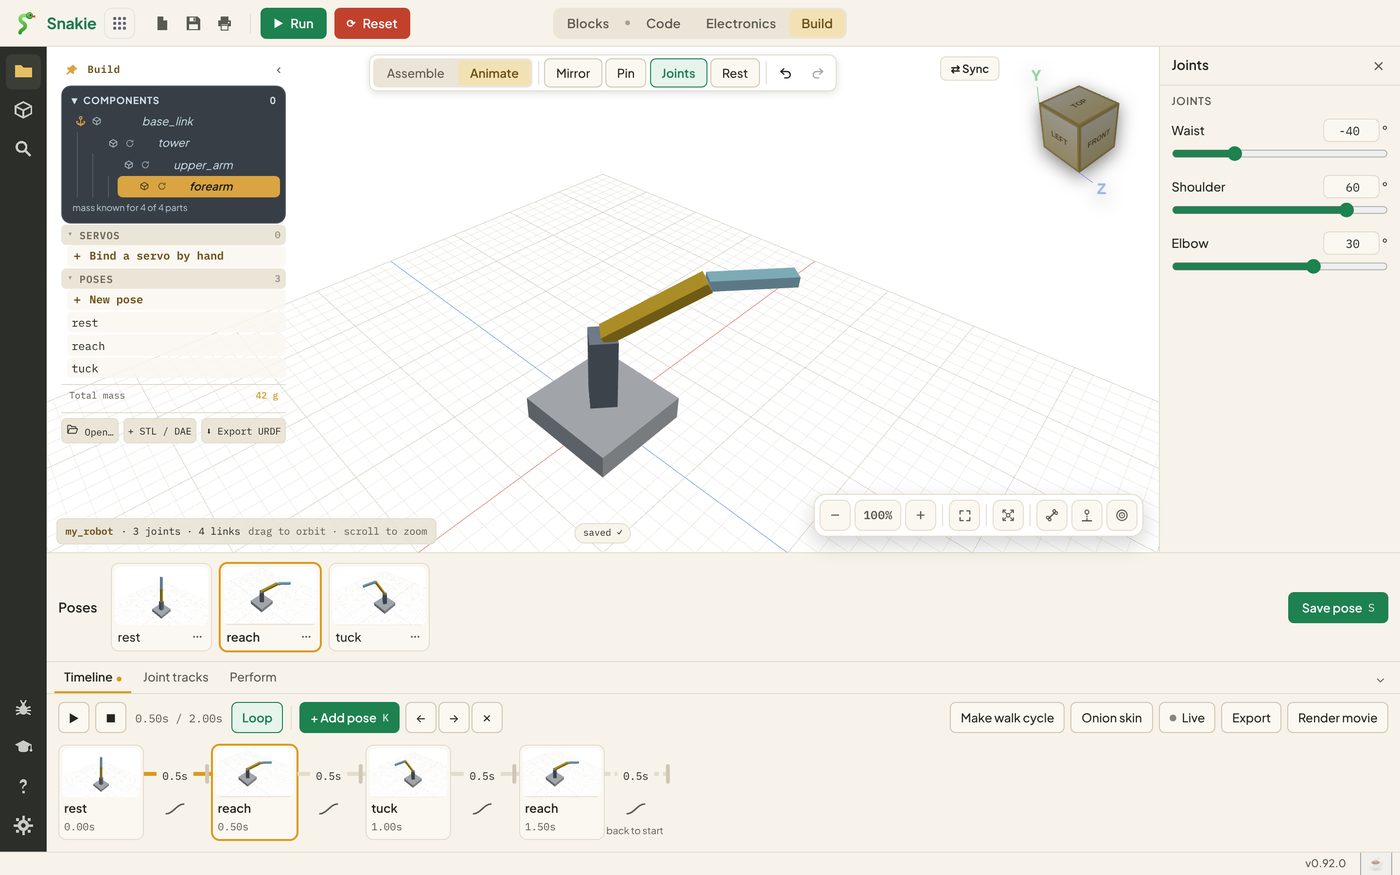
Each press adds a block to the timeline. You should have four: rest, reach, tuck, reach.
Reading the timeline
- Each block is a pose, with the time it’s reached written underneath
- The number between two blocks is how long the move takes. New moves take 0.5s. Click the number to type a new time, or drag the small handle beside it
- The little curve under that number is the easing. The default is smooth: it starts gently, speeds up and slows to a stop, which is how real arms like to move. Click the curve to switch to a steady, constant speed
- With Loop on, a final faint link is added, labelled back to start
- The clock beside the play button shows where you are and the total length
Click a block to select it. The ← and → buttons then move it earlier or later, and ✕ takes it off the timeline. The saved pose stays on the shelf.
Play it
Press the play button or the Space bar. The arm runs through the blocks and, with Loop on, goes round again until you stop it.
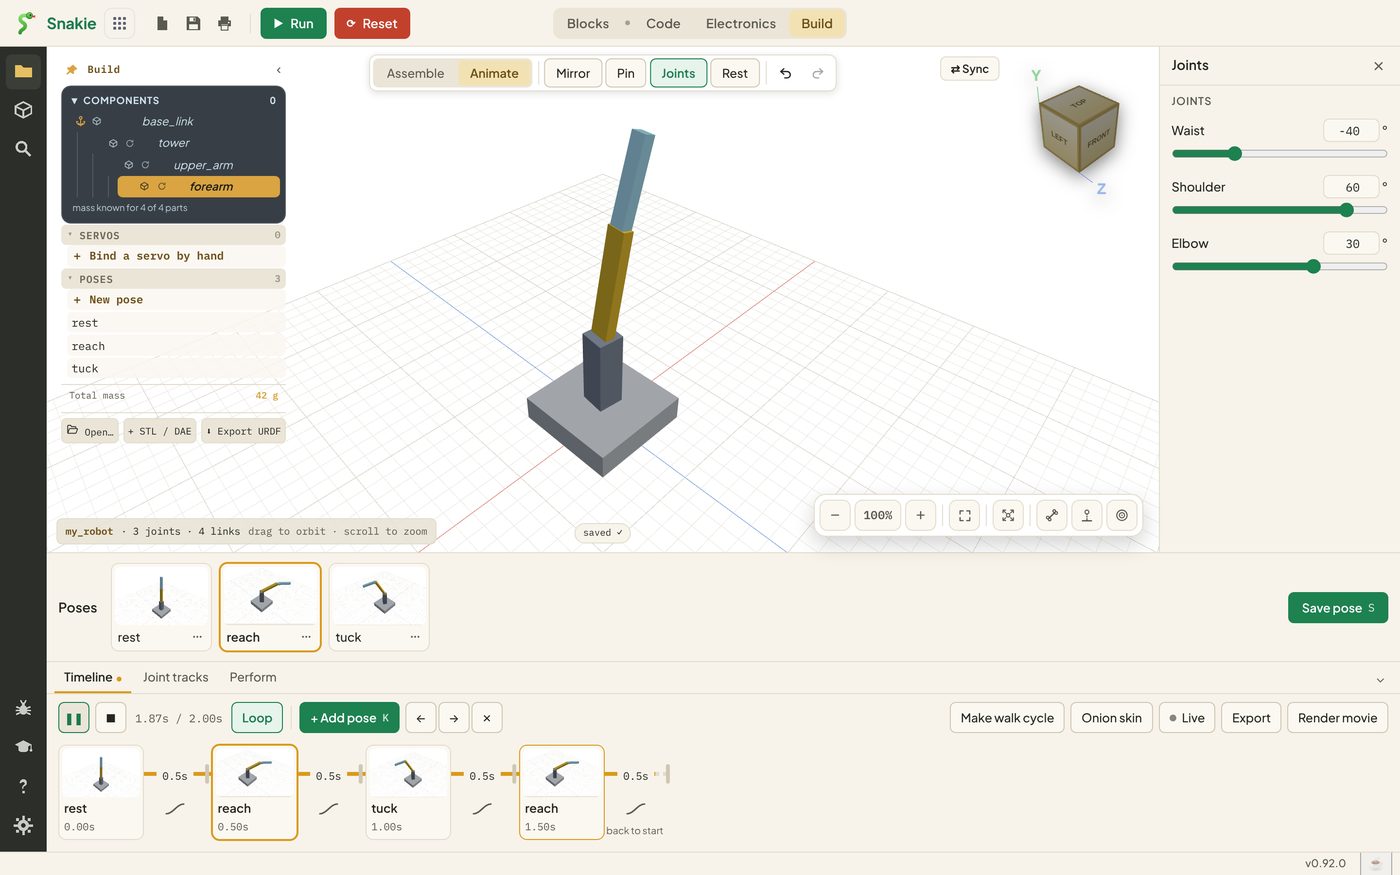
The joint sliders on the right move as it plays. They’re showing the same angles your servos will be sent later.
Onion skin
Click Onion skin, then click a block. Snakie draws faint ghosts of the pose before and the pose after.
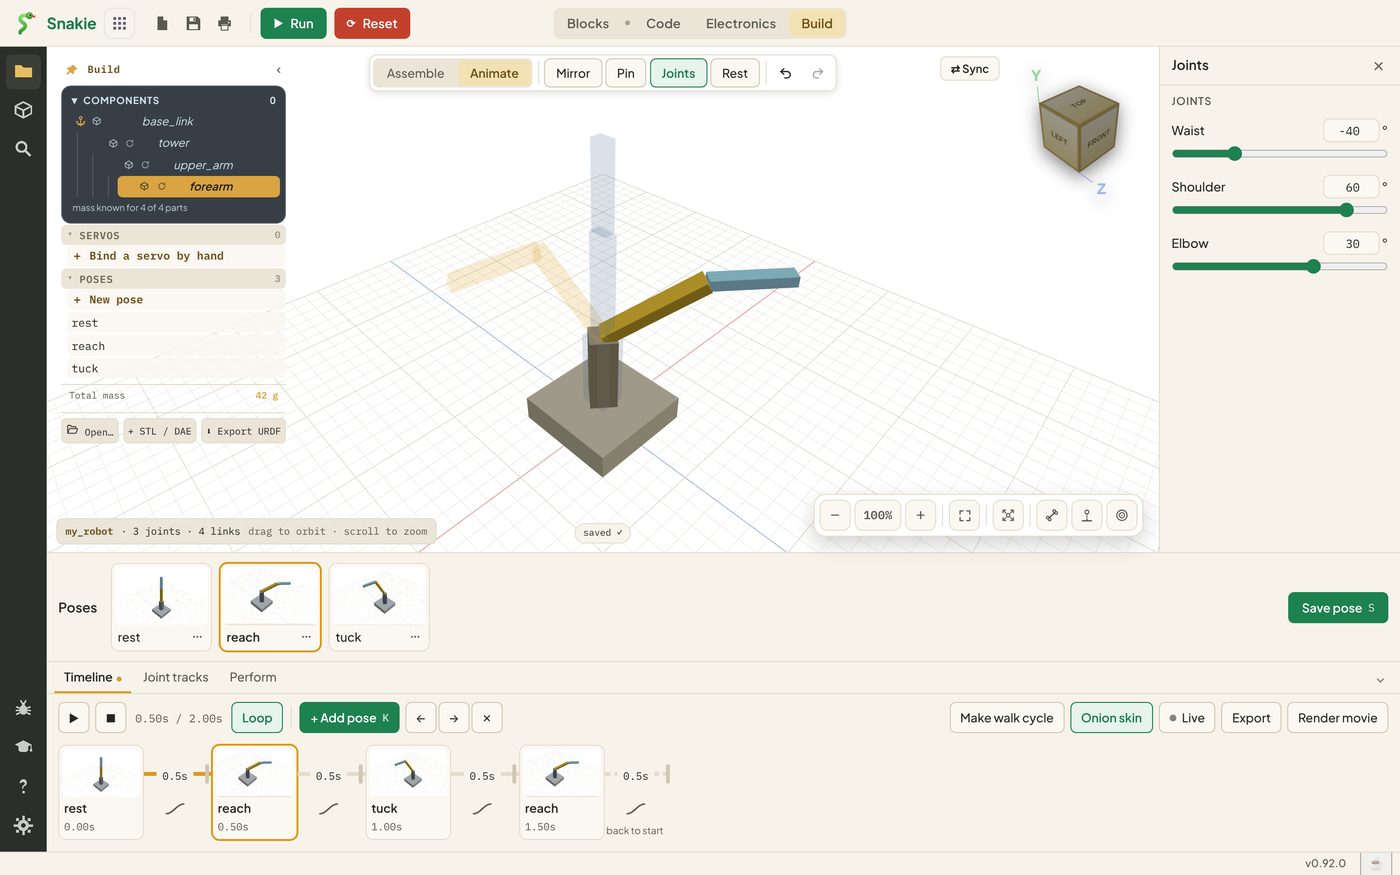
Animators use this to judge how big each move is. A huge jump between two ghosts means a fast, jerky move. Either give it more time or add a pose in between.
The rest of the buttons
| Button | What it does |
|---|---|
| Make walk cycle | Builds a walking loop for robots with left and right legs |
| Live | Sends the motion to real servos as it plays. Needs a connected board |
| Export | Writes MicroPython for the motion. Lesson 12 |
| Render movie | Makes a video. Lesson 14 |
Your motion is saved in robot.yml under sequences, as a list of pose names, each with a duration and an easing.
Try it Yourself
- Build the four-block motion and play it
- Change the move from
reachtotuckto take1.5seconds and play it again - Add your
wavepose from the last lesson to the end - Turn on Onion skin and find the biggest jump in your motion
Common Issues
Problem: + Add pose added the wrong pose. Solution: Click the pose card first and wait for the arm to arrive, then add. Why: Add pose uses whatever the robot is doing right now.
Problem: The motion snaps instead of gliding. Solution: Give the move more time, or split it with an extra pose. Why: A big change in half a second is a fast move.
Problem: I removed a block and now I’m worried I’ve lost the pose. Solution: Look on the Poses shelf. It’s still there. Why: The timeline only holds references to poses. Removing a block never deletes the pose itself.
Check your understanding
Quick quiz 1 of 3
What does + Add pose put on the timeline?
Quick quiz 2 of 3
What does easing change?
Quick quiz 3 of 3
Onion skin shows a huge gap between two ghosts. What does that tell you?
You can use the arrows ← → on your keyboard to navigate between lessons.
Comments