Cutting a Pocket
Cut a servo pocket and its screw holes in one click with BetterCad's Cut pocket command, then edit the steps it makes
By Kevin McAleer, 5 Minutes
Page last updated November 21, 2026

The servo is sitting in the deck with nowhere to go. You could sketch a rectangle the right size, cut it, then add two screw holes in the right places. Or you could let BetterCad do all three.
One click
- In the Browser, right-click SG90 micro servo.
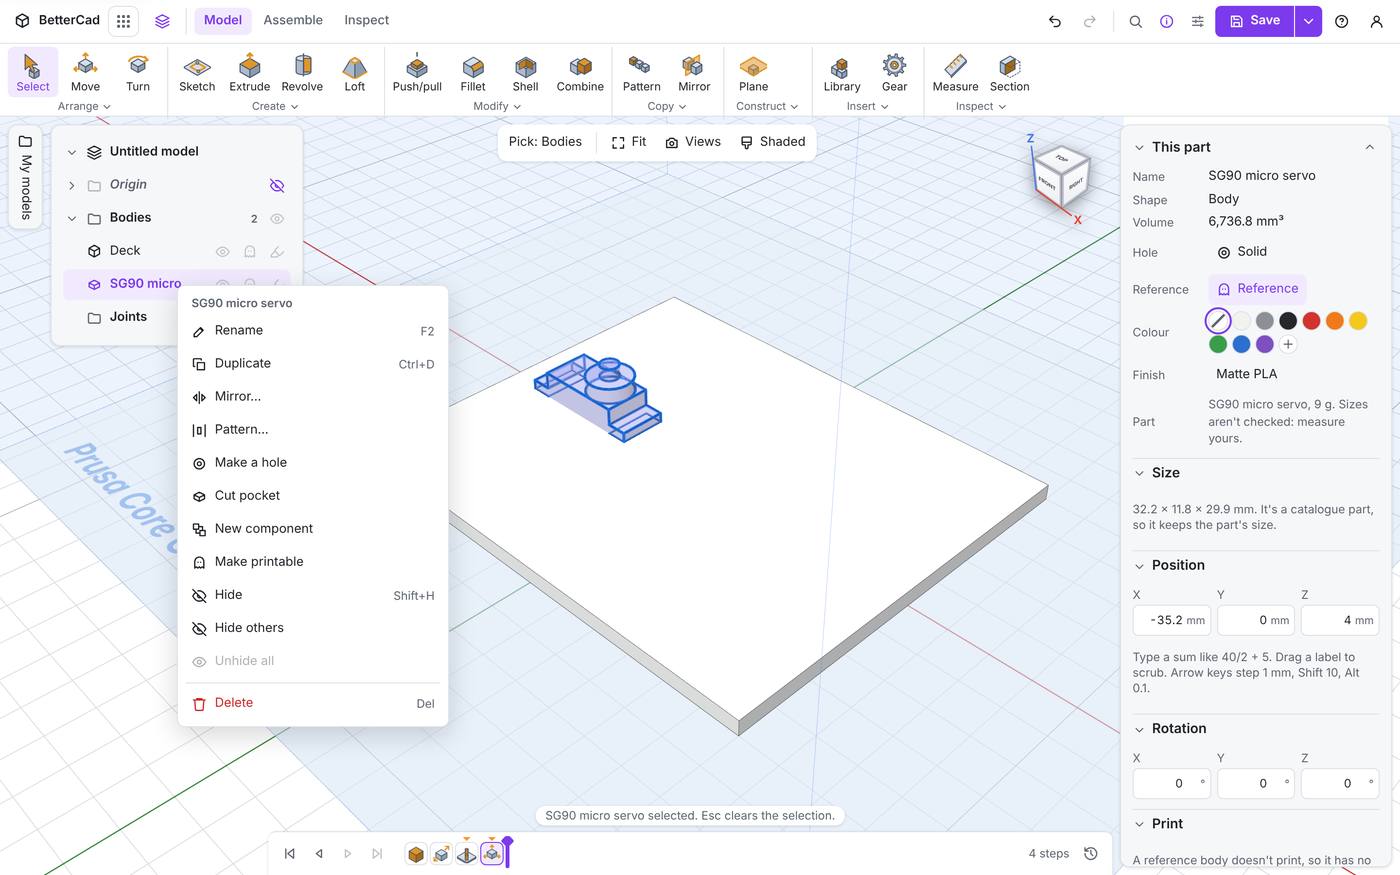
- Choose Cut pocket.
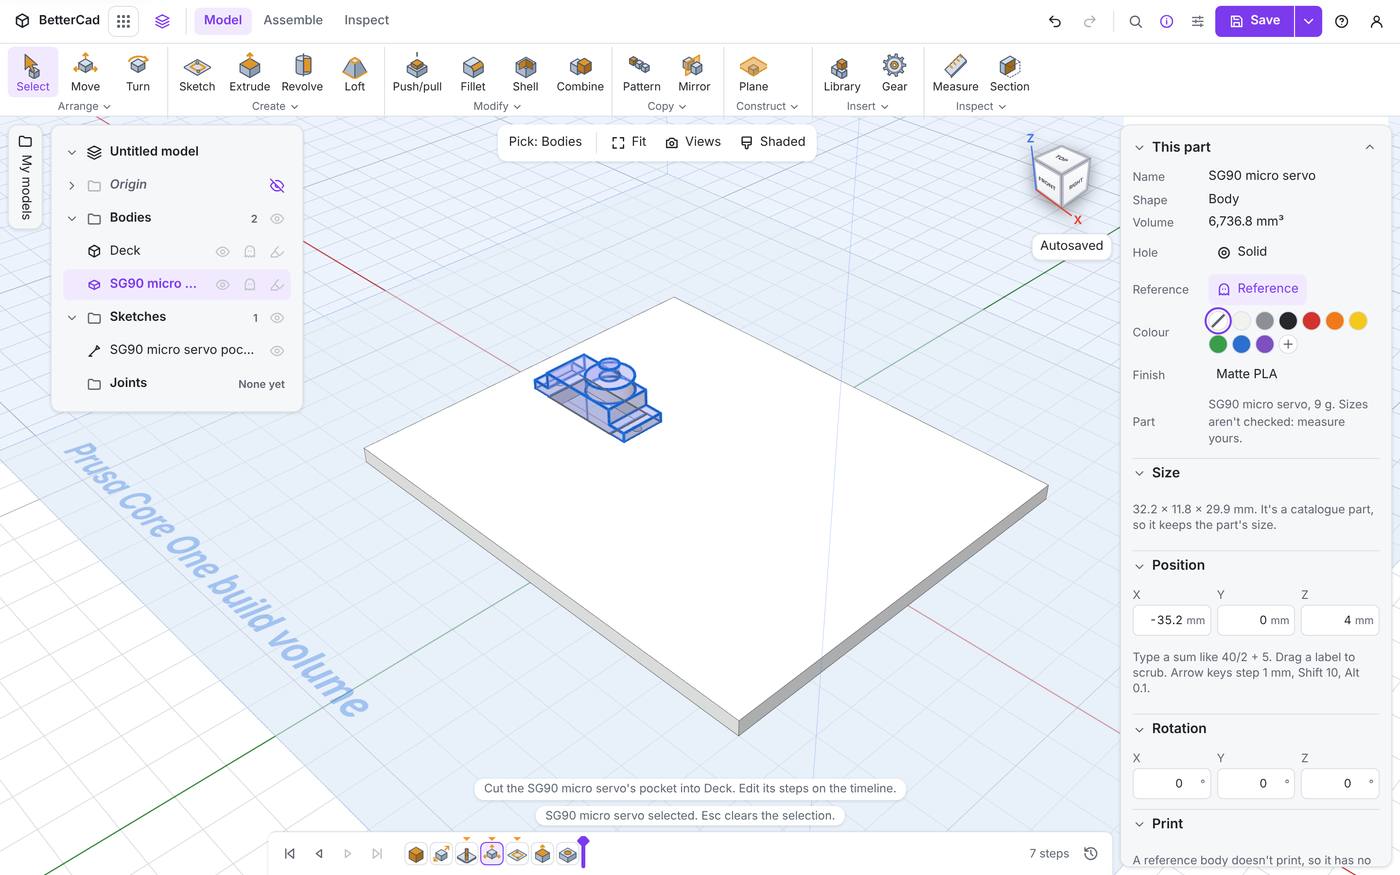
BetterCad says “Cut the SG90 micro servo’s pocket into Deck. Edit its steps on the timeline.” It found the body directly under the part by itself.
Hide the servo for a moment to see what it did. Select it and press Shift+H.
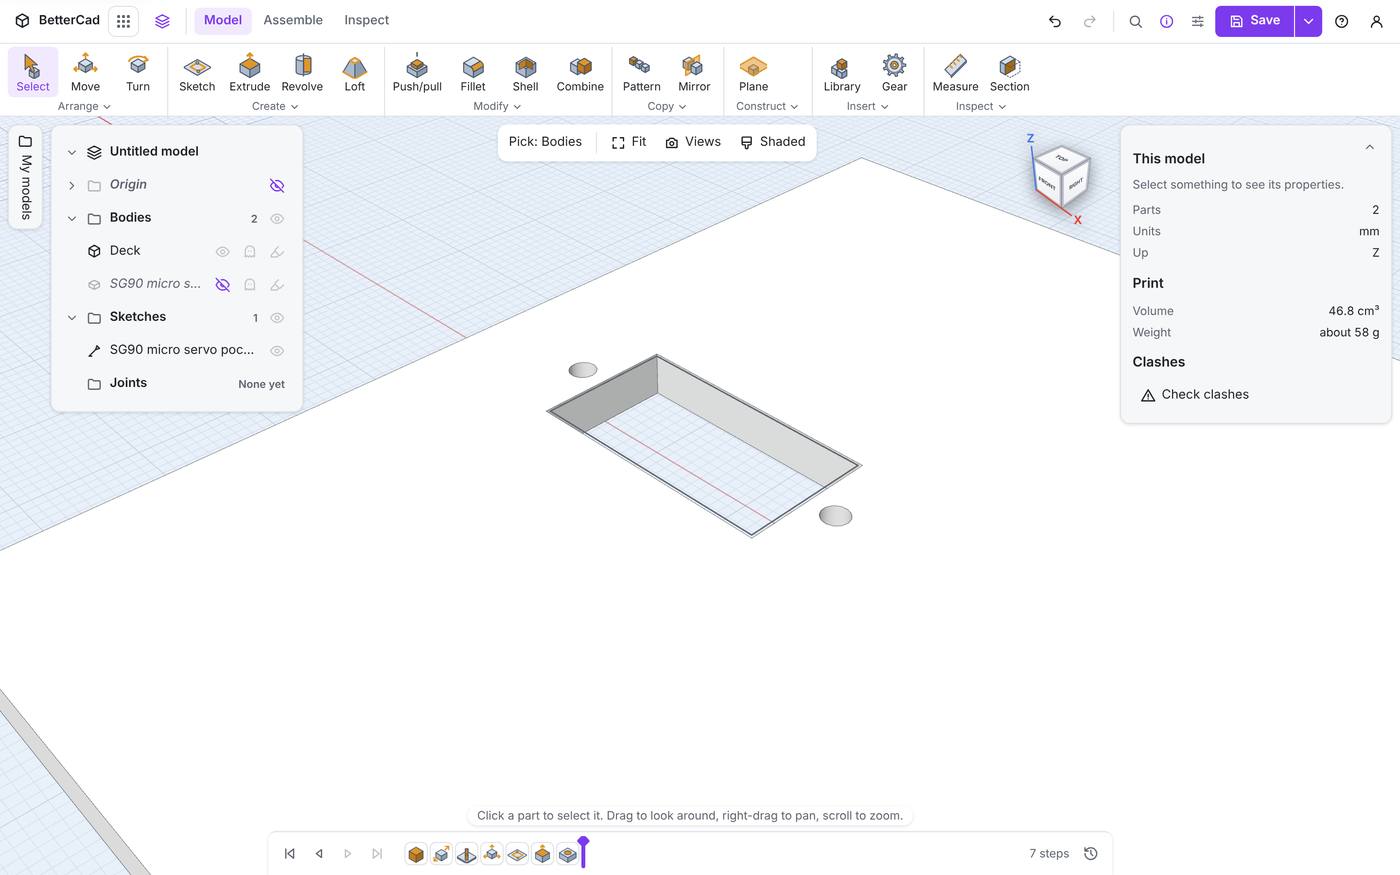
A rectangular opening for the body, and a small hole at each end for the mounting screws. Right-click the servo in the Browser and choose Unhide all to bring it back.
What it made
Cut pocket isn’t a special feature you can’t see inside. It adds three ordinary steps to the timeline, the same kind you’d make by hand:
| Step | What it is |
|---|---|
| SG90 micro servo pocket | A sketch of the body’s outline on the deck’s top face |
| Extrude 1 | A cut from that sketch, 15.9 mm deep, into the deck |
| Hole 1 | Two M2 holes at printed clearance, right through |
Two details make it print right first time:
- The cut is made at your printer’s sliding fit, so the opening is a little bigger than the servo on every side. On a fresh printer profile that’s 0.25 mm a side.
- The holes use the Hole tool’s clearance for printing, so an M2 hole comes out at 2.4 mm and the screw really goes in.
Both come from the printer settings you calibrated in Print It Right with BetterCad.
The pocket is as deep as the part of the servo that hangs below its tabs, 15.9 mm. The deck is only 4 mm thick, so here the cut goes straight through and the servo’s body pokes out underneath. In a thicker block you’d get a blind pocket with a floor.
Edit the steps
Because they’re normal steps, you can change them.
- Right-click the sketch step and choose Edit to adjust the outline for a servo that measured differently.
- Right-click Hole 1 and edit it to change the screw size, or to swap the clearance holes for something else.
- Don’t want the screw holes at all? Delete that step.
Parts with no pocket
Some parts sit on a surface instead of in it. A Raspberry Pi Pico or a Pi has no pocket, so Cut pocket gives it only its screw holes. For a board you’ll usually want standoffs under it anyway, and that’s the next lesson.
If you move the part
The pocket is cut where the part was when you asked. Move the servo afterwards and the pocket stays behind.
To move both, delete the three steps, move the servo, and cut the pocket again. Or better, get the part where you want it before you cut.
Try it Yourself
- Add a Box 40 × 30 × 30 mm beside the deck, place an N20 gear motor on top of it, and cut its pocket. Is the pocket blind or through?
- Place a 608 bearing on the same box and cut its pocket. Hide the bearing and look at the recess.
- Right-click the Extrude step that made the bearing’s pocket and edit it. Make it 2 mm shallower.
Common Issues
Problem: There’s no Cut pocket in the menu. Solution: Right-click a part that came from the catalogue. Why: Only catalogue parts carry a pocket outline. An imported STL doesn’t.
Problem: The pocket was cut into the wrong body. Solution: Undo, move the part so the body you want is directly beneath it, and try again. Why: Cut pocket uses the body just under the part.
Problem: The real servo is tight in the printed pocket. Solution: Calibrate your fits with the fit coupon, or widen the pocket’s sketch by a few tenths. Why: The sliding gap comes from your printer profile, and an uncalibrated one may be too small for your machine.
Check your understanding
Quick quiz 1 of 3
What does Cut pocket add to the timeline?
Quick quiz 2 of 3
What fit is the pocket cut with?
Quick quiz 3 of 3
You move the servo after cutting its pocket. What happens to the pocket?
You can use the arrows ← → on your keyboard to navigate between lessons.
Comments