Horn Mounts
Bolt a servo horn to a 3D printed part with the BetterCad Horn mount, with no printed splines to strip
By Kevin McAleer, 5 Minutes
Page last updated November 21, 2026

A servo’s output shaft has tiny splines, far too fine to print well. Try, and you get a part that grips for a week and then slips.
Every servo comes with the fix in the bag: a set of plastic horns that already fit the splines perfectly. So don’t print the splines. Print a part that the horn bolts to.
What a horn mount is
BetterCad’s Horn mount cuts three things into a flat face:
- A shallow round recess that the horn’s hub sits in, so it’s centred
- A screwdriver hole through the middle, so you can still reach the screw that holds the horn on the servo
- Screw holes where the horn’s arms are, to bolt the horn to your part
Make one
A small turntable is a good test piece.
- Start a new model. Add a Cylinder from the Library and set its size to
40,40and5. - Click the word Insert and choose Mount.
- Click the top of the disc.
- In the Mount panel, set Kind to Horn mount.
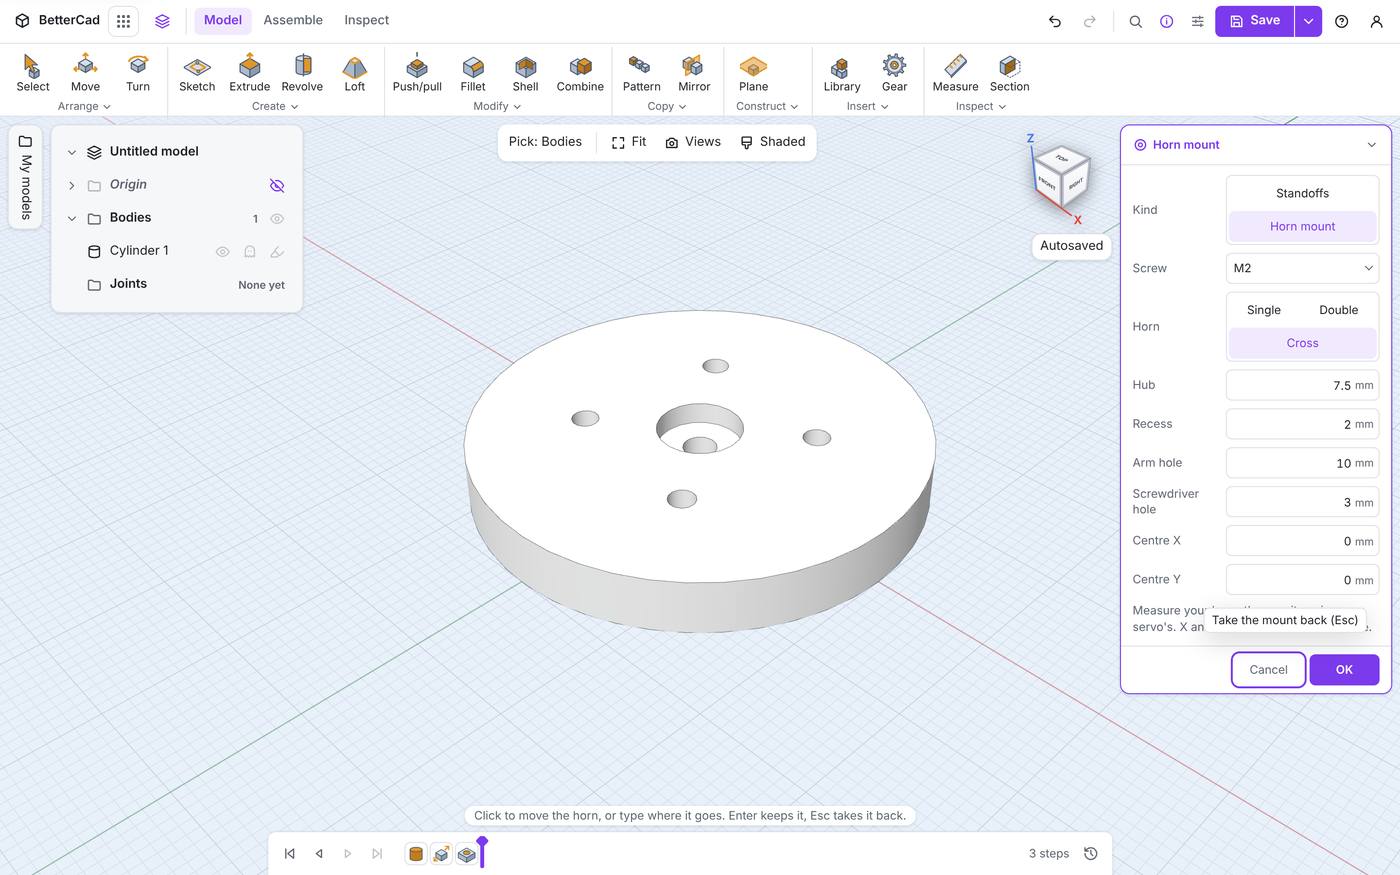
| Setting | What it is | Starts at |
|---|---|---|
| Screw | The screws through the horn’s arms | M2.5 |
| Horn | Single, Double or Cross | Single |
| Hub | Diameter of the recess for the horn’s hub | 7.5 mm |
| Recess | Depth of that recess | 2 mm |
| Arm hole | How far out the arm screw holes are from the centre | 10 mm |
| Screwdriver hole | Diameter of the hole through the middle | 3 mm |
| Centre X and Y | Where the horn’s centre is, from the face’s centre | Where you clicked |
- Choose Cross for a four-armed horn.
- Set Screw to M2, which suits the small holes in a micro servo’s horn.
- Set Centre X and Centre Y to
0so the horn is dead centre on the disc. - Click OK.
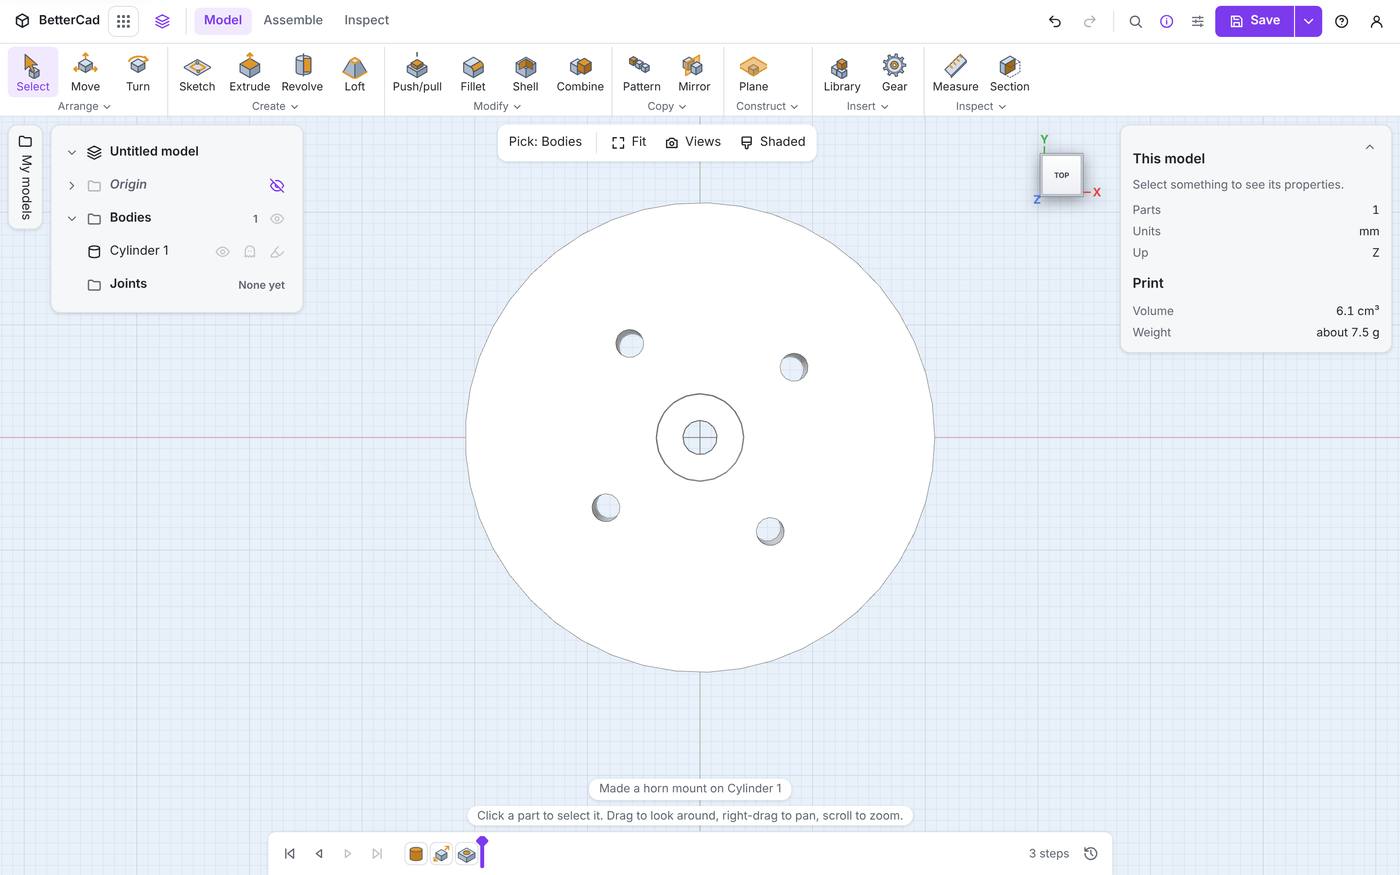
One hub recess with a hole through it, and four screw holes round it. Single gives one arm hole, Double gives two opposite each other, and Cross gives four.
Measure your horn
The panel says it plainly: “Measure your horn: these suit a micro servo’s.”
Horns differ even more than servos do. Before you print, check three numbers with callipers:
- The hub’s diameter, the round boss in the middle. Set Hub a few tenths bigger.
- The distance from the centre to the hole you’ll use on an arm. Horn arms have a row of holes. Pick one and set Arm hole to its distance from the centre.
- The hole size in the arm. Most micro servo horns take M2 or the small self-tapping screws that came in the bag.
Which way up?
Think about how it goes together. The horn pushes onto the servo. Your printed part sits on the horn, hub in the recess. Screws go through the horn’s arms into your part, and the horn’s own centre screw goes in through the screwdriver hole.
So the horn mount goes on the face that touches the horn. On a turntable that’s the underside, which means you model it on top and flip the part to print, or click the bottom face when you place the mount.
Try it Yourself
- Edit the Mount step and switch Horn between Single, Double and Cross. Watch the holes change.
- Set Recess to 0. What’s left?
- Measure a horn from your own servo and enter its three numbers.
Common Issues
Problem: The horn won’t sit in the recess. Solution: Increase Hub by 0.2 to 0.4 mm. Why: Printed holes and recesses come out a little small.
Problem: The arm screw holes don’t line up with the horn. Solution: Measure from the horn’s centre to the hole you want and set Arm hole to that. Why: The defaults suit a common micro servo horn. Yours may be longer.
Problem: I can’t reach the horn’s centre screw. Solution: Make Screwdriver hole wide enough for your screwdriver’s shaft, not just its tip. Why: The hole goes right through so the screw can be done up after the part is on.
Check your understanding
Quick quiz 1 of 3
Why bolt a horn to a printed part instead of printing the splines?
Quick quiz 2 of 3
What is the screwdriver hole for?
Quick quiz 3 of 3
How many arm screw holes does a Cross horn mount make?
You can use the arrows ← → on your keyboard to navigate between lessons.
Comments