The Robot Parts Catalogue
Place servos, motors, boards, sensors and bearings from the BetterCad robot parts catalogue onto your model
By Kevin McAleer, 5 Minutes
Page last updated November 21, 2026

Importing an STL works when you have one. For the parts nearly every small robot uses, you don’t need to go looking: BetterCad has them built in.
Open the catalogue
Start a new model. This is the first step of the course project, so give it a base to build on.
- Open the Library and click Box.
- In Properties set the size to
120,100and4. - Press F2 and rename the box
Deck. - Click the word Insert and choose Catalogue.
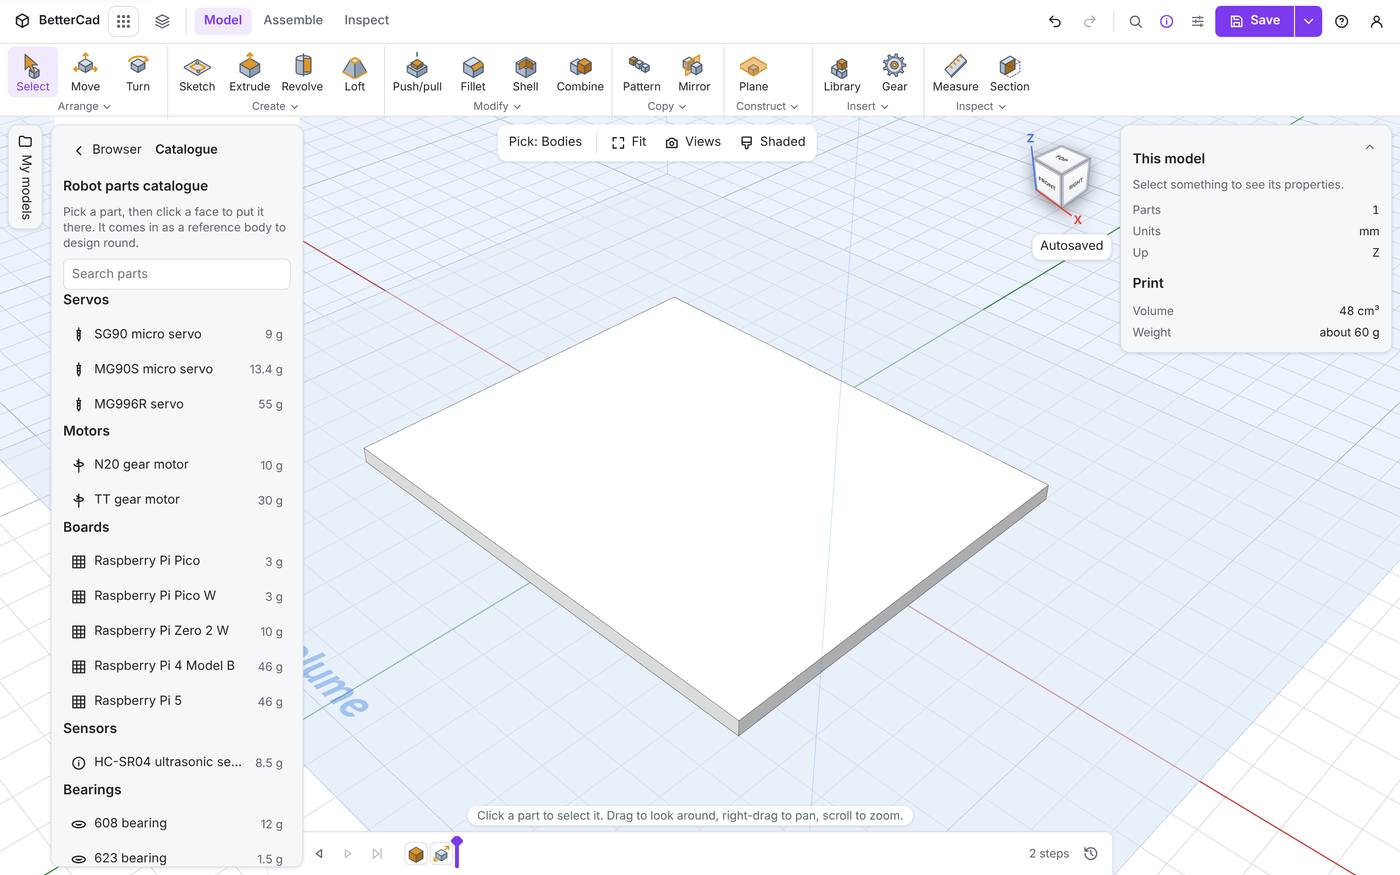
The catalogue opens where the Browser was. Here’s what’s in it today:
| Category | Parts |
|---|---|
| Servos | SG90 micro servo, MG90S micro servo, MG996R servo |
| Motors | N20 gear motor, TT gear motor |
| Boards | Raspberry Pi Pico, Pico W, Zero 2 W, 4 Model B and 5 |
| Sensors | HC-SR04 ultrasonic sensor |
| Bearings | 608 bearing, 623 bearing |
| Power | 18650 cell |
The number beside each part is its mass in grams. The search box matches every word you type against the name and description, so micro servo finds the SG90 and the MG90S.
Place a servo
- Click SG90 micro servo.
- Move the pointer over the deck.
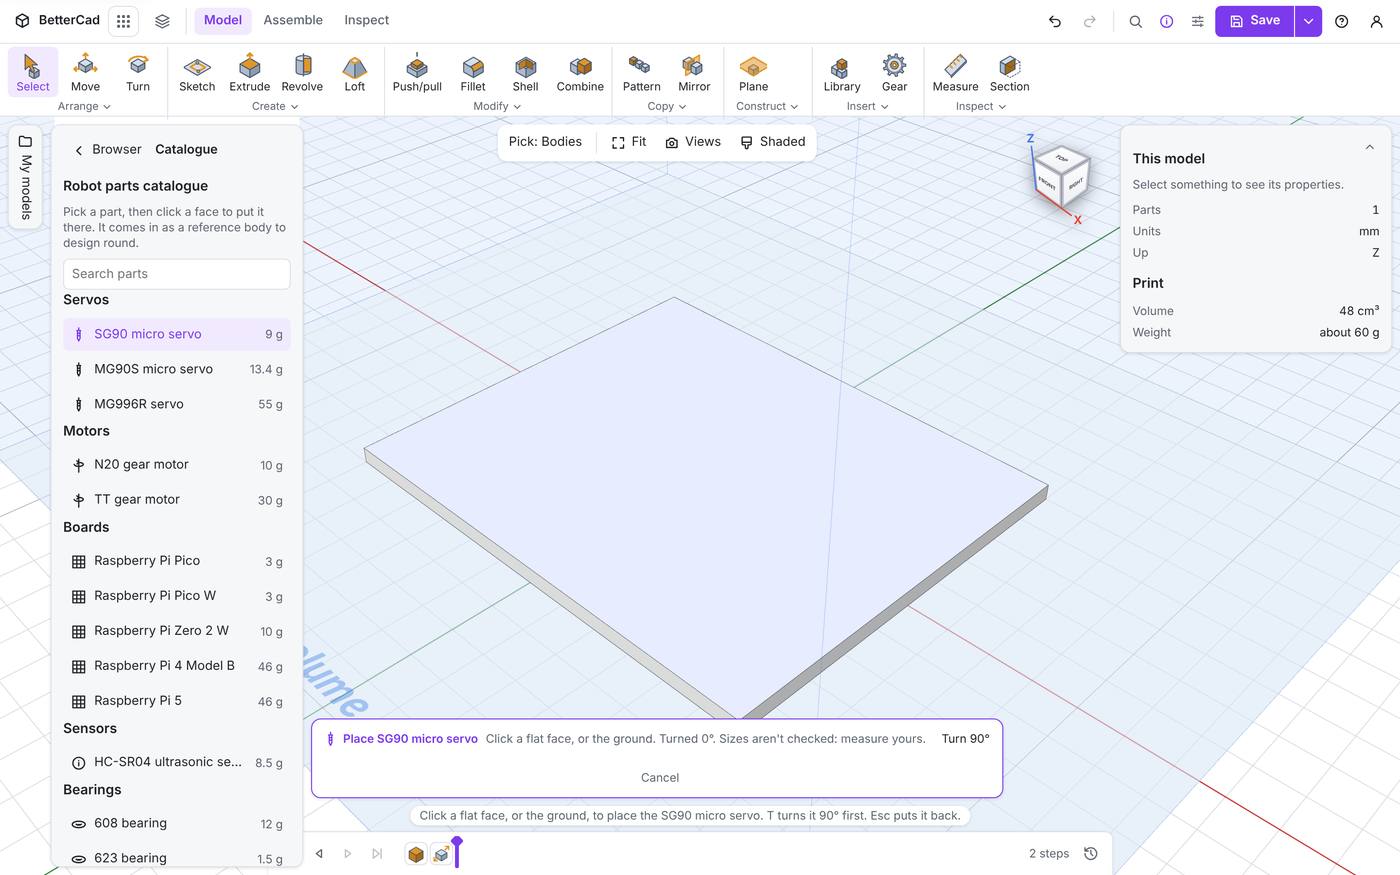
A bar appears: “Click a flat face, or the ground. Turned 0°. Sizes aren’t checked: measure yours.”
- Click the top of the deck, towards the left end.
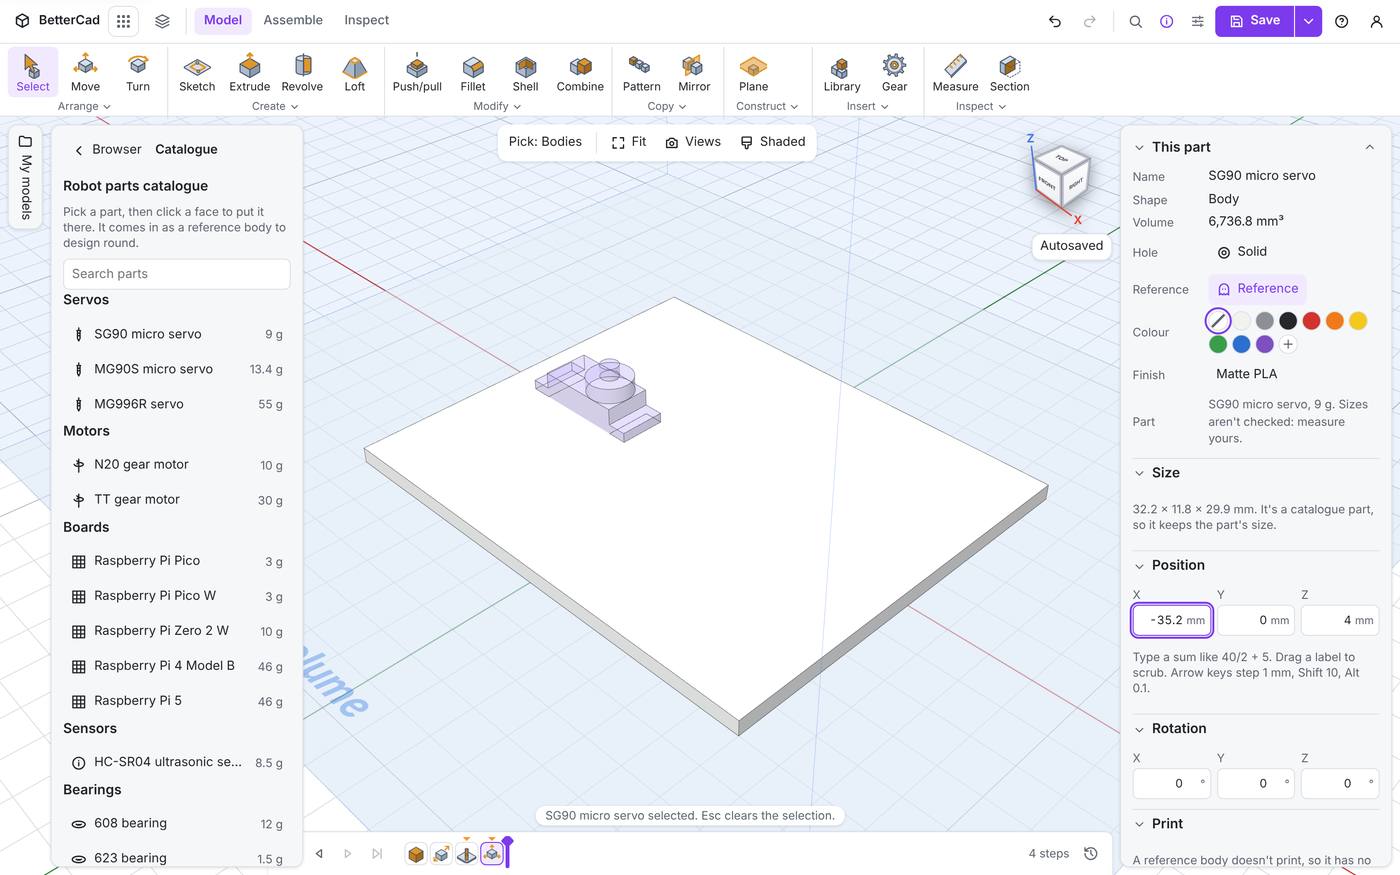
The servo lands where you clicked, snapped to a 0.5 mm grid. A few things to notice:
- It’s a reference body already. You’ll never print it by accident.
- Properties has a Part row: “SG90 micro servo, 9 g. Sizes aren’t checked: measure yours.”
- The Size section says “It’s a catalogue part, so it keeps the part’s size.”
- The timeline gained an Insert part step named after the servo.
Which way up?
Every catalogue part has a sensible zero. For a servo it’s the underside of the mounting tabs, so the tabs sit on the face you clicked and the body hangs below it, through the plate. That’s how a micro servo is normally fitted. Right now the body is buried in the deck because there’s no hole for it yet. Lesson 4 fixes that.
Turn it first
Before you click, press T or click Turn 90° on the bar to turn the part a quarter turn. Press it again for another quarter. Esc cancels.
Move it exactly
A placed part moves like any other body. For the project, the servo needs to be in a known place.
- With the servo selected, find Position in Properties.
- Set X to
-35.2and Y to0. Leave Z at4, the top of the deck.
Why 35.2 and not 35? A servo’s output shaft is off-centre, 5.2 mm from the middle of this one. Putting the body at -35.2 puts the shaft at a round -30, which makes the gear sums easier later.
Old models stay put
The Insert part step keeps its own copy of the part’s details. If the catalogue’s SG90 is corrected next month, the one in this model doesn’t move and nothing you built round it breaks.
The catalogue is part of the app, so it works offline too.
Try it Yourself
- Place a 608 bearing on the deck, then delete it.
- Place an HC-SR04 and press T before you click. Which way does it face?
- Search the catalogue for
pico. How many parts match?
Common Issues
Problem: The part lands on the ground, not on my plate. Solution: Click on a flat face of the plate itself. Turn the view so its top is clearly visible first. Why: Clicking empty space places the part on the ground.
Problem: The servo seems to be sunk into the plate. Solution: That’s correct. Its body hangs below the tabs and needs a pocket. Why: The part’s zero is the surface it screws to.
Problem: I can’t change the servo’s size. Solution: You can’t, by design. Pick a different part if you need one. Why: A catalogue part keeps the part’s size.
Check your understanding
Quick quiz 1 of 3
What kind of body is a part from the catalogue?
Quick quiz 2 of 3
What does pressing T do while placing a part?
Quick quiz 3 of 3
Where is an SG90’s zero height?
You can use the arrows ← → on your keyboard to navigate between lessons.
Comments