Print It Right with BetterCad
Use the BetterCad Print panel to check, calibrate and export parts that print cleanly and fit first time
By Kevin McAleer, 4 Minutes
Page last updated November 20, 2026

Overview
Designing a part is half the job. The other half is getting it off the printer in one piece, the right size, without a bin full of failed attempts.
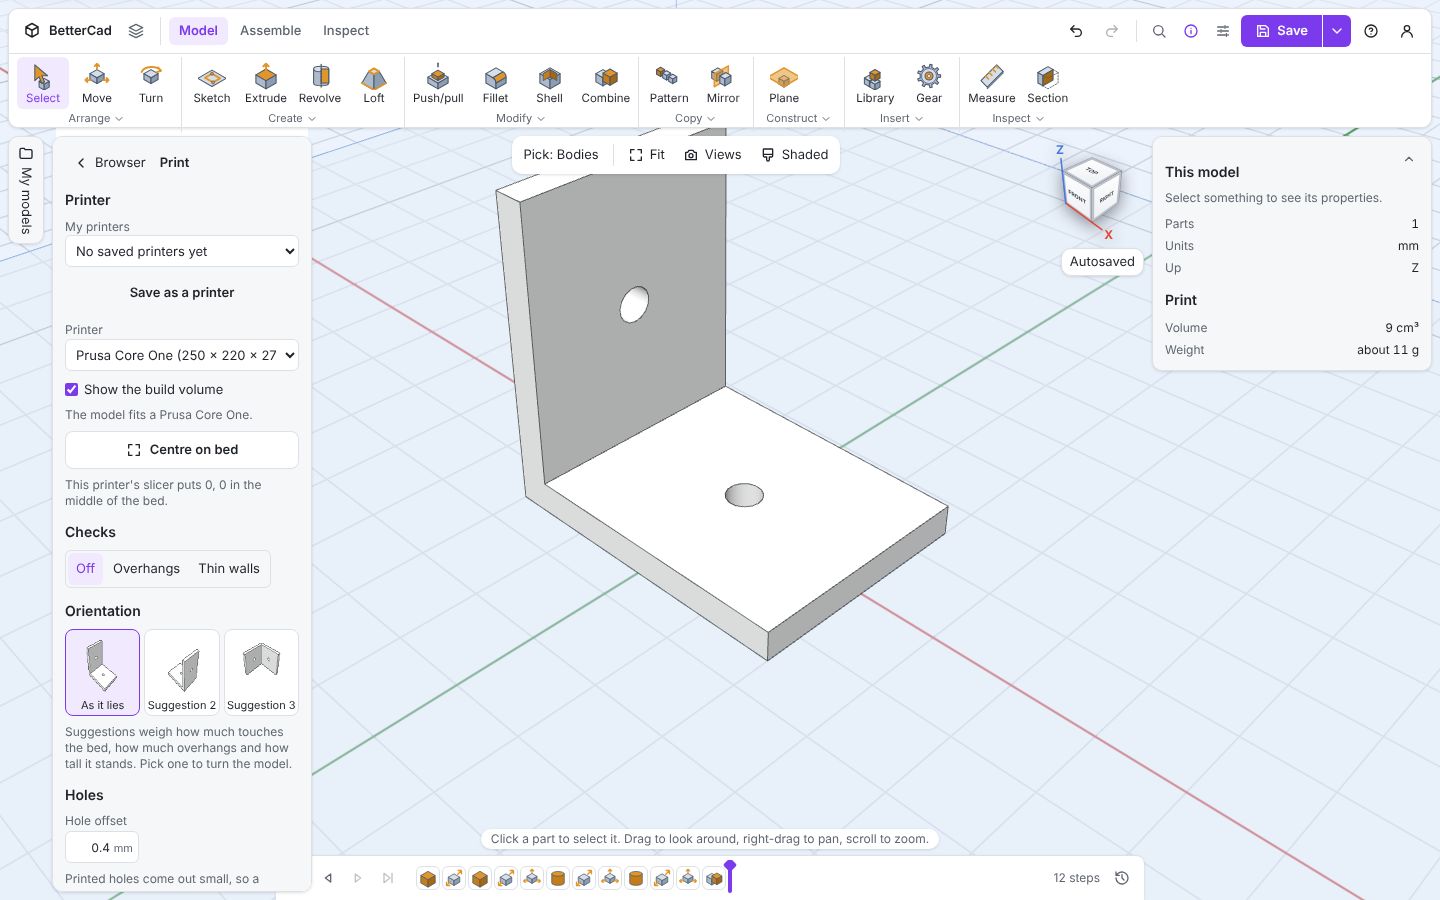
BetterCad has a Print panel built for exactly that. It knows the size of your printer’s bed, spots overhangs and thin walls, suggests which way up to print, and remembers how your printer behaves so that holes and joints come out right. This course works through the panel from top to bottom, then puts it to use on a box with a lid that closes with a satisfying fit.
Course Content
- Choosing your printer and checking a model fits the bed
- Finding overhangs, and designing them out
- Finding walls too thin to print
- Picking an orientation for strength, finish and fewer supports
- Calibrating screw holes to your printer with a test plate
- Press, sliding and loose fits between printed parts
- Checking where parts meet, and fixing joints that are too tight
- Materials, infill and the weight estimate
- STL, 3MF and STEP, and which to send where
- Project: tune and print a box with a lid
Key Results
After this course you will be able to:
- Tell before you print whether a part needs supports
- Print a hole that an M3 screw slides into, first time
- Make two printed parts press together, slide or drop in, on purpose
- Save your printer’s settings once and reuse them in every model
- Export the right file at the right resolution for your slicer
What you’ll need
- A computer with a recent browser
- BetterCad. It’s free and needs no account
- A 3D printer, slicer and some filament. PLA is ideal
- A few M3 screws for the hole test. M2 to M6 all work
- About 10 g of filament and under an hour of printing for the two calibration prints
You can read the course without a printer, but the calibration lessons only pay off when you print the test pieces.
How the course works
Lessons are short and each covers one part of the Print panel. Steps to follow are numbered, keys look like K, and names of buttons and panels are in bold. Most lessons use the samples built into BetterCad, so there’s nothing to draw until the project.
To open the Print panel, click the account menu at the top right and choose Print settings. It opens on the left, where the Browser normally sits. Click Browser at the top of the panel to go back.
BetterCad is in alpha. Buttons move and features arrive often, so your screen may differ a little from the screenshots.
Prerequisites
You should be able to find your way around BetterCad and make a simple part. Learn BetterCad covers everything you need, and lesson 10 of that course is a quick preview of this one.
Try it Yourself
- Open the Bracket sample from the start card, or open it directly.
- Open Print settings from the account menu and scroll through the whole panel. How many headings does it have?
- With nothing selected, look at Properties on the right. What does BetterCad think the bracket weighs?
Check your understanding
Quick quiz 1 of 3
Where is the Print panel?
Quick quiz 2 of 3
What does this course help you avoid?
Quick quiz 3 of 3
Do you need an account to use the Print panel?
You can use the arrows ← → on your keyboard to navigate between lessons.
Comments