Project - A Box With a Lid
Resize BetterCad's box with a lid for your own project, set the lid's fit from your calibration, check it and export both parts
By Kevin McAleer, 7 Minutes
Page last updated November 20, 2026

A box with a lid is the classic test of whether a designer and a printer understand each other. The lid has to go on without a fight and stay on without rattling. Everything in this course feeds into that one joint.
You’ll take BetterCad’s Box with a lid sample, resize it for something of your own, set the lid’s fit from your calibration and export both parts ready to print.
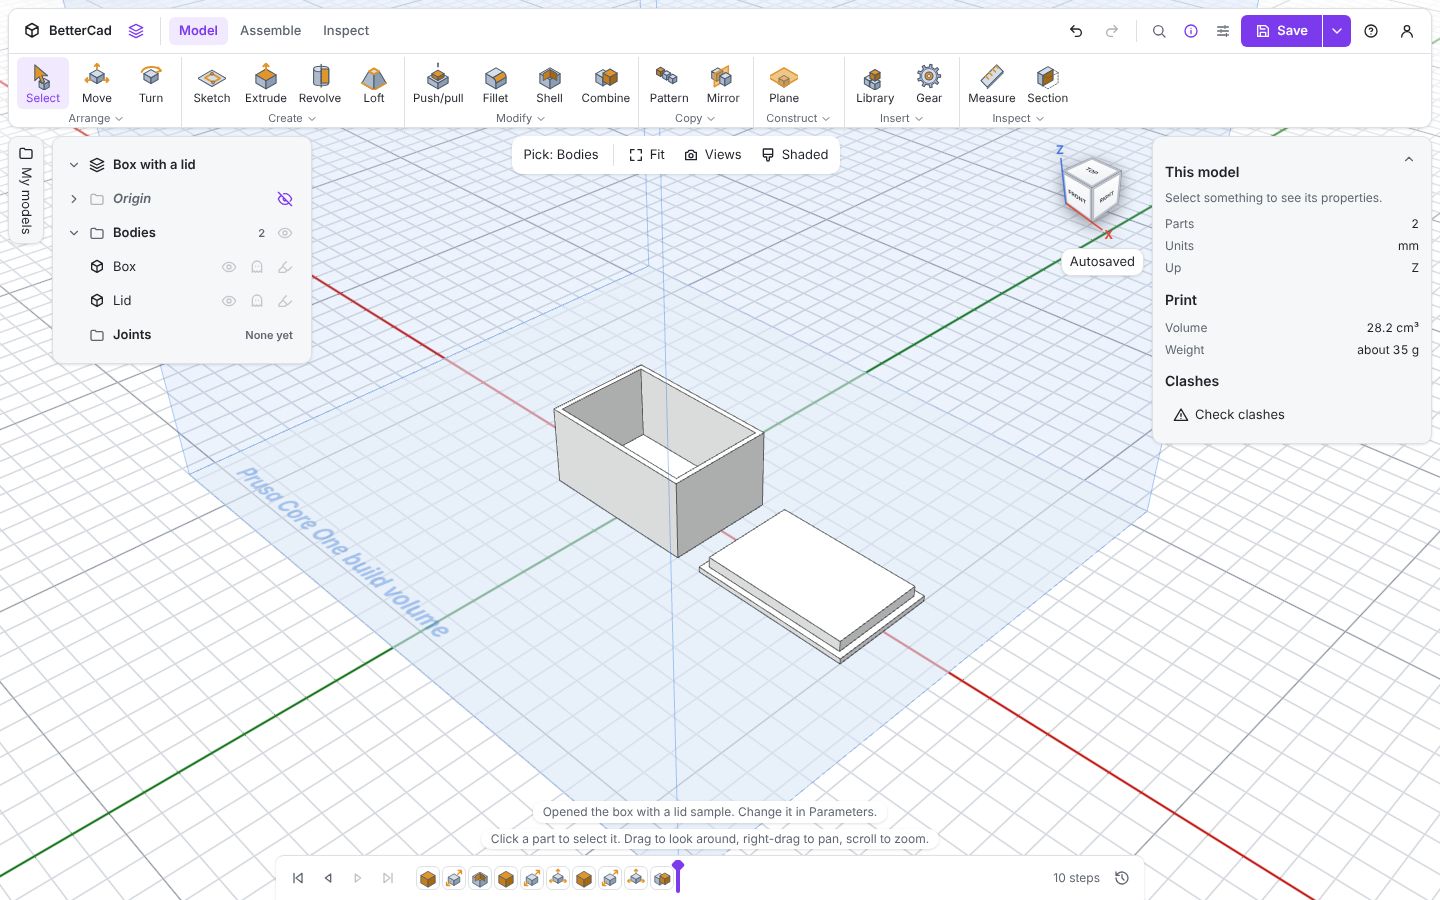
Step 1: Open the sample and pick your printer
- Start a new model (Ctrl+N) and choose Box with a lid from the start card, or open it directly.
- Open Print settings and choose your saved printer from My printers.
The box and its lid are laid out side by side, the way they’ll print. The lid is upside down, with its lip pointing up. The lip is the raised rectangle that drops inside the walls of the box and stops the lid sliding off.
Step 2: Meet the parameters
Open Parameters.
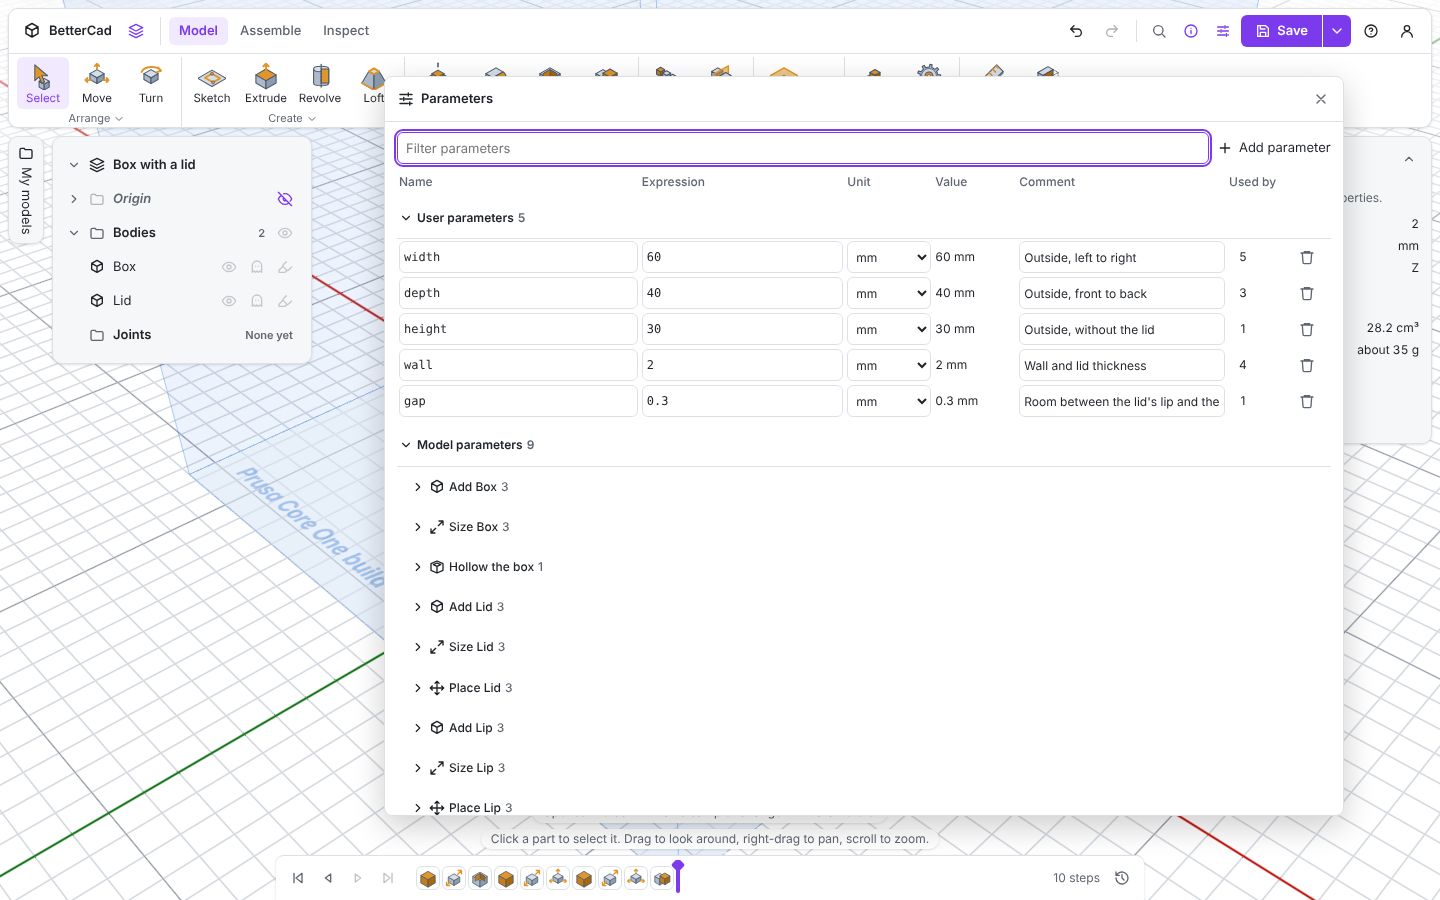
| Parameter | Starts at | What it is |
|---|---|---|
width |
60 | Outside, left to right |
depth |
40 | Outside, front to back |
height |
30 | Outside, without the lid |
wall |
2 | Wall and lid thickness |
gap |
0.3 | Room between the lid’s lip and the walls, on each side |
Notice the sizes are outside sizes. To find the outside from what has to fit inside, add two walls.
Step 3: Size it for your project
Decide what goes in the box and measure it. As an example, a Raspberry Pi Pico is 51 × 21 mm. Allow a couple of millimetres all round for clearance and you want an inside of about 55 × 25 mm, and 16 mm deep to clear the header pins and a few wires.
| Parameter | Sum | Set it to |
|---|---|---|
width |
55 + 2 × 2 | 59 |
depth |
25 + 2 × 2 | 29 |
height |
16 + 2 | 18 |
Height only adds one wall, because the box has a floor but its top is open.
Type the new values and close the panel.
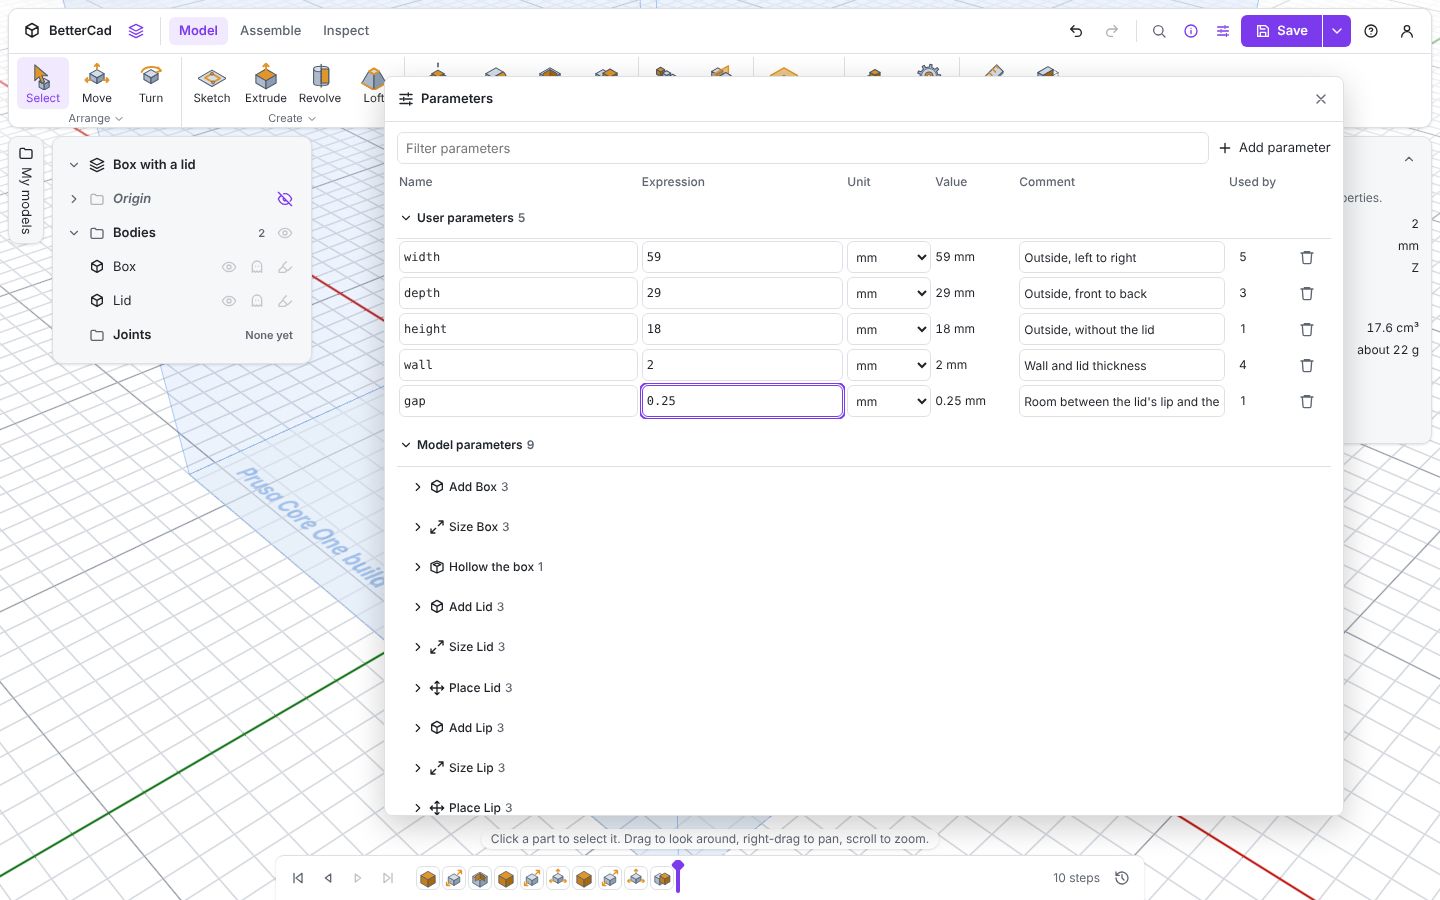
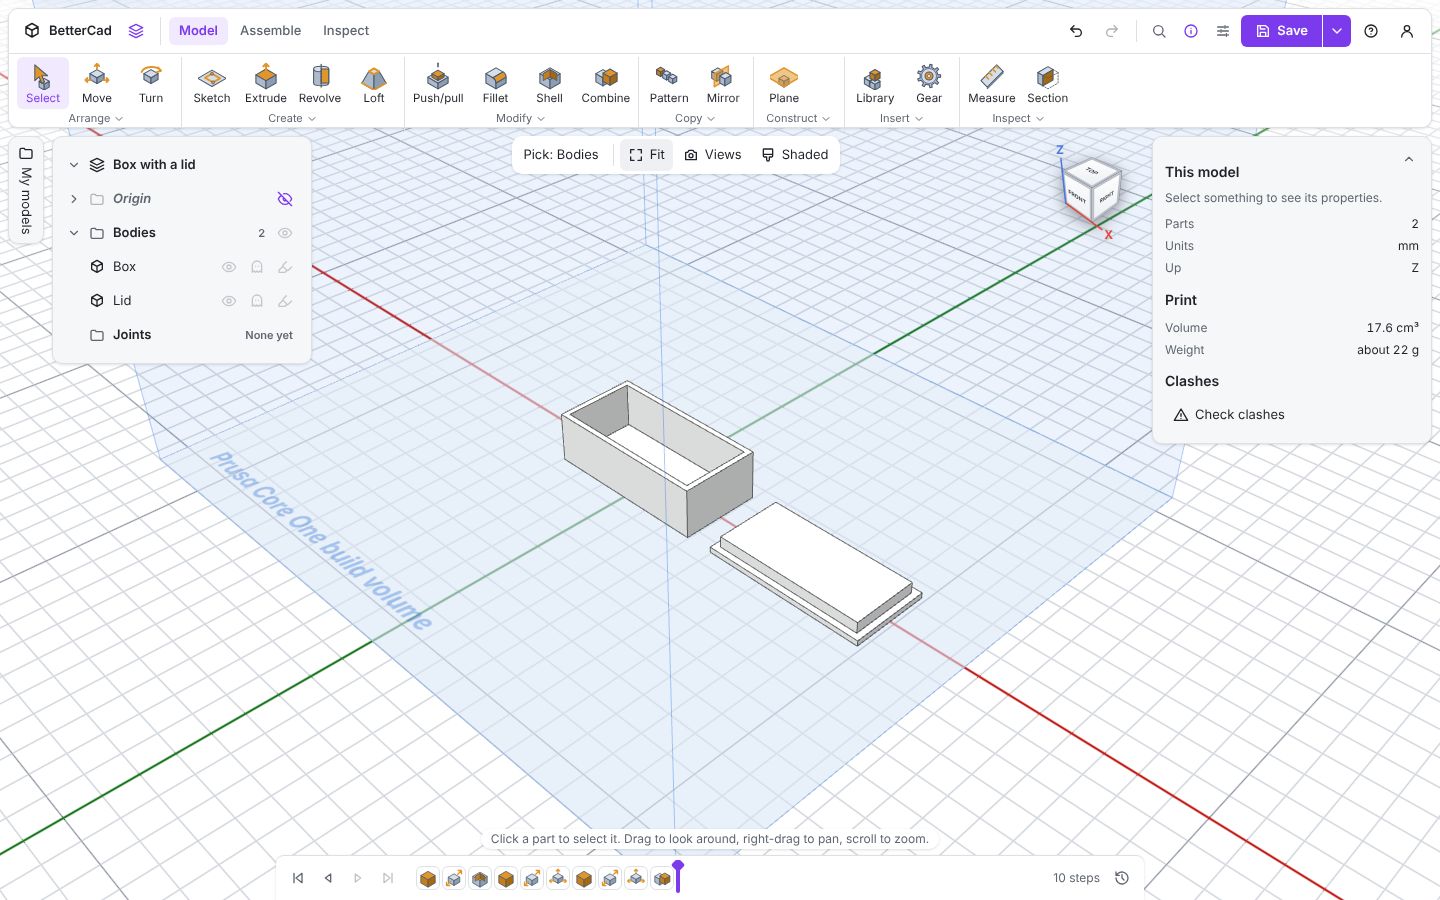
Box, lid and lip all rebuild to match. Select the box and Properties confirms 59 × 29 × 18 mm.
Step 4: Set the fit
This is the number that matters. gap is the space on each side between the lip and the inside of the walls, exactly like the fits in lesson 6.
- Calibrated your fits? Use your Sliding value from the Print panel
- Want a lid that grips and has to be pulled off? Go halfway between your Press and Sliding values
- Not calibrated yet? Leave it at
0.3, a safe starting point for most printers
In the screenshots above, gap is set to 0.25.
Because the lid is long and thin, don’t go tighter than your sliding fit on your first try. A lid that’s slightly loose still works. One that’s too tight goes in the bin.
Step 5: Run the checks
Open the Print panel.
- Does it fit the bed? The panel says so under the printer.
- Click Overhangs.
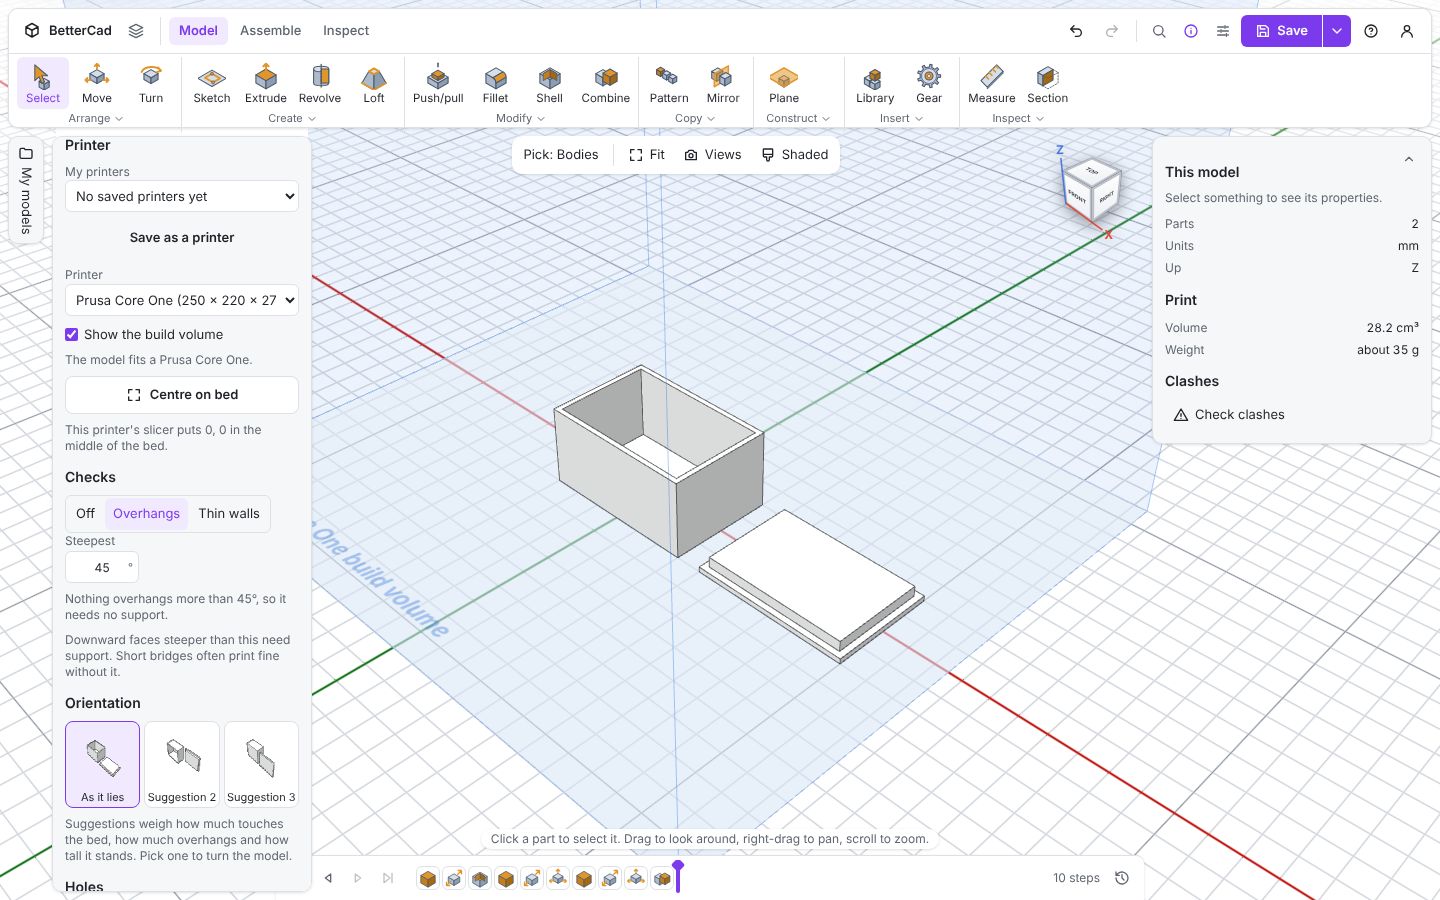
Nothing overhangs more than 45°, so it needs no support. The box is open at the top and the lid’s lip points up, so every surface is on the bed, upright or facing the sky. That’s why the lid is modelled upside down.
- Click Thin walls. With a 2 mm wall you’ll see No walls thinner than 0.8 mm.
If you lower wall to save plastic, run this again. At 0.6 it will fail.
- Look at Orientation. As it lies is already right for both parts: biggest face down, nothing hanging.
Step 6: Check the weight
Scroll to Material and pick what you’re printing in. The Pico-sized box and lid come to about 22 g in PLA.
Try changing the infill. The weight doesn’t move, for the reason you met in lesson 8. Walls this thin are solid all the way through.
Step 7: Export
- Press Ctrl+E.
- Choose 3MF.
- For What, choose All bodies to print the pair together, or Each on its own if you want the lid in another colour.
- Leave Resolution on Normal and Place on the bed ticked.
- Click Export.
- Press Ctrl+S to save the
.bcad.
Step 8: Print and test
Slice with your usual settings. Three walls and 15% infill are plenty. Print, let it cool and try the lid.
| What happens | What to change |
|---|---|
| The lid drops on, with a faint click or none, and doesn’t slide about | Nothing. Write the gap down |
| The lid won’t go on, or needs force | Raise gap by 0.05 and reprint the lid only |
| The lid rattles or falls off when tipped | Lower gap by 0.05 and reprint the lid only |
| One corner is tight | Look for a blob at the layer seam, or a lifted corner. That’s a print problem, not a design one |
Only the lid changes when you change gap, so a second attempt costs a few grams.
When it’s right, that gap is your number for lids on this printer in this material. Put it in your saved printer’s Sliding fit.
Make it yours
- Add a cable slot. Put a hole-shaped Box through one wall and group it
- Add screw posts. Roll the timeline back to before Hollow the box, add four M3 holes with the Hole tool, and step forward again. The holes become posts, as they did in Learn BetterCad
- Round the corners. Fillet the four upright edges of the box, before the shell step, and the lid to match
- Label it. Sketch some text on the lid and cut it in by 0.6 mm
Try it Yourself
- Resize the box for a real thing you own, and print it.
- Find your ideal
gapby printing two lids 0.1 mm apart. - Challenge: add a 12 × 6 mm slot in one end wall for a USB cable, positioned with parameters so it stays centred.
Common Issues
Problem: The lid fits one way round but not the other. Solution: Check the bed is level and the first layer isn’t squashed, which spreads the base of the lip. Why: A squashed first layer makes the bottom of a part slightly bigger, known as elephant’s foot.
Problem: The lid is tight only at the corners.
Solution: Fillet the four upright edges of the lip by 1 mm, or raise gap slightly.
Why: Printers slow down and deposit a little extra plastic at sharp corners, so they bulge.
Problem: The lid goes on but the lip is too shallow to hold. Solution: Make the lip taller. Double-click the Size Lip step and raise its height from 4 mm. Why: A taller lip has more wall to bear against.
Check your understanding
Quick quiz 1 of 3
The inside must be 55 mm wide and the wall is 2 mm. What is width?
Quick quiz 2 of 3
The lid won’t go on. What do you change?
Quick quiz 3 of 3
Why is the lid modelled upside down?
You can use the arrows ← → on your keyboard to navigate between lessons.
Comments