Fits Between Parts
Make 3D printed parts press together, slide or drop in using BetterCad's named fits, and calibrate the gaps to your own printer
By Kevin McAleer, 6 Minutes
Page last updated November 20, 2026

A lid on a box. A peg in a socket. A battery in a holder. Whenever one printed part goes into another, the tiny space between them decides everything. Too little and they jam. Too much and they rattle.
Draw a pocket exactly the size of its peg and it will print too tight, for the same reason holes come out small. The answer is to leave a deliberate gap, and BetterCad gives the useful gaps names.
Three named fits
| Fit | Gap each side | What it feels like | Use it for |
|---|---|---|---|
| Press | 0.15 mm | Pushes together by hand and stays put | Pins, bearings, magnets |
| Sliding | 0.25 mm | Slides together with no force and no wobble | Lids, slots, shafts that turn |
| Loose | 0.4 mm | Drops in with room to spare | Hinges, quick-release parts, big prints that might warp |
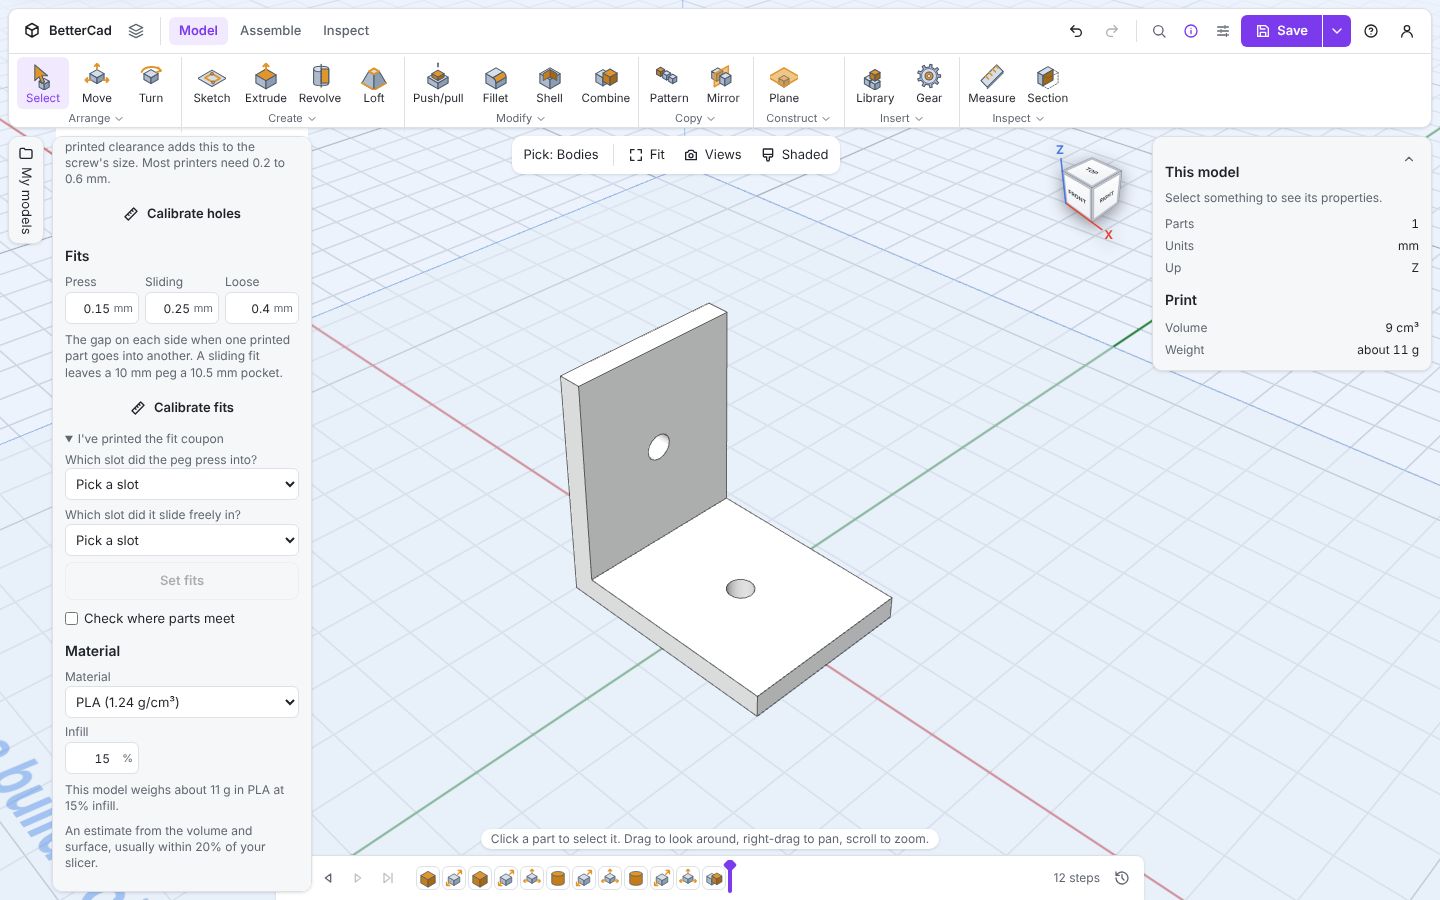
These are in the Print panel under Fits, and they’re starting points you’ll tune in a moment.
Each side, not the diameter
This catches everyone once. A fit’s gap is added on every side. A 10 mm peg with a sliding fit gets a 10.5 mm pocket: 0.25 mm on the left and 0.25 mm on the right.
The hole offset from the last lesson works the other way. It’s added to the hole’s diameter, so a 0.4 mm offset is a 0.2 mm gap each side.
Cut with a fit
You don’t have to do the sums. Tell BetterCad which fit you want when you make the cut and it grows the cutting shape by the gap first. There are two ways.
With a hole shape
Here’s a 30 × 30 × 10 mm block and a 10 mm cylinder that will become a socket for a peg.
- Select the cylinder and switch it from Solid to Hole in Properties.
- A Fit row appears. Click it.
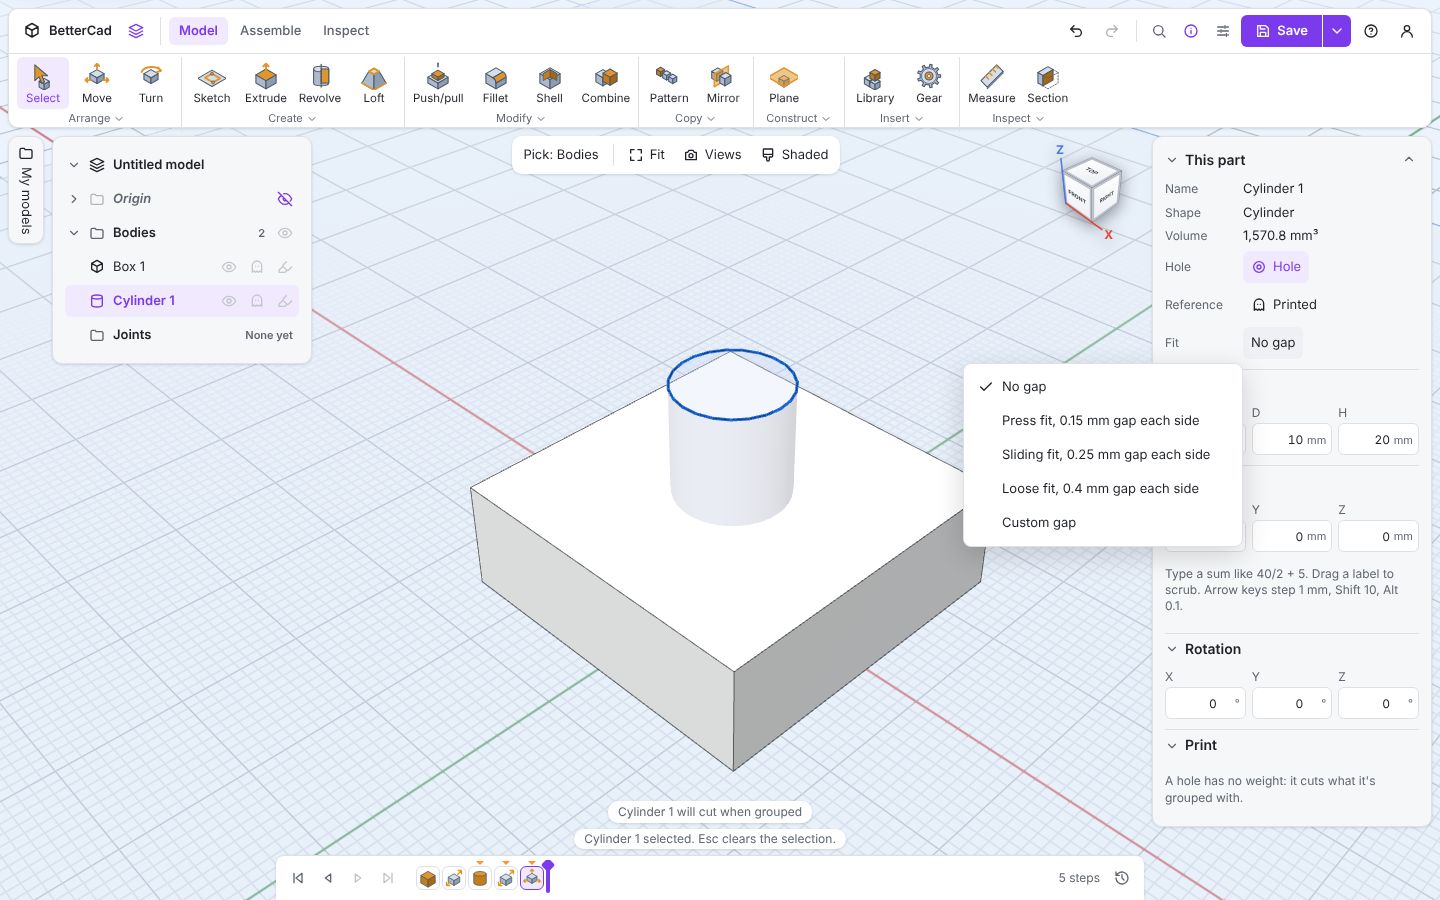
- Choose Sliding fit, 0.25 mm gap each side.
- Select both shapes and press Ctrl+G.
The socket is cut at 10.5 mm, and your cylinder was 10 mm. Drop a 10 mm peg in and it slides.
With Combine
The Combine tool (C) has the same menu. Click the body to keep, Shift-click the body to cut with, and choose Cut. A Fit menu appears beside the operation.
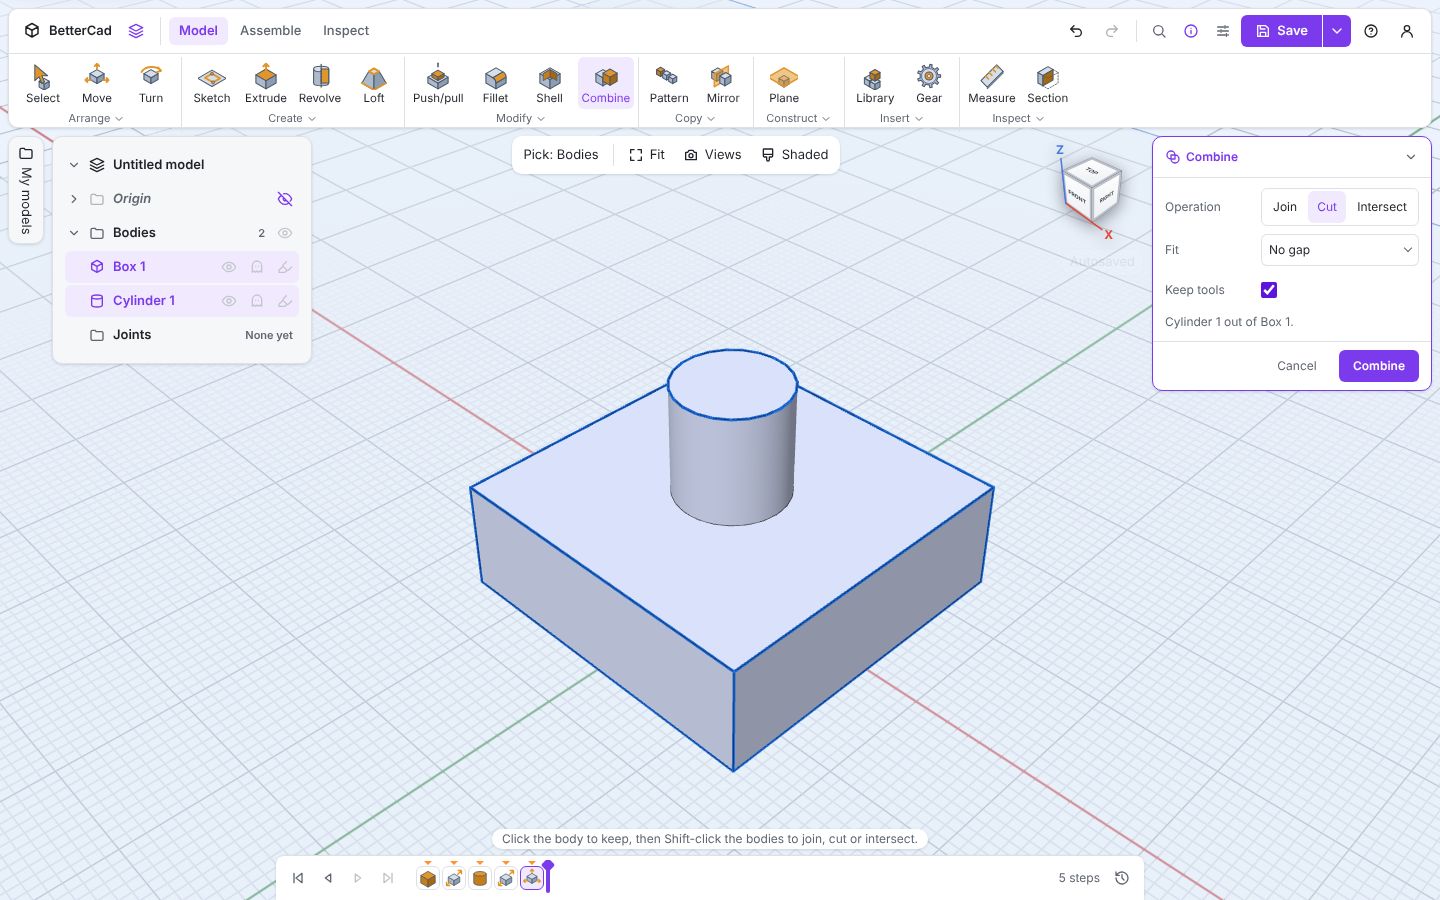
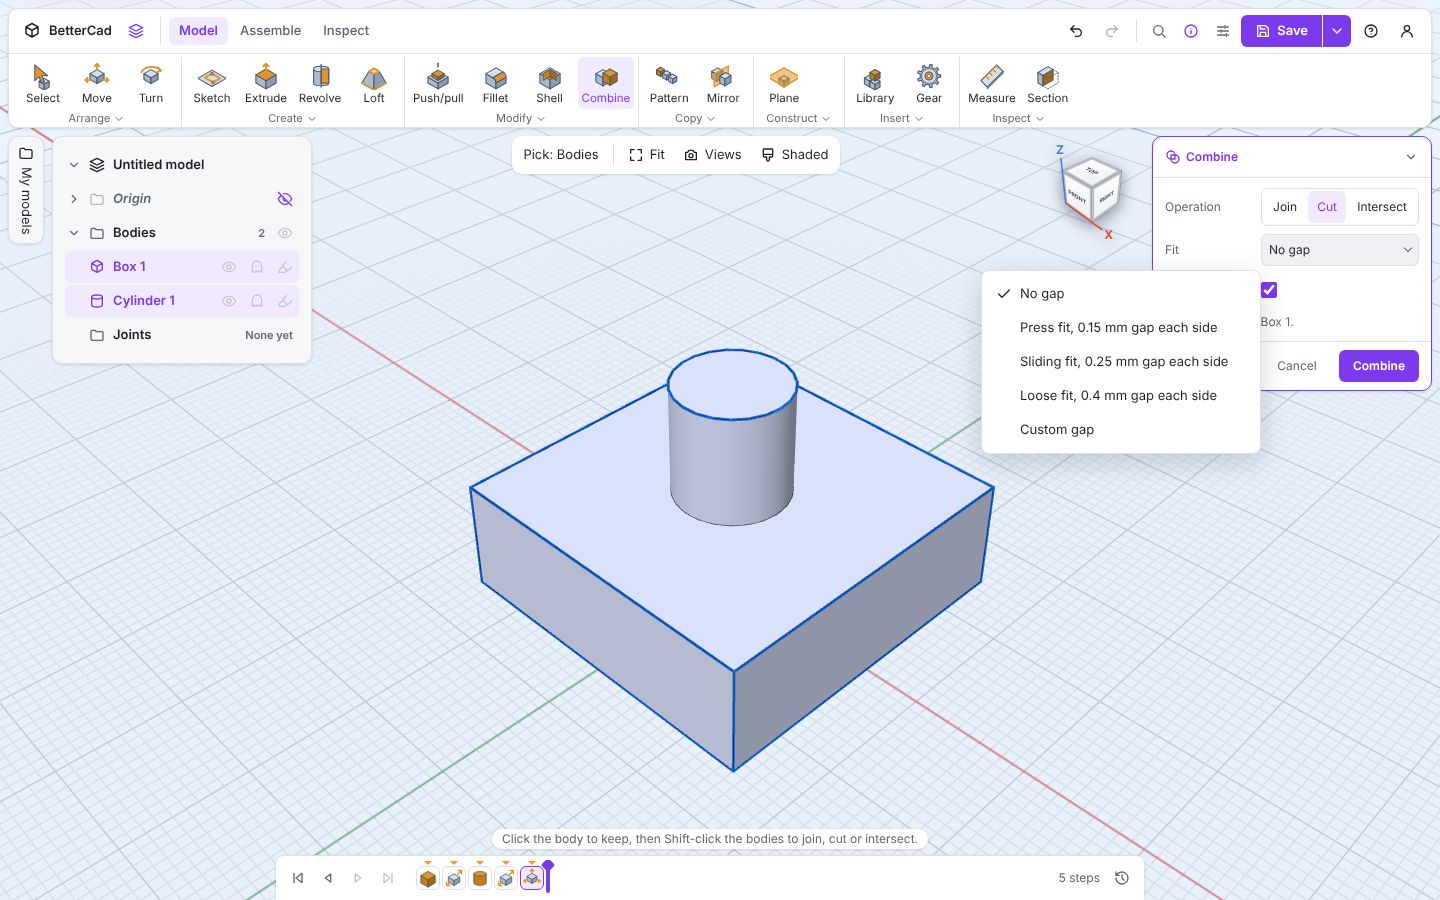
Tick Keep tools and the cutting body stays afterwards. That’s the neat way to make a matching pair: model the peg, cut it out of the block with a sliding fit, and keep the peg. One shape, two parts, guaranteed to match.
Custom gap lets you type any value for the odd case.
Calibrate your fits
0.25 mm is a typical sliding gap. Your printer might want 0.2 or 0.3. Find out with the second test print.
- In the Print panel, click Calibrate fits.
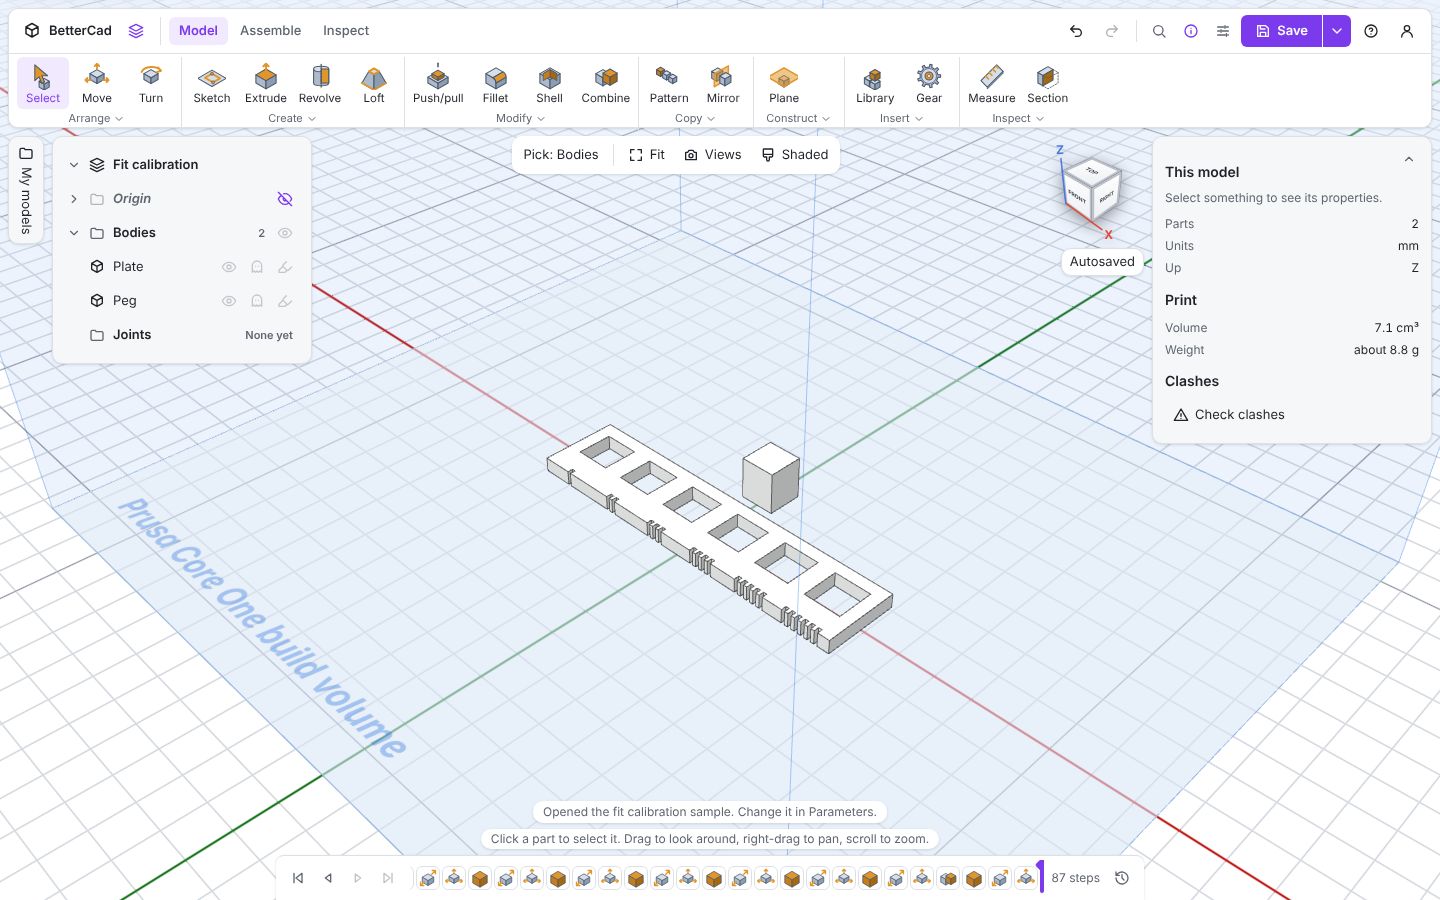
You get a 4 mm plate with six square slots, and a 10 mm square peg to print beside it. Each slot is bigger than the peg by a different gap each side: 0.05, 0.1, 0.15, 0.2, 0.3 and 0.4 mm, from the left. Notches on the front edge count the slot, from one to six.
- Export and print the plate and the peg, both flat.
- Try the peg in every slot and note two things: the slot it pressed into and stayed, and the slot it slid freely in.
- In the Print panel, open I’ve printed the fit coupon.
- Answer the two questions, Which slot did the peg press into? and Which slot did it slide freely in?, then click Set fits.
BetterCad sets Press and Sliding from your answers and makes Loose 0.15 mm wider than Sliding. You can also type any of the three gaps directly.
Save them to your printer with Save to, and every model you start from that printer gets fits that match your machine.
Fits you’ve already cut
Like holes, each cut remembers the gap it was made with. Change your fits and the Print panel offers Update N fitted cuts to bring the older ones into line, as one undo step.
Try it Yourself
- Print the fit calibration plate and set your three fits.
- Make a 30 × 30 × 10 Box and a 10 mm Cylinder at the same position. Cut the cylinder out with a Press fit and Keep tools ticked. Print both. Does the peg stay in?
- Do it again with Loose fit. Turn the block upside down. Does the peg fall out?
Common Issues
Problem: The Fit menu doesn’t appear in Combine. Solution: Choose Cut first. Why: A gap only makes sense when one shape is removed from another.
Problem: My peg presses into a slot but won’t come out again. Solution: That’s a press fit doing its job. For parts that come apart, use Sliding. Why: Press fits rely on the plastic gripping.
Problem: A sliding fit is perfect on small parts but tight on a 150 mm lid. Solution: Use Loose for large parts. Why: Long edges are never perfectly straight, and small errors add up along them.
Check your understanding
Quick quiz 1 of 3
A 10 mm peg gets a sliding fit of 0.25 mm. How wide is the pocket?
Quick quiz 2 of 3
Which fit suits a magnet that must stay in its recess?
Quick quiz 3 of 3
What does Keep tools do in a Combine cut?
You can use the arrows ← → on your keyboard to navigate between lessons.
Comments