Thin Walls
Use the BetterCad thin wall check to find parts of a model that are too thin to print, and learn how thick a wall should be
By Kevin McAleer, 5 Minutes
Page last updated November 20, 2026

A printer draws with a line of molten plastic about as wide as its nozzle. Ask it for a wall thinner than that and the slicer has two choices: skip it, or make it thicker than you drew. Neither is what you wanted. The thin wall check finds those places.
Run the check
In the Print panel, under Checks, click Thin walls.
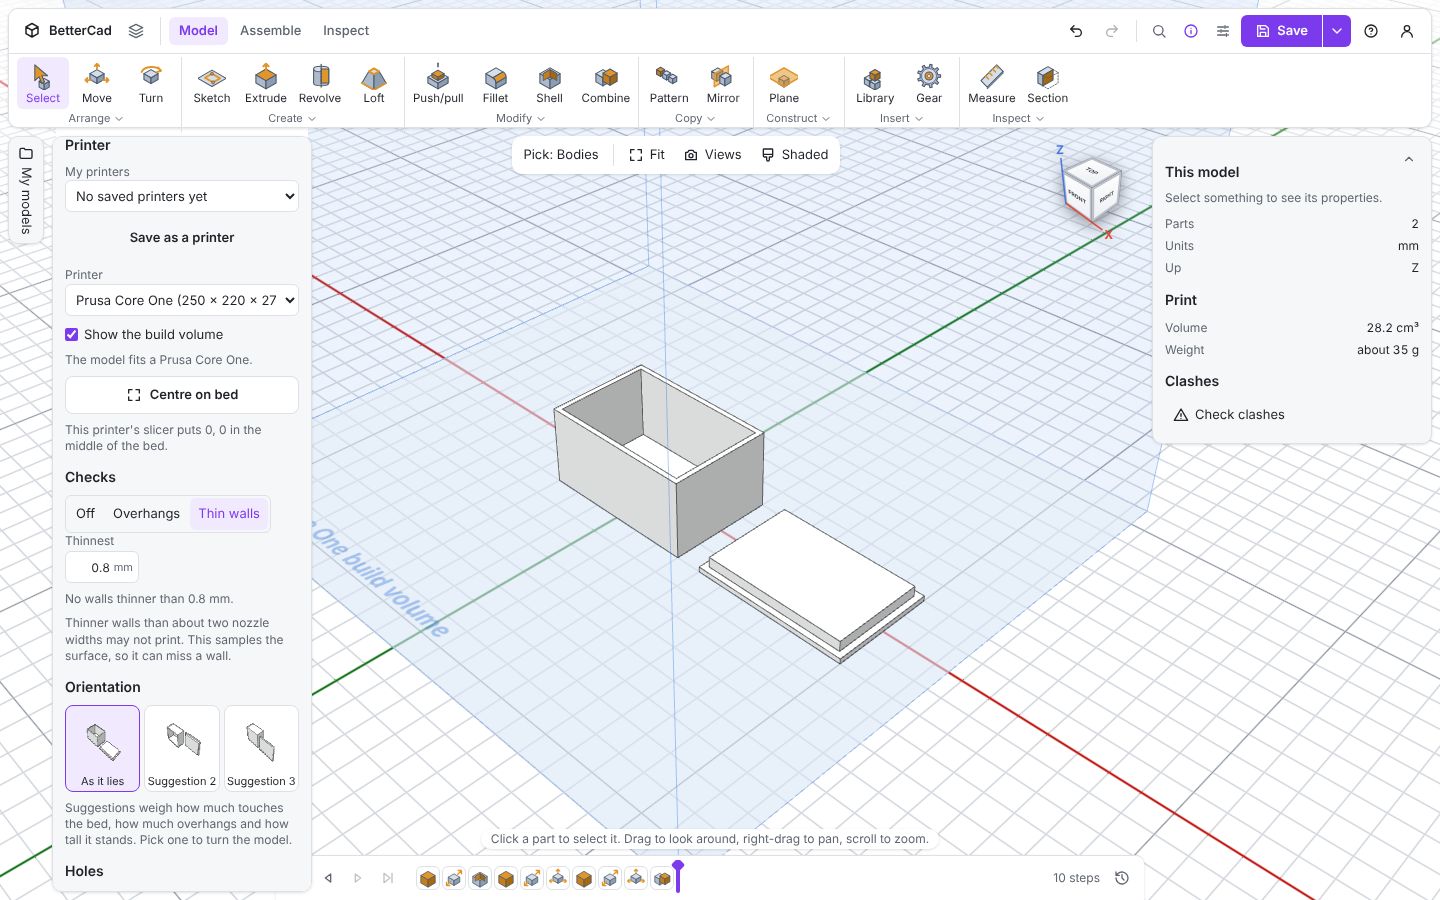
On a healthy part you’ll see No walls thinner than 0.8 mm.
Now a part that fails. This is a panel 30 mm wide, 20 mm tall and only 0.6 mm thick.
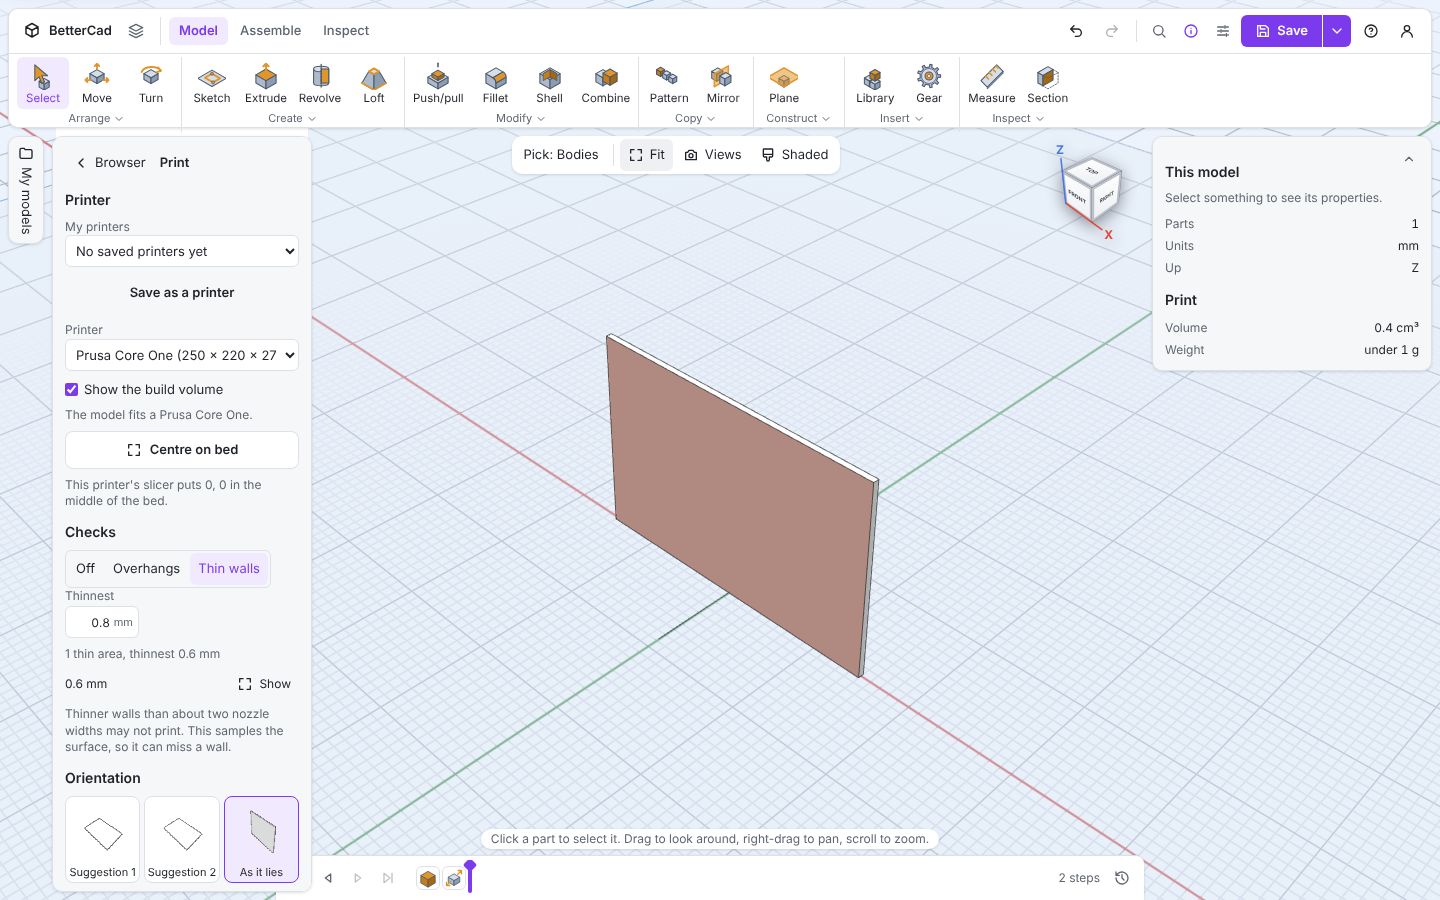
1 thin area, thinnest 0.6 mm. The whole panel is tinted, and it’s listed with its thinnest point and a Show button.
Why 0.8 mm?
The Thinnest box sets the limit. It starts at 0.8 mm: two passes of a standard 0.4 mm nozzle. One pass will print, but a single-line wall is fragile and often has gaps. Two lines fused side by side make a real wall.
| Nozzle | Sensible limit |
|---|---|
| 0.25 mm | 0.5 mm |
| 0.4 mm | 0.8 mm |
| 0.6 mm | 1.2 mm |
| 0.8 mm | 1.6 mm |
If you’ve fitted a different nozzle, change the limit to match.
How thick should a wall be?
Passing the check means a wall can print. Whether it’s strong enough is a design decision. Walls are strongest when they’re a whole number of nozzle widths, because the slicer fills them with clean lines and no slivers.
| Wall (0.4 mm nozzle) | Lines | Good for |
|---|---|---|
| 0.8 mm | 2 | Light covers, dividers, anything that only has to exist |
| 1.2 mm | 3 | Small boxes and trays |
| 1.6 mm | 4 | Everyday enclosures and brackets |
| 2.0 to 2.4 mm | 5 to 6 | Things that get dropped, clamped or screwed into |
Where thin walls hide
Thin walls rarely come from typing a small number. They appear by accident, where two features nearly meet:
- A hole too close to an edge. A 3.4 mm hole centred 2 mm from an edge leaves 0.3 mm of wall beside it
- Two holes or pockets too close together
- A fillet on a thin rim, which feathers down to nothing
- Shelling a part with a wall thicker than a rib or a tab, which eats the feature from inside
- Text and fine detail
That’s why the check is worth running even when you’re sure of your numbers.
Fixing them
Go back along the timeline to the step that set the size, and change it. In a parametric model the fix is often one number: double-click the Shell step and change the wall, or open Parameters and raise wall.
For a hole near an edge, move the hole in. A good rule is to leave at least one hole diameter between the hole and the edge.
A guide, not a guarantee
The check works by sampling the surface: from each small patch it looks straight through the part to see how far away the other side is. The panel is honest about that: “This samples the surface, so it can miss a wall.” A wall that meets another at a shallow angle can slip through.
Your slicer’s preview is the final word. If a wall looks hollow or missing there, it’s too thin, whatever any check says.
Try it Yourself
- Add a Box and set its D to
0.6. Run the check, then raise D until it passes. What’s the smallest value that does? - Make a 30 × 30 × 5 Box and use the Hole tool to put an M3 hole 2 mm from one edge. Does the check find the thin wall?
- Change Thinnest to
1.2and run the check on the Bracket sample.
Common Issues
Problem: The check takes a moment to answer. Solution: Wait. You can keep working while it runs. Why: It measures the whole surface in the background.
Problem: A wall passes the check but my slicer leaves it out. Solution: Turn on your slicer’s “detect thin walls” option, or make the wall a multiple of the nozzle width. Why: A 1.0 mm wall with a 0.4 mm nozzle is two lines and an awkward 0.2 mm gap.
Problem: Several thin spots are listed as one area. Solution: Click Show and inspect the whole region. Why: Thin patches that touch, or nearly touch, are grouped together.
Check your understanding
Quick quiz 1 of 3
Why is 0.8 mm the default limit?
Quick quiz 2 of 3
Where do accidental thin walls usually come from?
Quick quiz 3 of 3
The check passes but the slicer preview shows a gap in a wall. Which do you trust?
You can use the arrows ← → on your keyboard to navigate between lessons.
Comments