Overhangs and Supports
Find the parts of a model that would print in mid-air with the BetterCad overhang check, and learn how to design them away
By Kevin McAleer, 5 Minutes
Page last updated November 20, 2026

A 3D printer builds from the bed upwards, and every layer needs something to sit on. Where there’s nothing underneath, you get an overhang. Small ones print fine. Large ones sag, string or fail unless the slicer adds supports, which cost time and plastic and leave a rough surface behind.
The overhang check shows you where they are while you can still do something about it.
Run the check
With the Bracket sample open, go to Checks in the Print panel and click Overhangs.
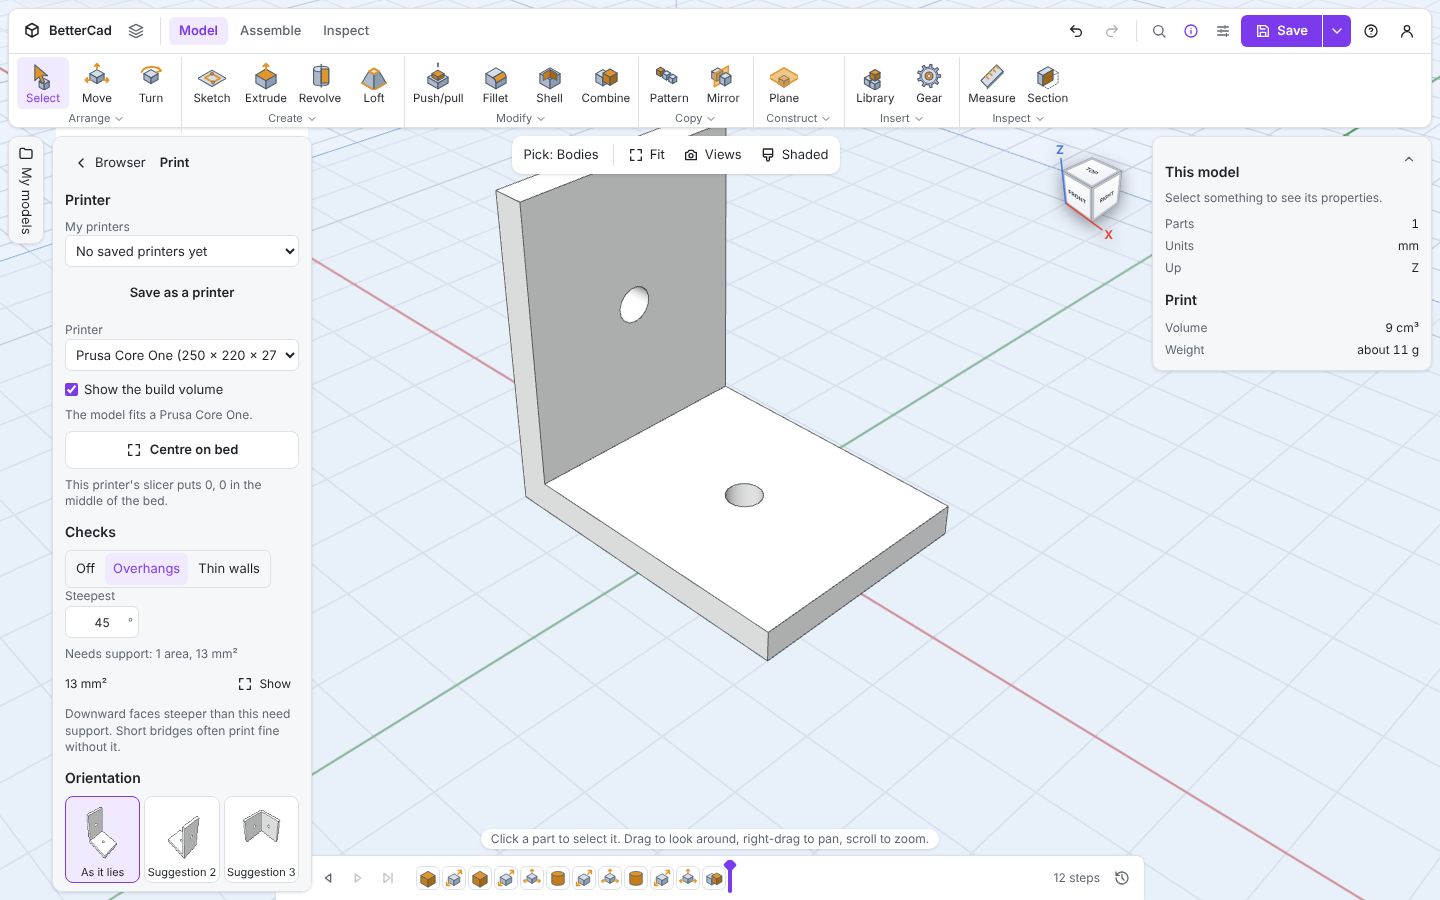
The result is one line: Needs support: 1 area, 13 mm². Each area is listed with its size and a Show button that swings the view round to it. Problem faces are tinted on the model, and the tint is stronger the closer a face is to flat.
Here the culprit is the top of the screw hole in the upright. It’s a tiny roof. At 13 mm² it will print without help.
The 45 degree rule
Each layer can stick out a little beyond the one below. Stack those small steps and you get a slope. Most printers manage a slope up to about 45° from vertical with no support at all. Past that, quality drops quickly.
The Steepest box sets the limit the check uses. It starts at 45° and goes from 30° to 70°.
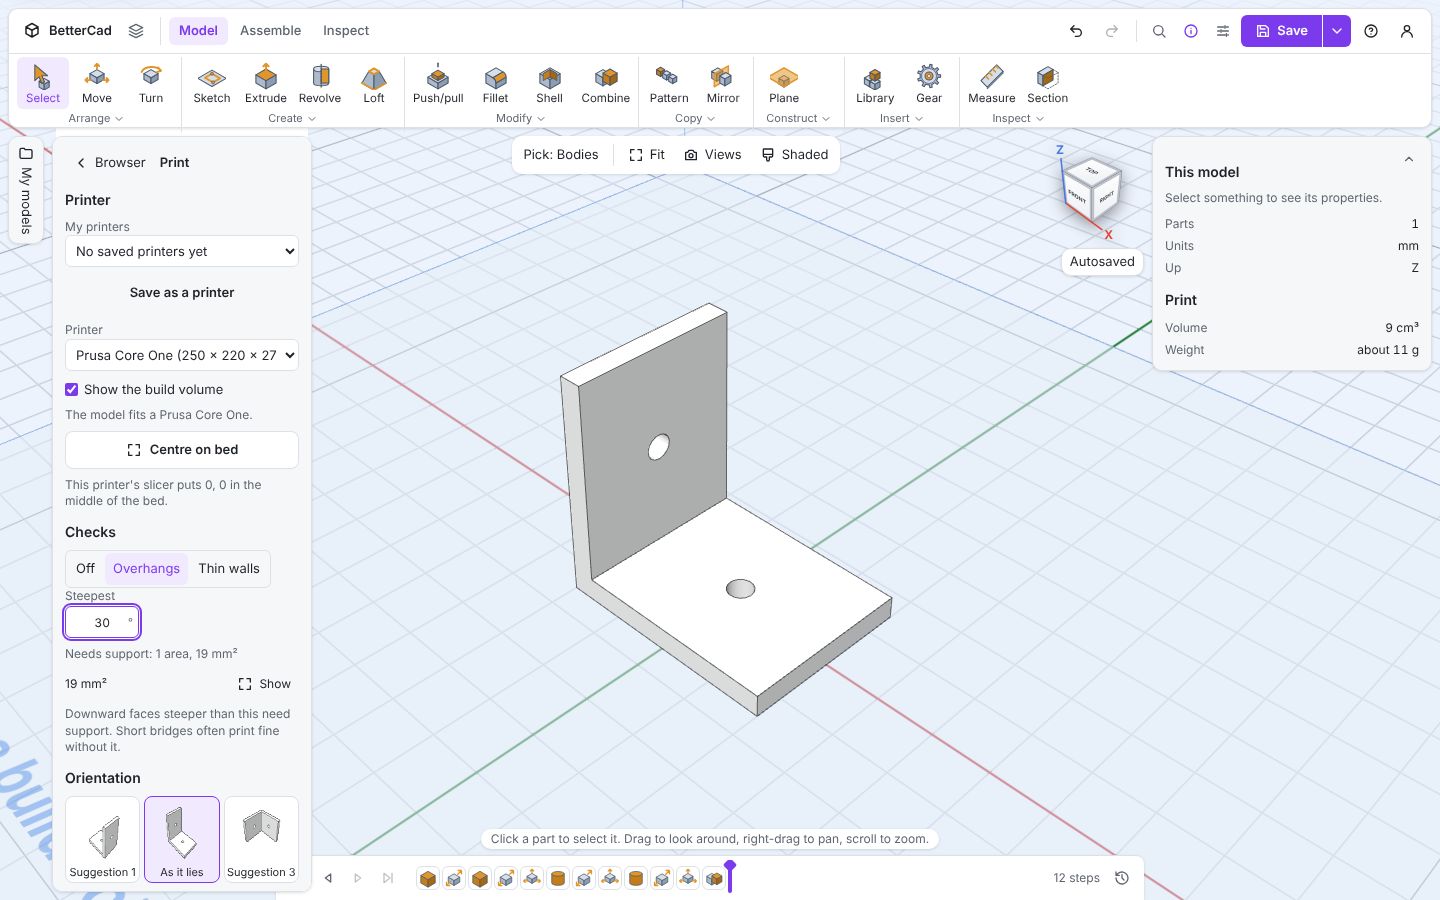
At 30° the bracket’s area grows from 13 to 19 mm², because more of the hole’s curve now counts.
| Set it to | When |
|---|---|
| 30° to 40° | Your printer struggles with overhangs, or you’re printing fast or in PETG |
| 45° | The sensible default |
| 55° to 70° | A well-tuned printer with good cooling, in PLA |
A real overhang
A tee shape makes the problem obvious: a 10 mm post with a 40 mm bar across the top.
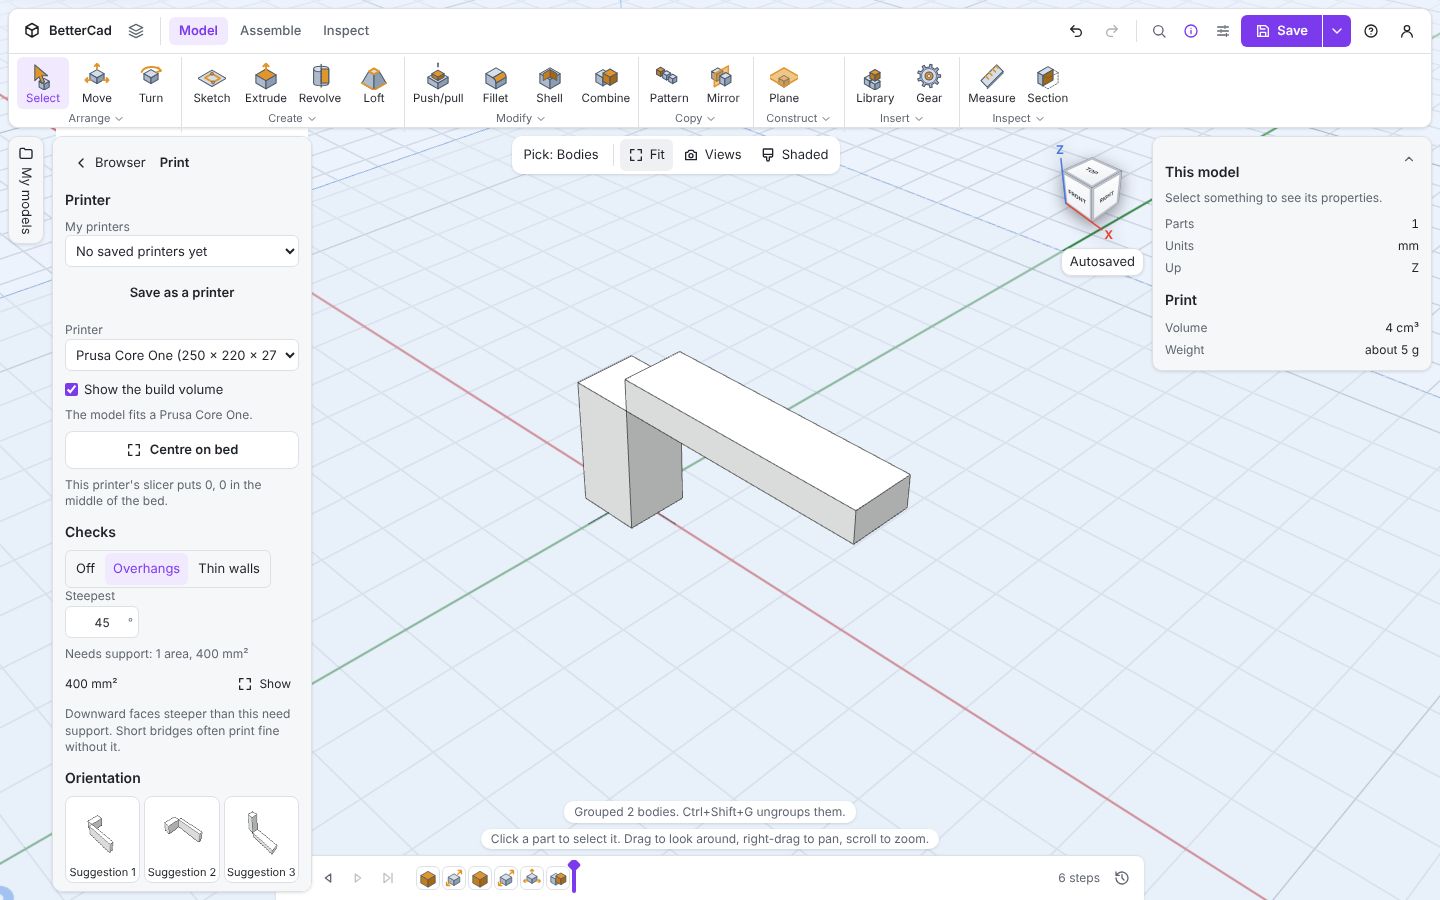
Needs support: 1 area, 400 mm². That’s the whole underside of the bar, hanging in space on one side of the post. Printed like this it needs a tower of support.
Three ways to fix an overhang
Turn the part. Lay the tee on its side and nothing hangs at all.
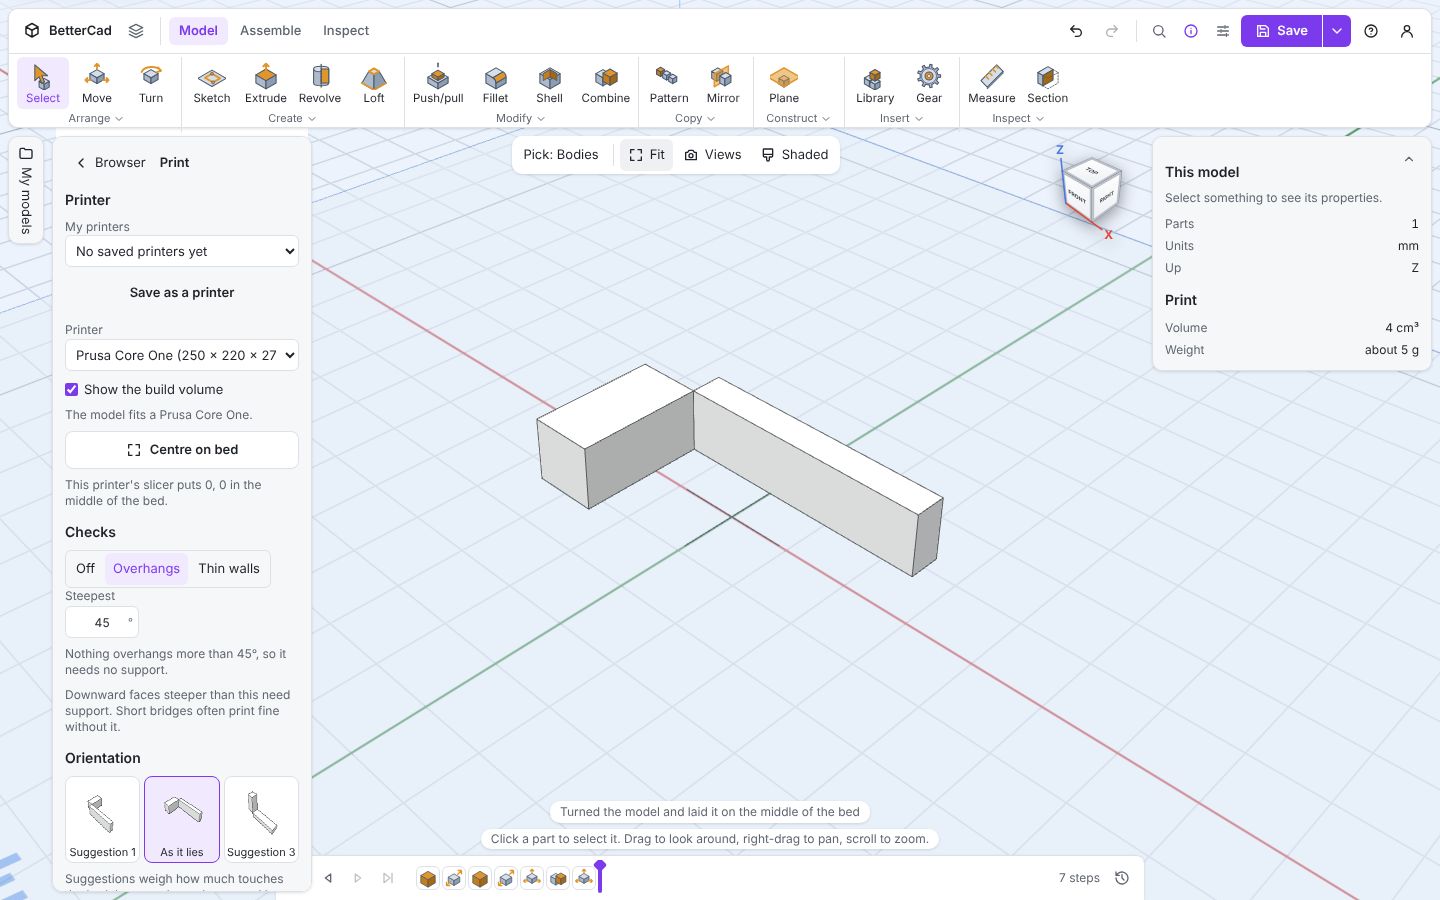
Nothing overhangs more than 45°, so it needs no support. This is the cheapest fix there is, and it gets a whole lesson of its own next.
Add a slope. Replace a flat underside with a 45° chamfer or a wedge, so each layer steps out gradually. This is why BetterCad’s phone stand sample uses a wedge for its back rest.
Change the shape of holes. A round hole on its side has a flat roof at the very top. On small holes it doesn’t matter. On large ones, a teardrop or a hole with a pointed top prints cleanly.
What the check doesn’t know
The check flags every downward-facing surface past the limit. It doesn’t yet recognise a bridge: a flat span held at both ends, like the top of a window. Printers can cross a gap of a few centimetres in mid-air, so a short bridge that gets flagged can usually be ignored. The panel reminds you: “Short bridges often print fine without it.”
Faces within 0.2 mm of the bed are never flagged. They’re the first layer.
Try it Yourself
- Open the Phone stand sample and run the check. Then change its
leanparameter to20. Does it still pass? - Build the tee: a Box 10 × 10 × 20, and a Box 40 × 10 × 5 with a Z position of 20, grouped. Check that you get 400 mm².
- Fix the tee without turning it. Add a Wedge under the bar, group it and check again.
Common Issues
Problem: I can’t see the tinted area. Solution: Click Show beside it in the list, or turn the view to look from underneath. Why: Overhangs face downwards, away from the usual viewpoint.
Problem: The check flags the top of every horizontal hole. Solution: Ignore them on holes smaller than about 8 mm. Why: The roof of a small hole is a very short bridge.
Problem: The check says no support is needed but my print still drooped. Solution: Lower Steepest to 40° or 35° and check again. Why: 45° is typical, but your printer, speed and material set the real limit.
Check your understanding
Quick quiz 1 of 3
What is an overhang?
Quick quiz 2 of 3
What’s usually the cheapest way to remove an overhang?
Quick quiz 3 of 3
The check flags a 15 mm flat span held at both ends. What is it?
You can use the arrows ← → on your keyboard to navigate between lessons.
Comments