Where Parts Meet
Let BetterCad find every place two printed parts meet, report the fit and repair joints that are too tight to print
By Kevin McAleer, 6 Minutes
Page last updated November 20, 2026

In a model with several parts, it’s easy to lose track of which faces touch. A peg modelled at exactly the size of its hole looks perfect on screen and seizes solid on the printer. BetterCad can go looking for those places for you.
Switch on the check
In the Print panel, under Fits, tick Check where parts meet.
BetterCad looks at every pair of printed bodies and lists two kinds of meeting:
| Meeting | What it is |
|---|---|
| A pin in a hole | Two round faces on the same axis, one inside the other |
| Facing flat faces | Two flat faces pointing at each other, less than 1 mm apart |
Hole shapes and hidden bodies are left out, because they don’t get printed.
A joint that’s right
This is the block from the last lesson, with a socket cut at a sliding fit and a 10 mm peg standing in it.
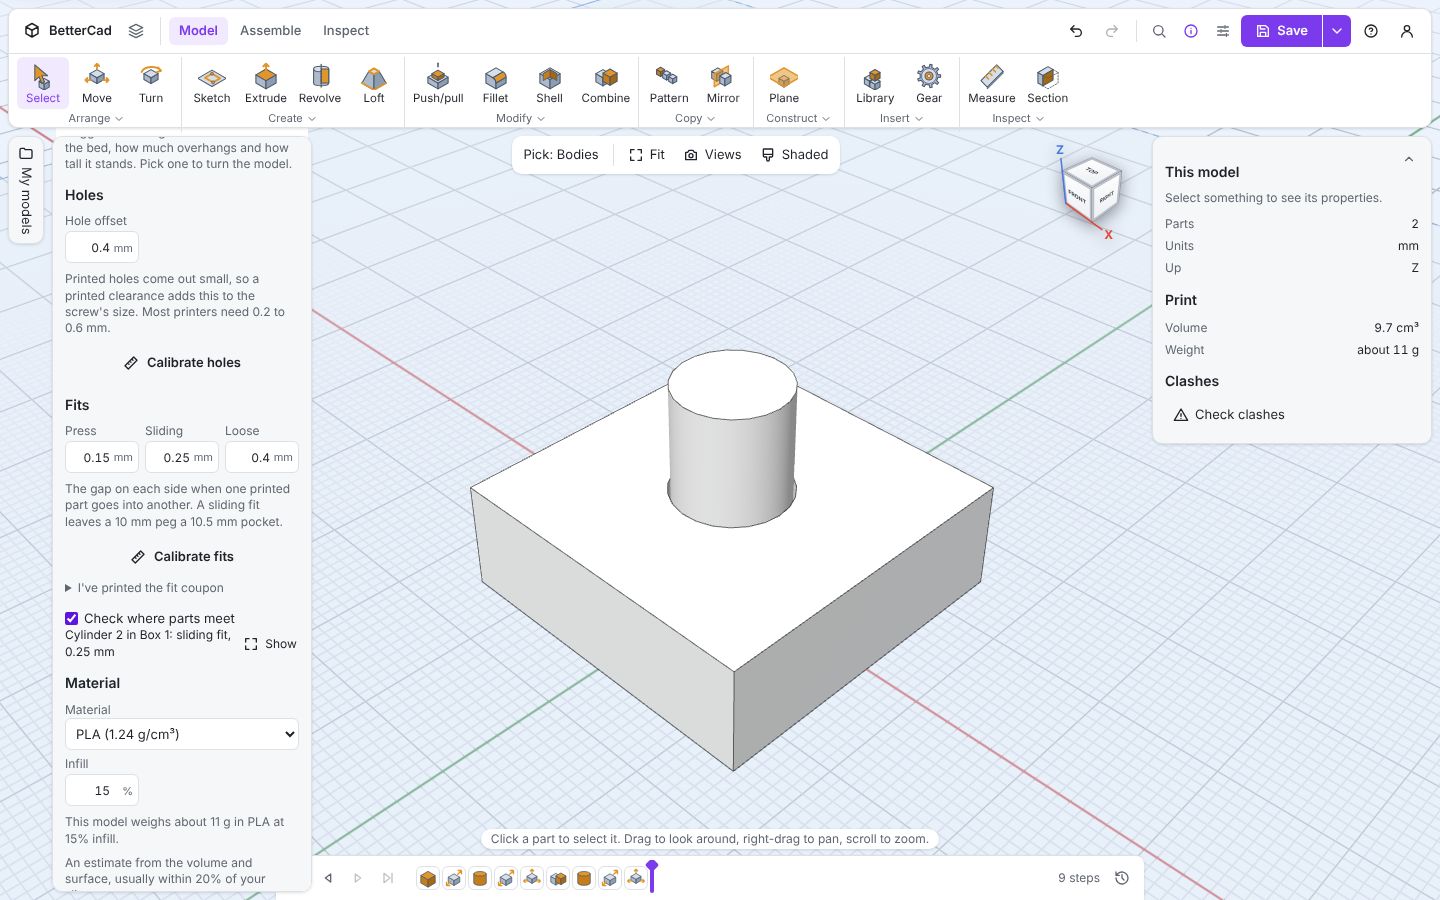
The check reports Cylinder 2 in Box 1: sliding fit, 0.25 mm. It measured the gap and named the nearest fit. Show frames the joint in the view.
A joint that’s too tight
Now the same block, but the socket was cut with No gap. The peg and the hole are both exactly 10 mm.
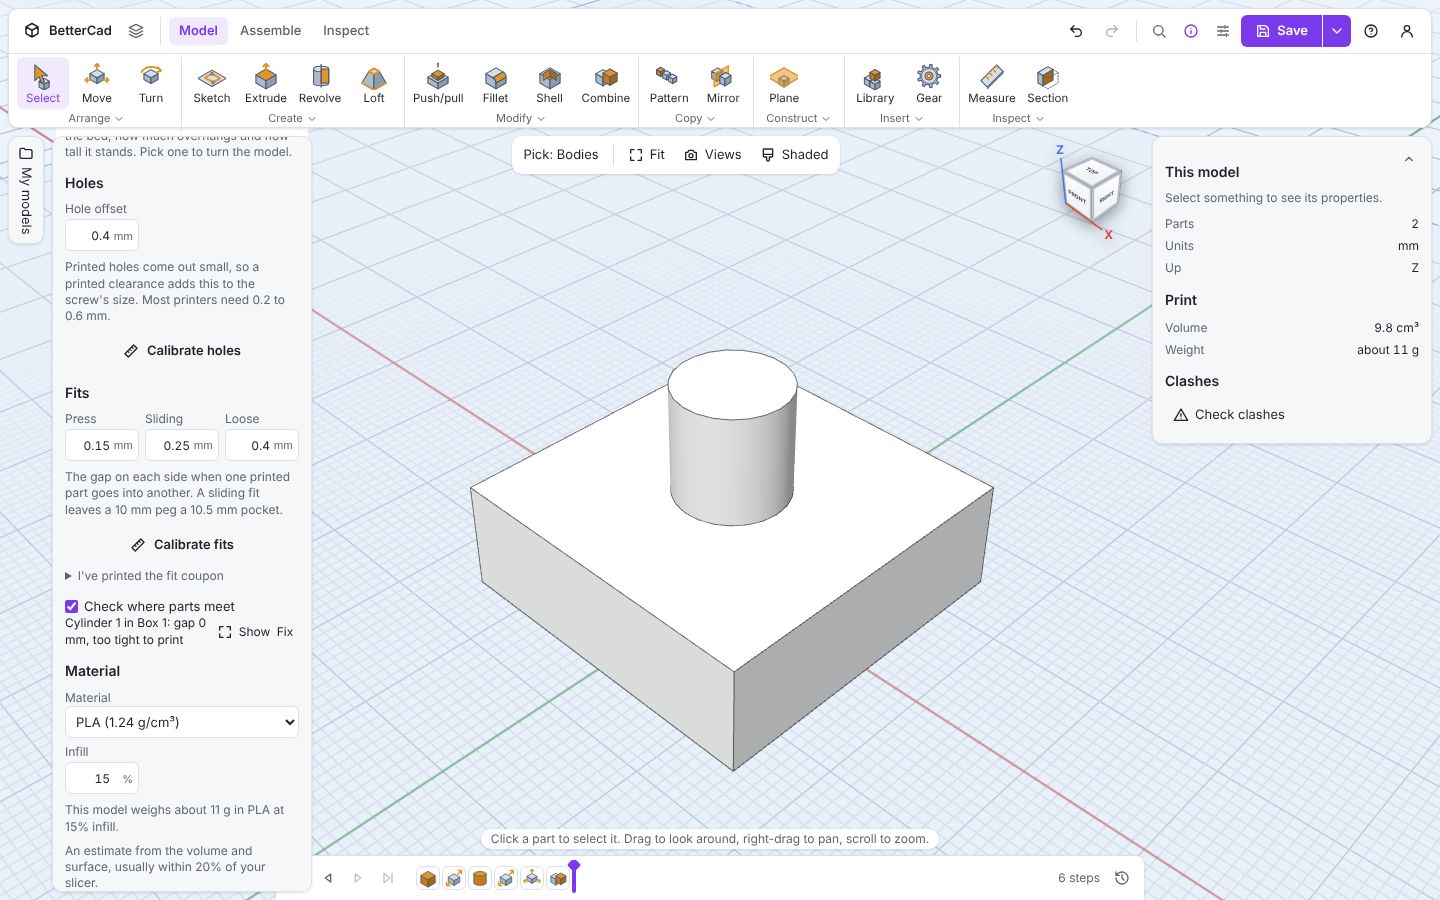
Cylinder 1 in Box 1: gap 0 mm, too tight to print. On screen the two look identical to the good joint. Printed, you’d need a hammer.
A joint is called too tight when its gap is less than half your press fit, or when the parts overlap.
Fix it
Beside the tight joint is a Fix button. Click it.
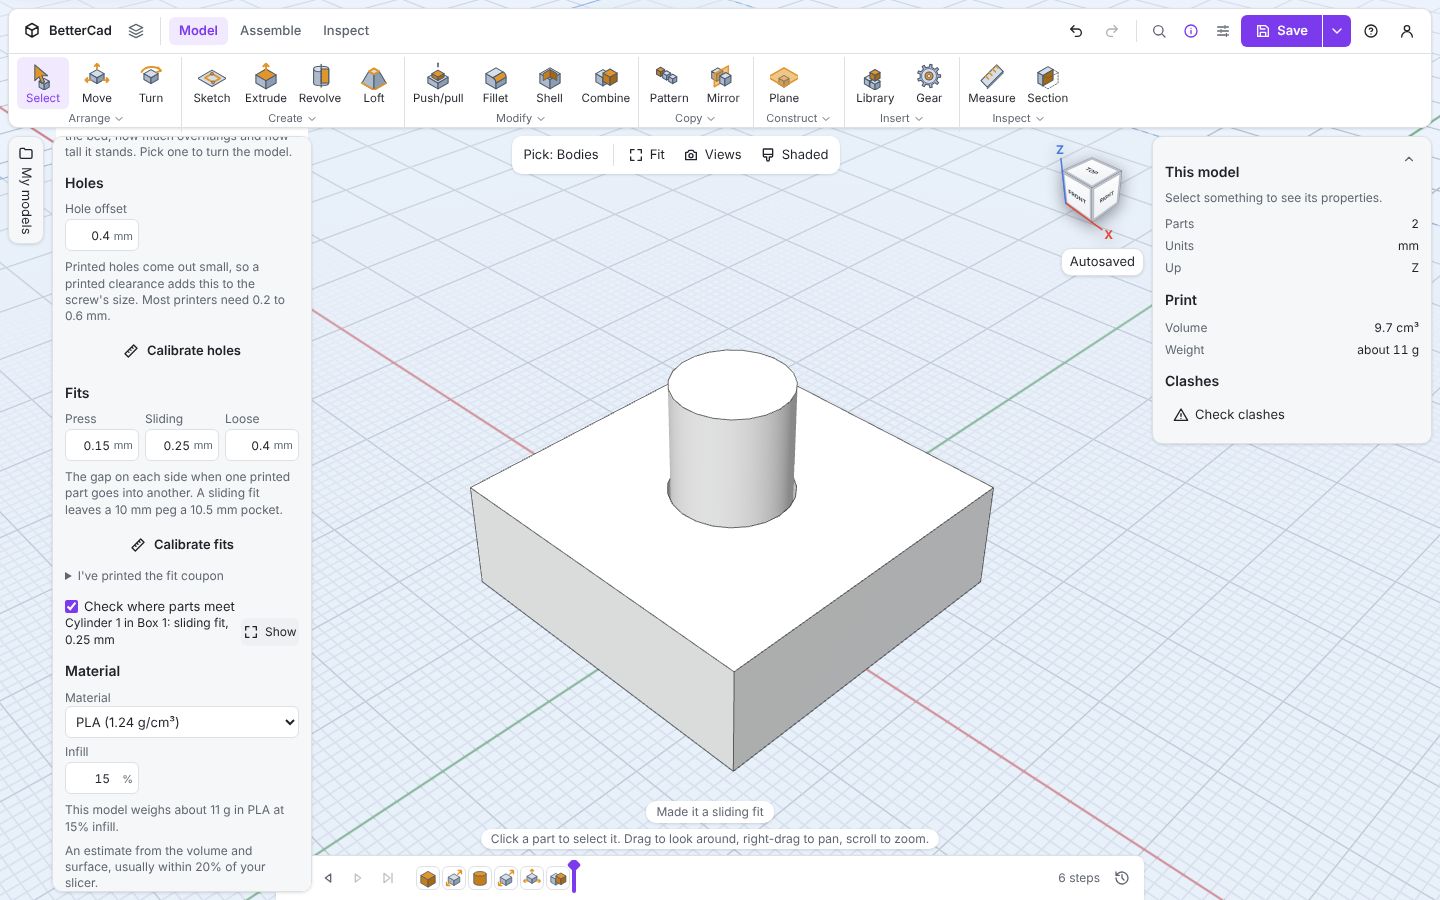
BetterCad reports Made it a sliding fit, and the line now reads sliding fit, 0.25 mm. What Fix does depends on how the joint was made:
| The joint | What Fix does |
|---|---|
| A pin that was cut out of the body it sits in | Changes that cut to a sliding fit |
| Two flat faces too close together | Adds a Push/pull step that moves one face back |
| A pin whose hole came from somewhere else | Tells you how much wider to make the hole |
Each fix is a step on the timeline, so you can see what changed and undo it.
When nothing is listed
Open the Box with a lid sample and switch the check on.
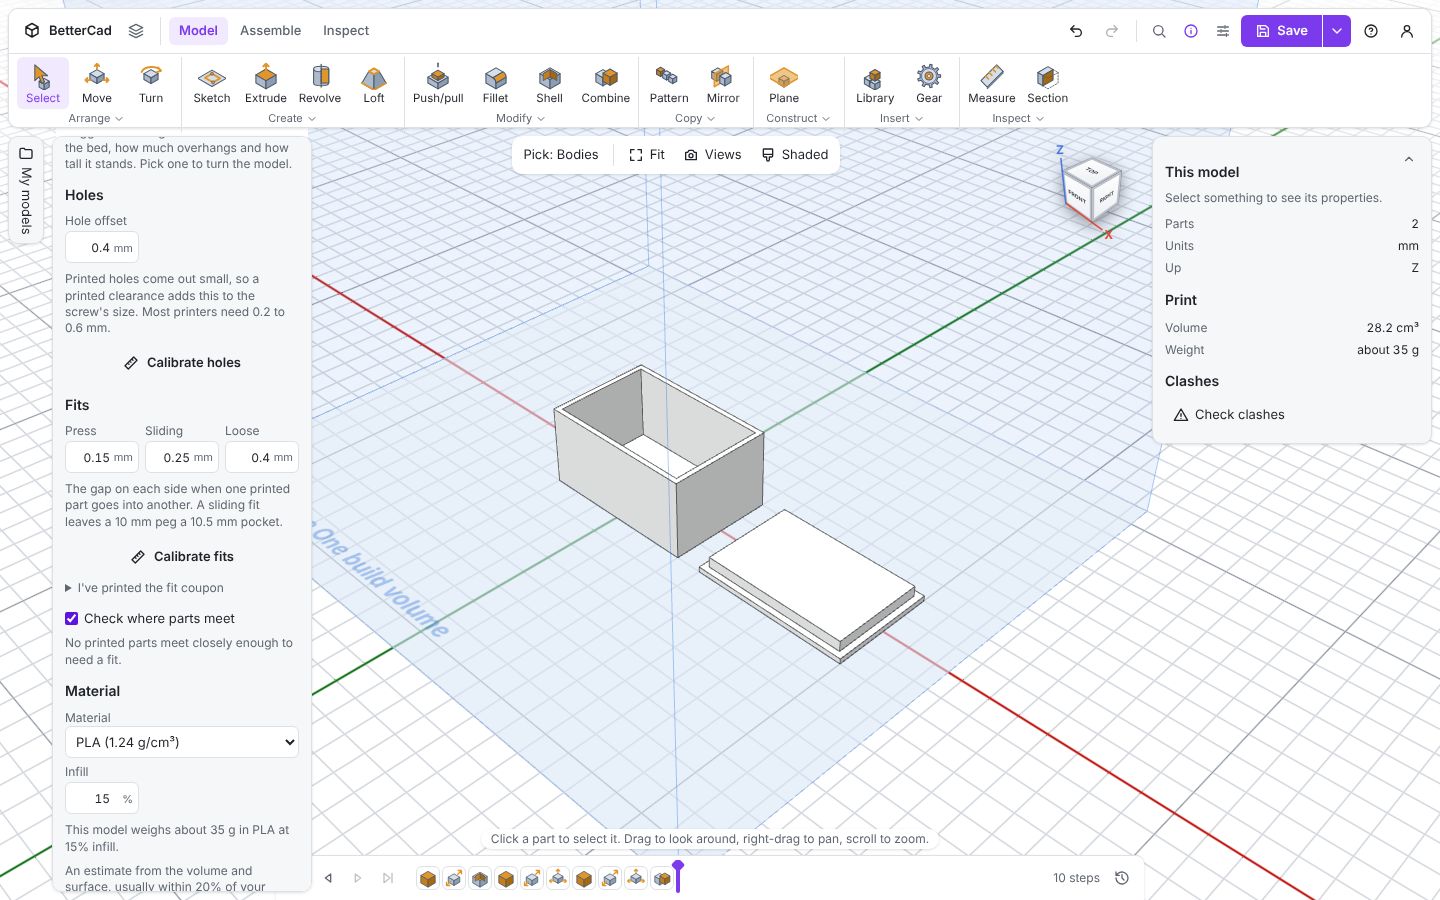
No printed parts meet closely enough to need a fit. That’s correct. The lid is laid out beside the box, ready to print, so nothing is touching.
This is worth understanding. The check looks at parts where they are now. To test how a lid fits, it has to be sitting on the box. Many designers keep an assembled arrangement while designing, then move the parts apart for printing at the end.
Clashes
With more than one part in the model and nothing selected, Properties also shows a Clashes section with a Check clashes button. A clash is two solid parts trying to occupy the same space. The fit check tells you a joint is tight. The clash check tells you parts collide somewhere you may not have looked.
Make it a habit
For any design with more than one part, before you export:
- Put the parts together as they’ll be used.
- Tick Check where parts meet.
- Read the list. Is each joint the fit you intended?
- Fix anything marked too tight.
- Move the parts apart for printing.
Try it Yourself
- Build the block and peg with No gap, switch the check on and use Fix. Look at the timeline to see what changed.
- Put two Boxes side by side with a 0.1 mm space between them. What does the check call it?
- Challenge: open the Box with a lid sample, turn the lid over and place it on the box. What fits does the check find?
Common Issues
Problem: The check lists nothing, but my parts are meant to fit together. Solution: Move them into their assembled positions. Why: Only faces within 1 mm of each other, or a pin inside a hole, count as meeting.
Problem: A joint I care about isn’t listed. Solution: Measure it by hand with Measure (I). Why: The check finds round pins in round holes and facing flat faces. Odd shapes, like a hexagon in a hexagonal pocket, show up face by face or not at all.
Problem: There’s no Fix button on a tight joint. Solution: Read the note it gives and widen the hole yourself. Why: When the hole wasn’t made by cutting with that pin, BetterCad can’t tell which step to change.
Check your understanding
Quick quiz 1 of 3
What does “too tight to print” mean?
Quick quiz 2 of 3
The check finds nothing on a box and its lid laid side by side. Why?
Quick quiz 3 of 3
What does Fix do to a pin that was cut out of the body it sits in?
You can use the arrows ← → on your keyboard to navigate between lessons.
Comments