Sharing Your Parts
Package your Snakie parts as a library with versions, add a 3D model and learn how the community registry shares parts with other makers
By Kevin McAleer, 6 Minutes
Page last updated November 21, 2026

A part you’ve made is useful to you. A part you’ve shared is useful to everyone with the same board. Because parts are just folders of text files, sharing them is refreshingly simple.
Share one part
The quickest way to share is to send the folder.
- Click Reveal the parts folder in the Library toolbar.
- Open
my-parts. - Zip the
vl53l0x-distance-sensorfolder and send it.
Your friend unzips it into their own my-parts folder and clicks Refresh library. Everything travels together: the pins, the photo, the help and the blocks.
Make a library
For more than a couple of parts, make a library of your own. It’s a folder with a library.yml and one folder per part:
robot-club-parts/
  library.yml
  vl53l0x-distance-sensor/
    parts.yml
    image.png
    help.md
    blocks.yml
  tiny-robot-brain/
    parts.yml
The library.yml describes the collection:
id: robot-club-parts
name: Robot Club Parts
description: Sensors and boards we use at robot club.
author: Robot Club
homepage: https://github.com/your-name/robot-club-parts
version: 1.0.0
Put that folder inside Snakie’s parts folder and it shows up in the Library as its own section. In the Part Editor, Saved to in the top bar becomes a list, so you can choose which library a part is saved into.
Put the folder on GitHub and you get history, backups and an easy way for other people to suggest fixes. The Git lesson in Coding Faster in Snakie covers the basics.
Versions
Parts and libraries both carry a version number in three parts, such as 1.2.0.
| Change | Example | Bump |
|---|---|---|
| A fix that changes nothing for users | Nudged a label | 1.2.0 to 1.2.1 |
| Something new that doesn’t break projects | Added blocks or a photo | 1.2.0 to 1.3.0 |
| A change that could break projects | Renamed or removed a pin | 1.2.0 to 2.0.0 |
Renaming a pin is the one to be careful with. Projects remember their wires by pin name, so a rename can leave wires with nowhere to go.
The community registry
Snakie has a community registry: a list of approved part libraries kept in a GitHub repository. Click Add library in the Library toolbar and Snakie fetches the list and shows the libraries you don’t have yet. Installing one downloads it into your parts folder.
Snakie also compares each installed library’s version with the registry. When there’s a newer one, you’re offered the update. The Refresh library button checks straight away.
To get your own library listed, you open a pull request against the registry, adding an entry like this:
{
  "id": "robot-club-parts",
  "name": "Robot Club Parts",
  "description": "Sensors and boards we use at robot club.",
  "author": "Robot Club",
  "repo": "https://github.com/your-name/robot-club-parts",
  "version": "1.0.0",
  "tags": ["sensor", "robot"]
}
The registry lives at github.com/kevinmcaleer/snakie-parts, along with the Standard Parts. It’s also a great place to read well-made parts.
Add a 3-D model
One more thing makes a part complete. Open it in the Part Editor and click 3-D.
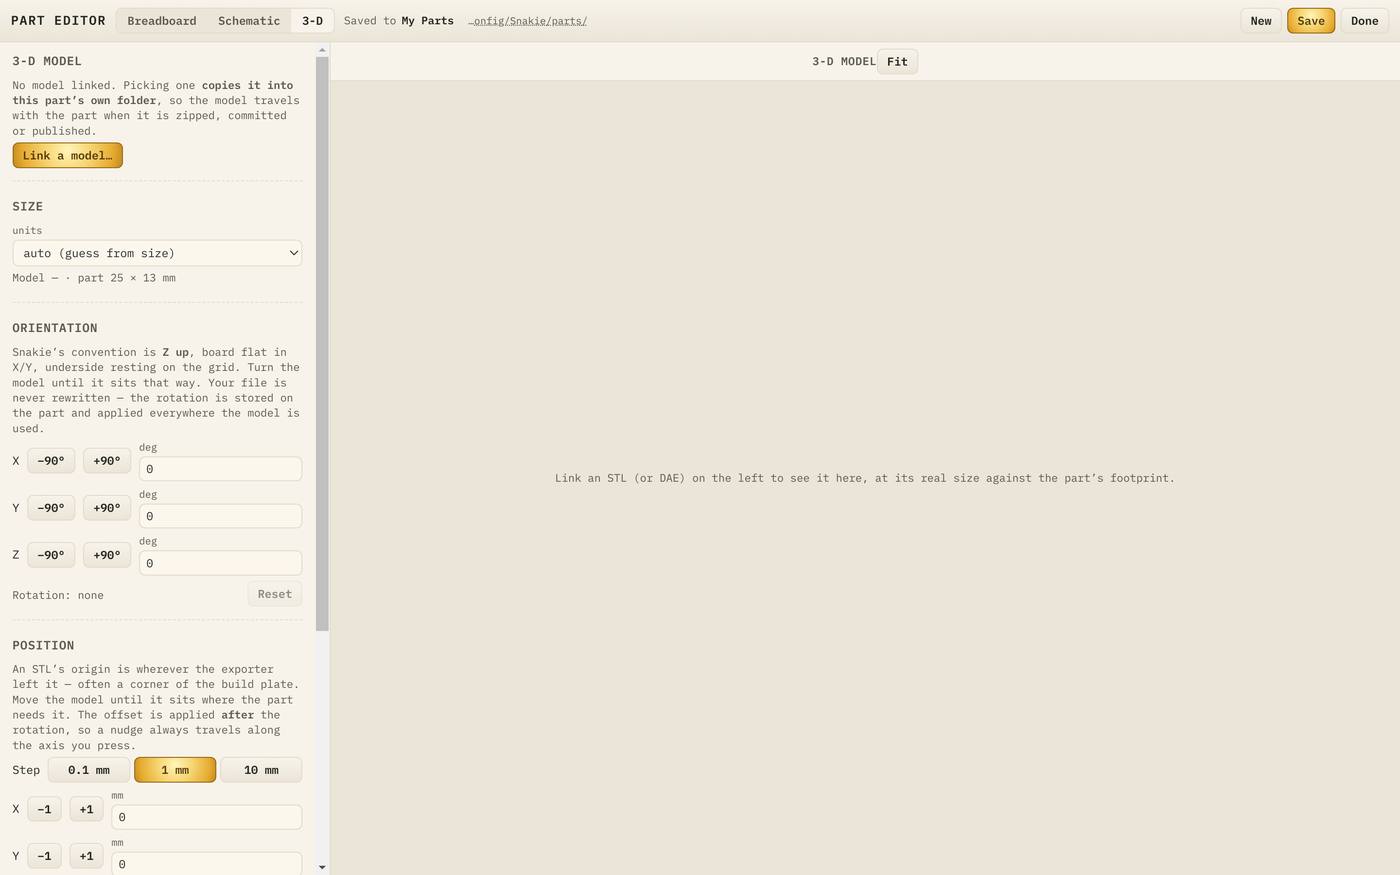
Click Link a model… and choose an STL or DAE file. Snakie copies it into the part’s folder, so it travels with the part. Then:
- Size sets the units, in case your model was saved in metres.
- Orientation turns it until it lies flat, with Z pointing up.
- Position slides it until it sits on the part’s footprint.
Snakie uses the model wherever the part is shown in 3-D, such as the Build workspace. You can design the model yourself. The Learn BetterCad course shows you how, and exports STL files that work here.
A checklist before you share
- The size is measured, not guessed
- Every pin has the right name, type and capabilities
- I2C pins have their signal set, and the address is recorded
- Supply limits are filled in
- The driver installs, and the help has a working example
- You have the right to share the photo
- The version number has gone up
Try it Yourself
- Zip your part’s folder and look inside. Which files are there?
- Copy it to a new folder with its own
library.yml. - Click Refresh library and find your new library in the list.
- Click Add library and see what the registry offers.
- Bump your part’s version to
0.2.0and save.
Common Issues
Problem: Add library says no libraries were found. Solution: Check your internet connection and click Retry. Why: The registry is fetched from GitHub, so it needs a connection. You’ll see the same message when you already have every listed library.
Problem: My friend’s copy of the part has no picture.
Solution: Send the whole folder, not just parts.yml.
Why: The image, help and blocks are separate files beside it.
Problem: My new library doesn’t appear.
Solution: Check it has a library.yml with an id, then click Refresh library.
Why: The manifest is what makes a folder a library.
Check your understanding
Quick quiz 1 of 3
What do you send to share one part completely?
Quick quiz 2 of 3
You rename a pin from SDA to DATA. What kind of version bump is that?
Quick quiz 3 of 3
How does a library get into the community registry?
You can use the arrows ← → on your keyboard to navigate between lessons.
Comments