Making a Microcontroller Board
Turn a Snakie part into a microcontroller board with GPIO numbers so it appears in the board selector for your projects
By Kevin McAleer, 5 Minutes
Page last updated November 21, 2026

Sensors plug into a board. But what if the board is the thing that’s missing? Maybe you’ve designed your own robot controller, or bought a new microcontroller that Snakie doesn’t list yet.
In Snakie a board is just a part with one box ticked.
What makes a board different
| A sensor part | A board part | |
|---|---|---|
| Where you find it | In the Library | In the Library and the board selector |
| How many in a project | As many as you like | One, the brain of the project |
| GPIO numbers on pins | Left empty | Filled in |
| Onboard LED | Usually none | Usually one |
The GPIO number is the big one. It’s the number you pass to Pin() in MicroPython, and it’s how Snakie connects a wire on the breadboard to a line of code.
Make a small board
Let’s make a pretend board called Tiny Robot Brain.
- Click + New part.
- Set Name to
Tiny Robot Brain. - Click Show next to Details.
- Set Family to
Microcontroller. - Tick This part is a microcontroller board.
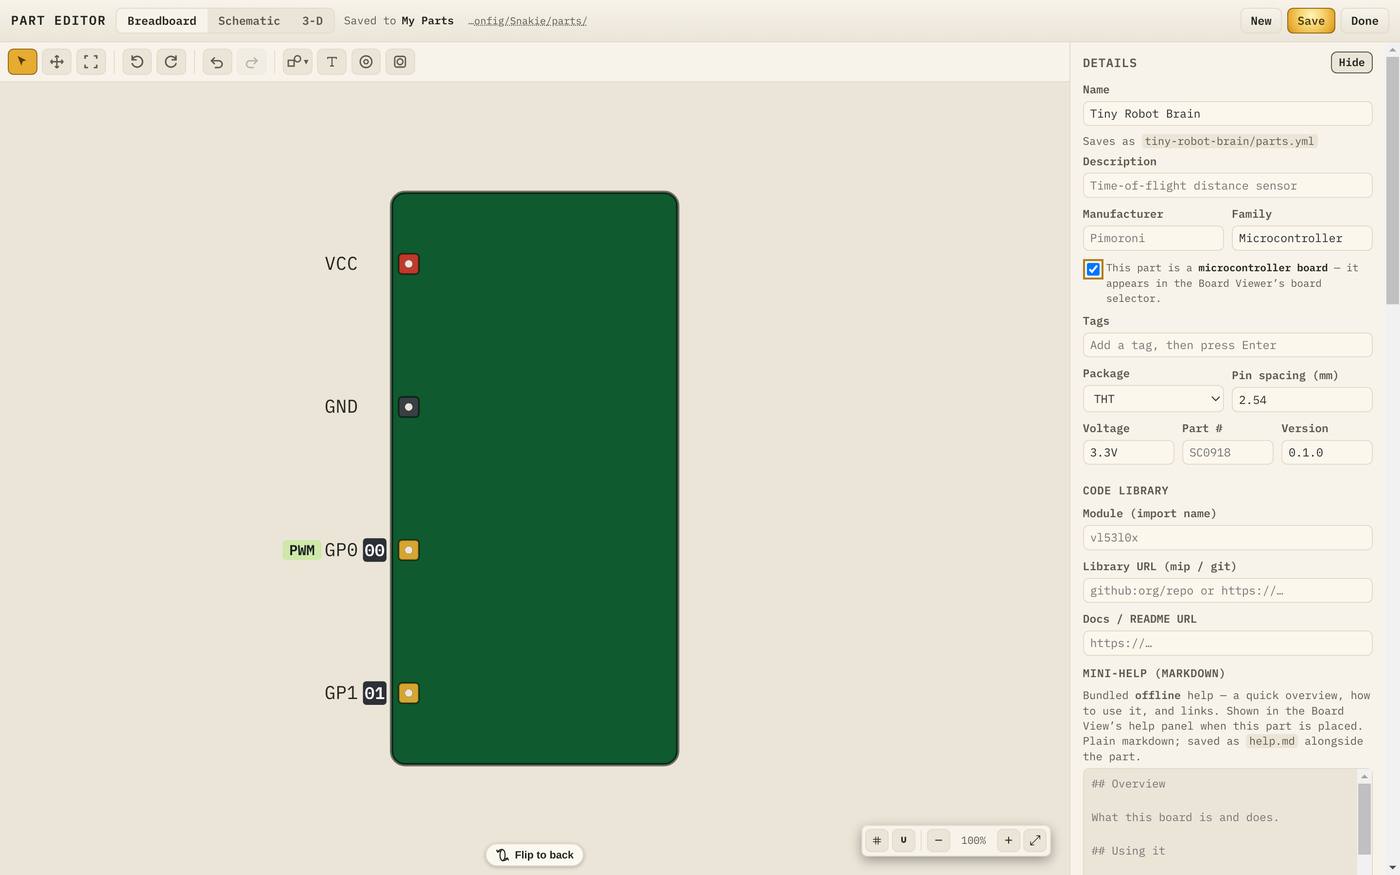
The starter pins already suit a board: VCC, GND, GP0 and GP1.
GPIO numbers
Click GP0. In the Inspector:
| Field | Value | Meaning |
|---|---|---|
| Name | GP0 | The label printed on the board |
| Board pin # | 3 | Its physical position, counting round the board |
| GPIO | 0 | The number your code uses |
Name and GPIO often look alike, but they aren’t the same thing. Physical pin 4 on a Pico is GP2, with GPIO number 2. The pin list in Layers has three columns for exactly this reason: the name, # for the board pin number and GP for the GPIO.
Then tick what each pin can do. If GP0 can do PWM and I2C, tick PWM and I²C and choose the I2C signal. The blocks and wiring tools use these to offer only pins that suit the job.
Get the capabilities from the board’s official pinout diagram. Guessing here leads to confusing bugs later.
Board extras
A few settings in the Board section only make sense for a microcontroller.
| Setting | What it’s for |
|---|---|
| Onboard LED pin | The pin the built-in LED is wired to |
| Footprint | A shared shape name, such as xiao. Boards with the same footprint plug into the same carrier boards |
From + Add on the Components row you can also add a Button, such as BOOT or RESET, and an LED. If a user button is wired to a GPIO, give it that number so blocks can offer it.
Pick your board
Click Save, then Done. Now open the board selector at the top of the Electronics workspace, the one that usually says Raspberry Pi Pico 2 W. Scroll down.
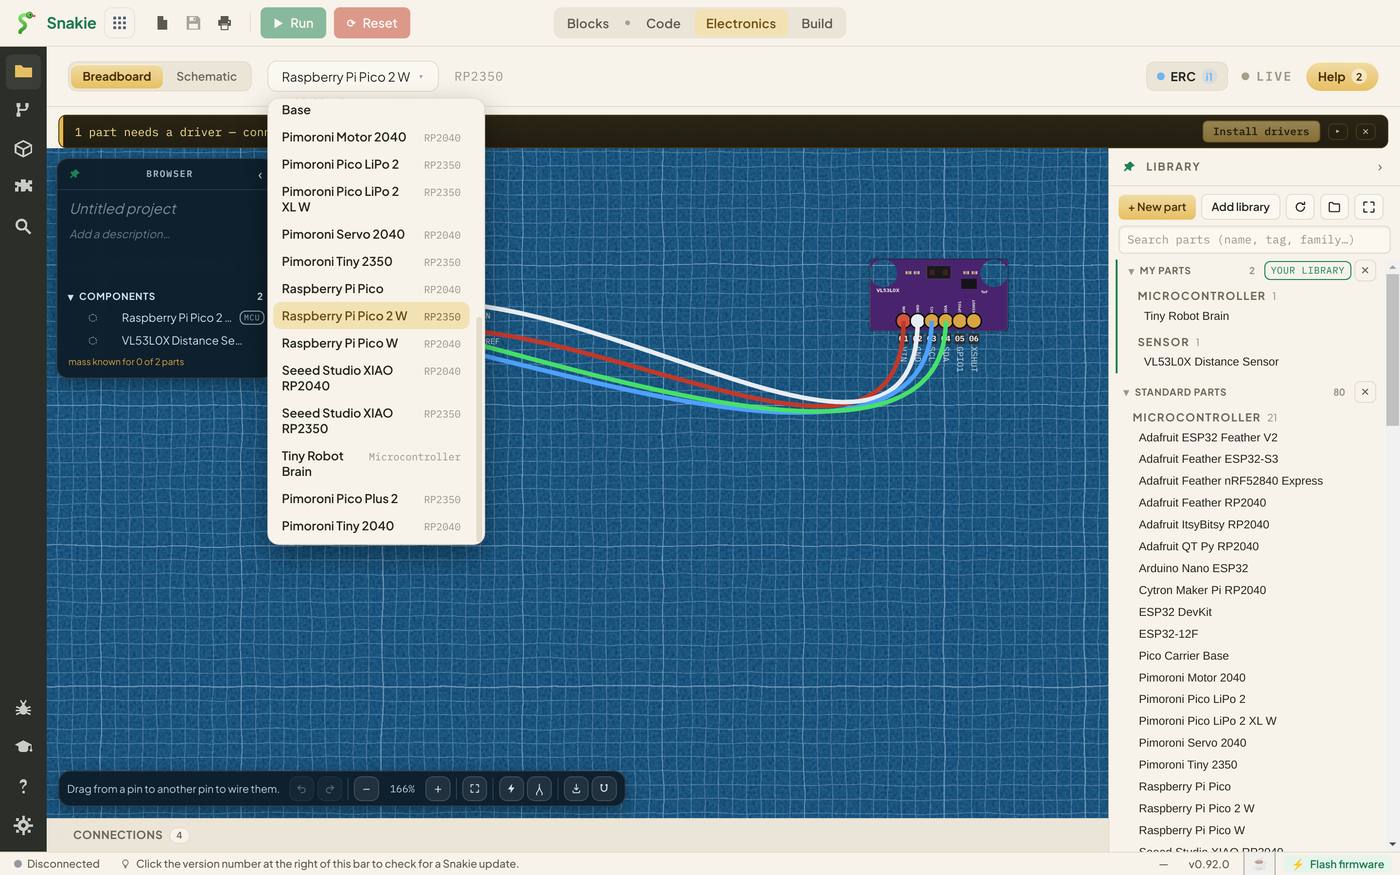
Your board is in the list. Choose it. If the project already has wires, Snakie asks before it swaps:
Swap to Tiny Robot Brain?

1 connection(s) will be kept — moved to the matching GPIO / rail where needed.

3 will be removed — no matching pin on Tiny Robot Brain:
  • 3V3 rail
  • GPIO 5
  • GPIO 4
Read that carefully. Snakie keeps every wire it can find a home for, by matching GPIO numbers and power rails. Our tiny board has no 3V3 pin and no GPIO 4 or 5, so those three wires go.
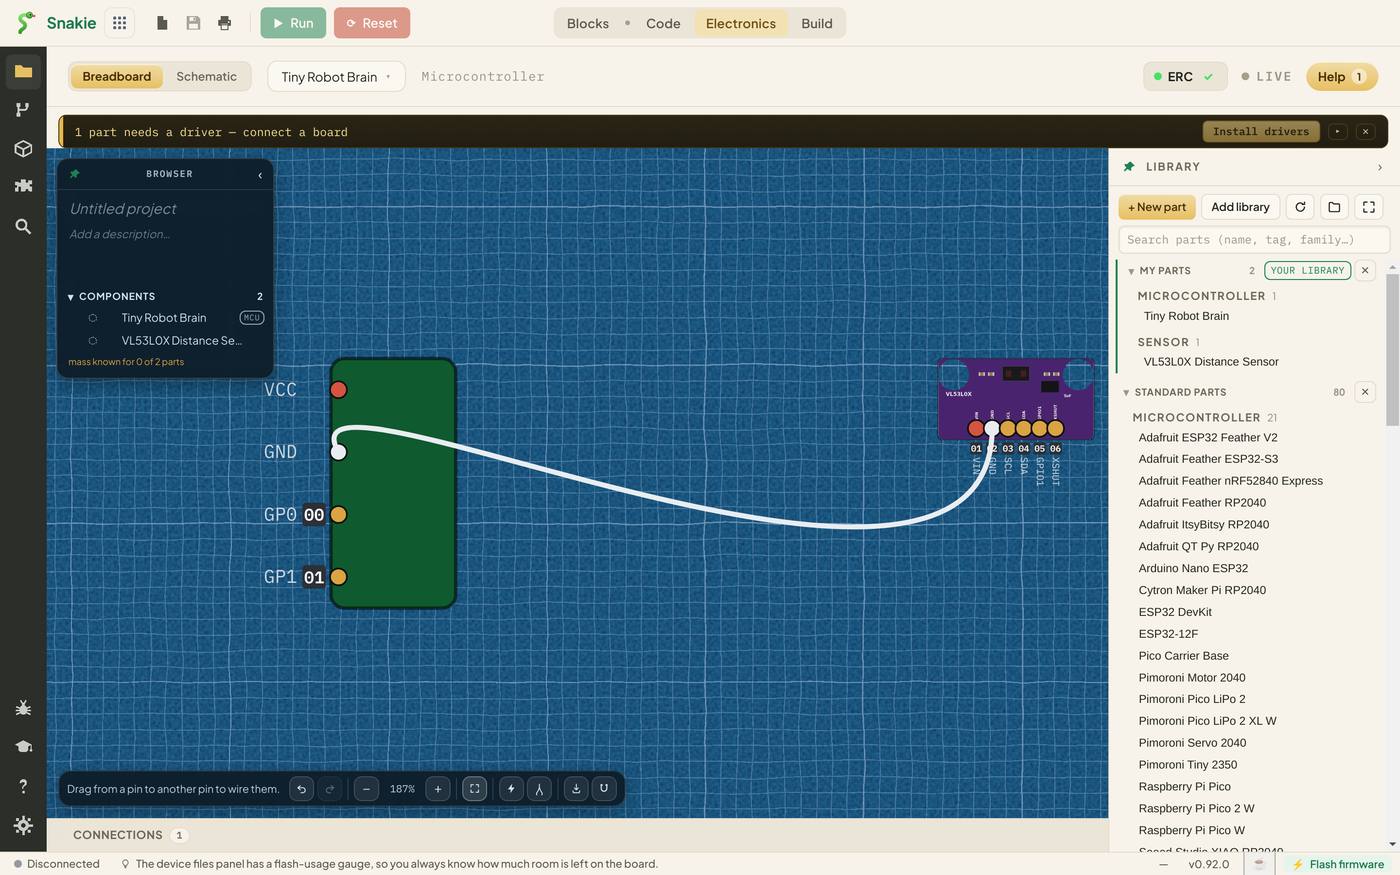
This is another reason to get the GPIO numbers right. They’re what lets a project move from one board to another.
Try it Yourself
- Make the Tiny Robot Brain and save it.
- Edit it and add four more pins: GP2 to GP5, with GPIO numbers 2 to 5.
- Mark GP4 and GP5 as I²C, with signals SDA and SCL.
- Add a 3V3 power pin.
- Swap a wired project to your board again. How many wires survive this time?
Common Issues
Problem: My board isn’t in the board selector. Solution: Tick This part is a microcontroller board in Details and save. Why: Without the tick it’s an ordinary part, listed only in the Library.
Problem: Swapping boards removed my wires. Solution: Cancel the swap, add the missing pins to your board, then try again. Why: A wire can only move to a pin with the same GPIO number or rail.
Problem: The code uses the wrong pin.
Solution: Check the pin’s GPIO number, not its name or board pin number.
Why: MicroPython’s Pin() takes the GPIO number.
Check your understanding
Quick quiz 1 of 3
What turns a part into a board that appears in the board selector?
Quick quiz 2 of 3
Which number does MicroPython’s Pin() use?
Quick quiz 3 of 3
You swap boards and Snakie says three wires will be removed. Why?
You can use the arrows ← → on your keyboard to navigate between lessons.
Comments