Using Your Part in a Project
Place your own Snakie part on the breadboard, wire it to a Pico, install its driver and find the blocks Snakie makes for it
By Kevin McAleer, 5 Minutes
Page last updated November 21, 2026

This is the payoff. Your part leaves the editor and goes to work in a project, exactly like one of the standard parts.
Find it in the library
Click Save, then Done. Back in the Electronics workspace, the Library has a new section at the top: My Parts, marked Your library.
Click your part. A card opens below the list.
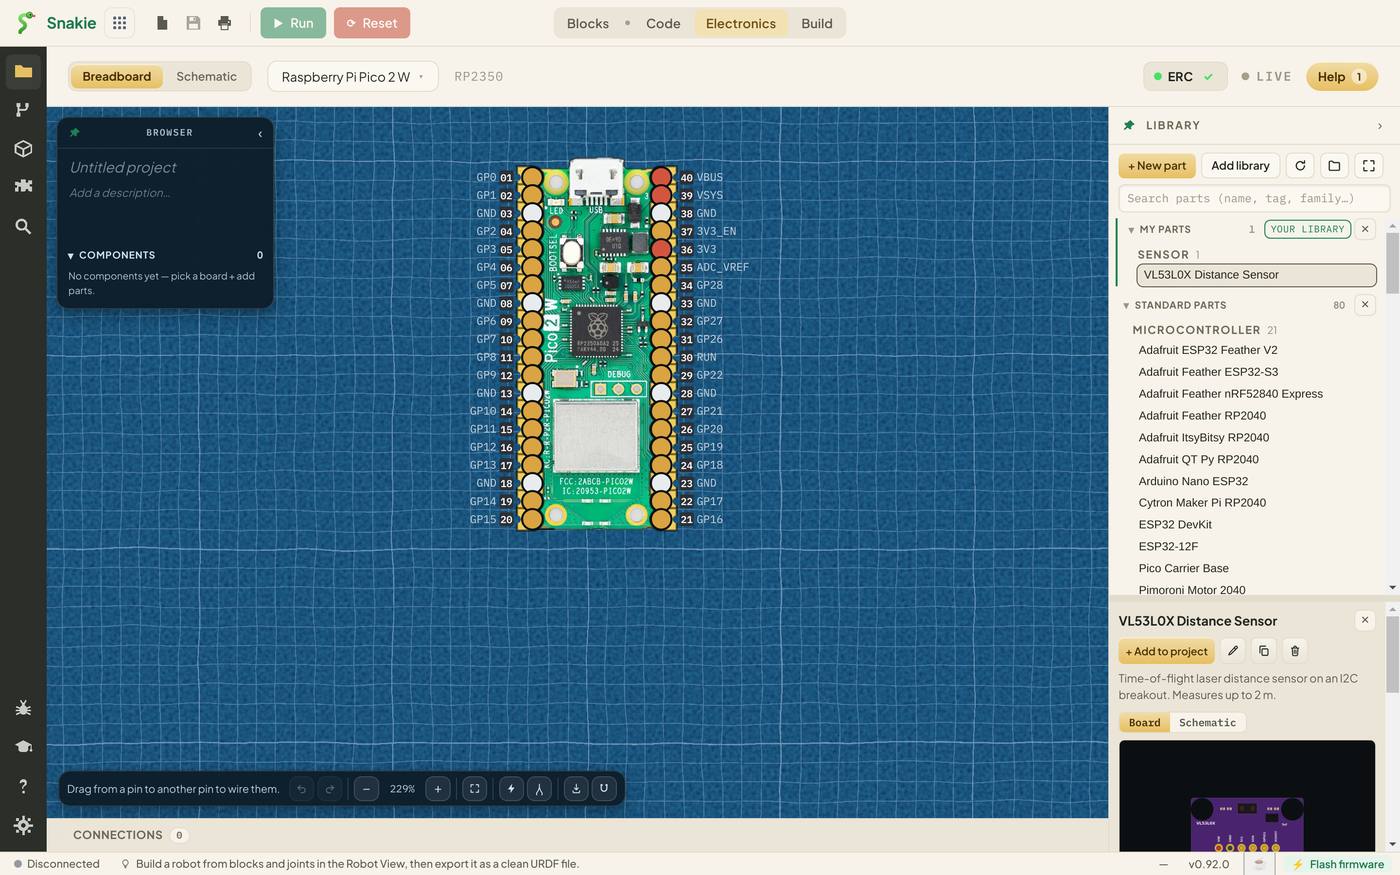
| Button | What it does |
|---|---|
| + Add to project | Puts the part on the breadboard |
| Pencil | Edit part in the Part Editor |
| Two squares | Duplicate part, a quick way to make a variation |
| Bin | Delete part |
The card also previews the part, with Board and Schematic tabs.
Place and wire it
- Click + Add to project. Your sensor appears next to the Pico.
- Drag from each sensor pin to a Pico pin:
| Sensor pin | Pico pin |
|---|---|
| VIN | 3V3 |
| GND | GND |
| SCL | GP5 |
| SDA | GP4 |
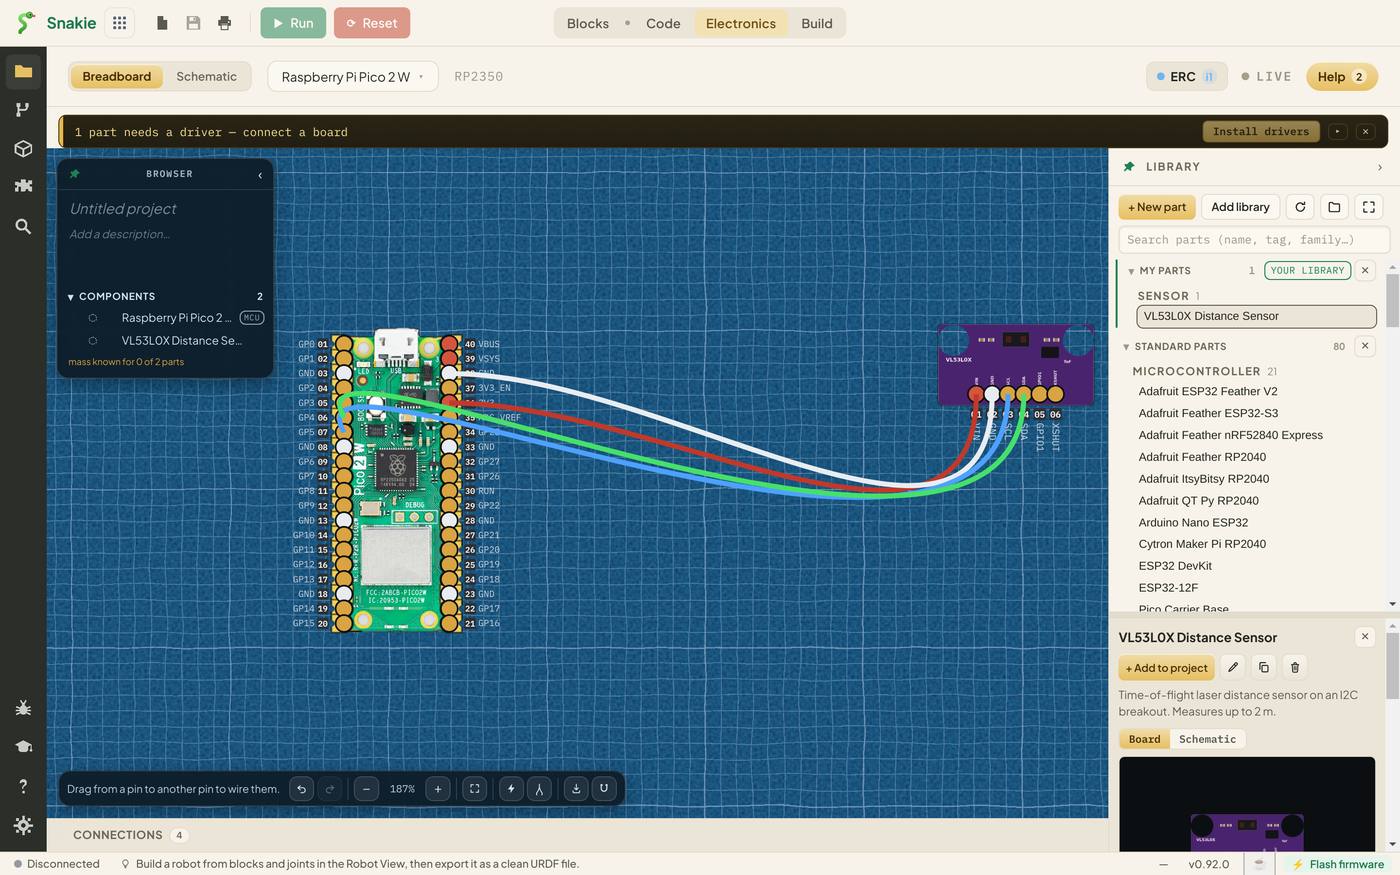
Look at what your careful work in lesson 4 bought you. The power wire is red and the ground wire is its own colour, because you set the pin types. The pin labels are the names you typed.
The driver banner
A banner appeared at the top of the canvas as soon as you placed the part:
1 part needs a driver — connect a board [Install drivers]
That’s the driver you attached in the last lesson. Connect your board and click Install drivers. Snakie copies vl53l0x.py into the board’s lib folder.
No board connected? The button waits until there is one. You can close the banner with the cross and carry on.
Blocks for your part
Now for the clever part. Open the Blocks workspace and start a New blocks program. In the toolbox, open My parts. Your sensor has a drawer of its own.
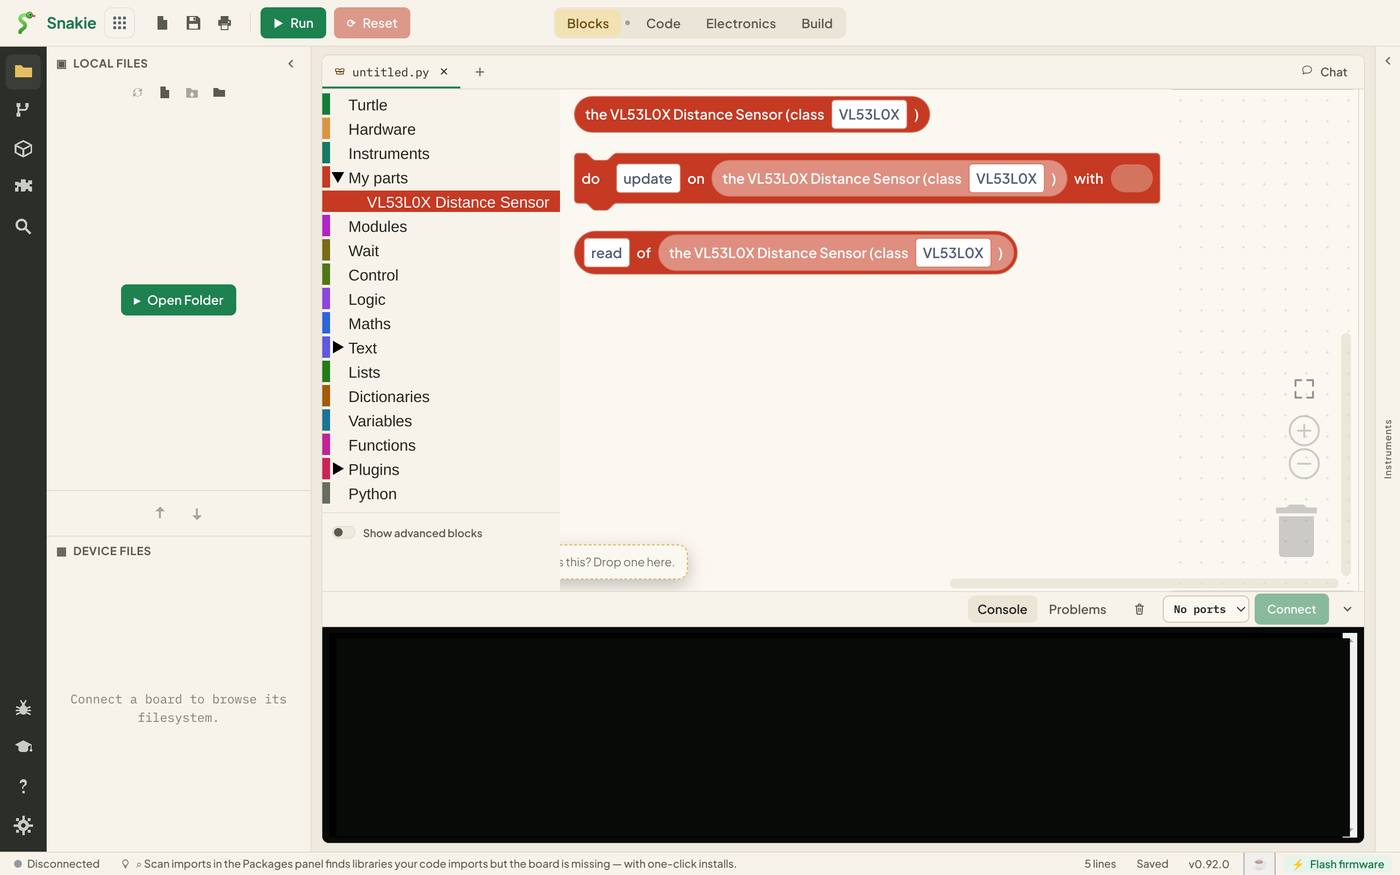
You didn’t make these. Snakie derived them from the module name you gave the part, vl53l0x.
| Block | What it does |
|---|---|
| the VL53L0X Distance Sensor (class VL53L0X) | The sensor object itself |
| do update on … with … | Calls a method on the sensor |
| read of … | Reads a value from the sensor |
Snakie knows the module, but it has to guess the class name. It uses the module name in capitals, VL53L0X, which is right more often than not. The guess is in an editable box on the block, and so are the method names. If your driver calls its class Sensor, type that in.
These blocks are a little rough. They work, but do update on isn’t how you’d describe measuring a distance. In the next lesson you’ll replace them with blocks that read like plain English.
Edit and refresh
Spotted a mistake in your part? Click it in the library, click the pencil, fix it and save.
If you change the part’s files by hand, click the Refresh library button in the Library toolbar to reload them from disk.
Try it Yourself
- Place your sensor and wire the four pins.
- Open the Connections list at the bottom of the canvas and check all four wires.
- Click Help at the top right of the Electronics workspace. Your mini-help is there.
- Open Blocks and find your part’s drawer under My parts.
- Think back to lesson 7. Which of the Pico’s power pins are inside the 2.6 to 5.5 V range you set? Would a 9 V battery be?
Common Issues
Problem: My part isn’t in the library. Solution: Save in the editor, then click Refresh library. Why: The library lists what’s on disk, and a part that was never saved isn’t there.
Problem: Install drivers can’t be clicked. Solution: Connect a board first. Why: Drivers are copied to the board, so there has to be one.
Problem: My parts in Blocks is empty. Solution: Add the part to the project in Electronics first. Why: The drawer only shows parts that are on your breadboard.
Problem: The derived blocks use the wrong class name. Solution: Type the right one into the box on the block. Why: Snakie can see the module name but can only guess the class.
Check your understanding
Quick quiz 1 of 3
Why is the wire to VIN drawn in red?
Quick quiz 2 of 3
Where do the blocks in the My parts drawer come from, if you haven’t written any?
Quick quiz 3 of 3
The derived block guesses the class name VL53L0X. How does Snakie choose it?
You can use the arrows ← → on your keyboard to navigate between lessons.
Comments