Tracing a Board Photo
Use a photo of a real board as the picture for your Snakie part, remove its background and line the pins up on top
By Kevin McAleer, 5 Minutes
Page last updated November 21, 2026

Drawn shapes are quick, but nothing beats the real board. The Part Editor can put a photo on your part, cut away the background and scale it to fit. Then you just check the pins sit on top of the pads.
Get a good picture
A good source photo makes this easy.
- Shoot from straight above, so the board isn’t a wedge shape.
- Put the board on a plain, contrasting background. White paper works well.
- Use even light, with no hard shadow along one edge.
- Keep the board the same way up as your part: pins along the bottom.
No photo yet? Practise with the picture we used: vl53l0x_board.png.
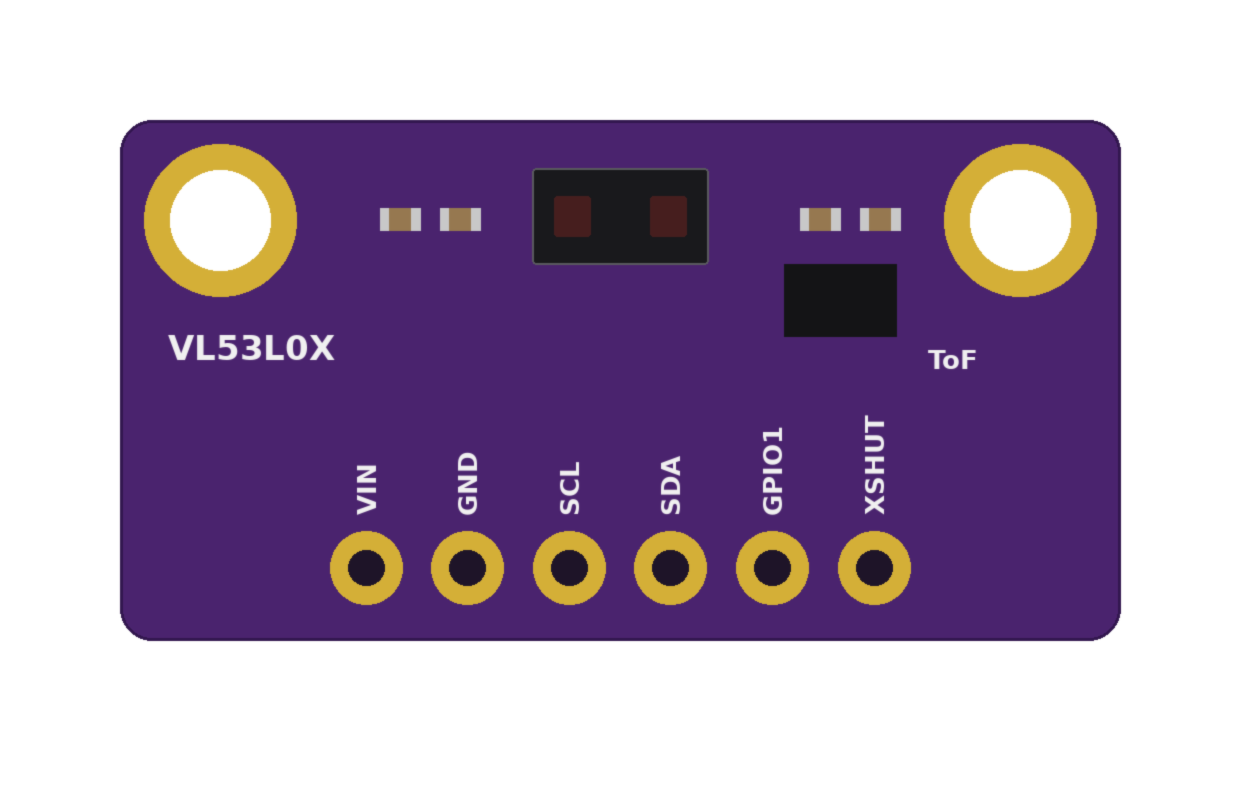
Using someone else’s product photo? Check you’re allowed to, especially if you plan to share the part.
Add the photo
- In Layers, find the Background row at the bottom.
- Click its + button and choose your picture. PNG, JPEG, WebP and SVG all work.
The photo appears on the board with a handle at each corner, white background and all.
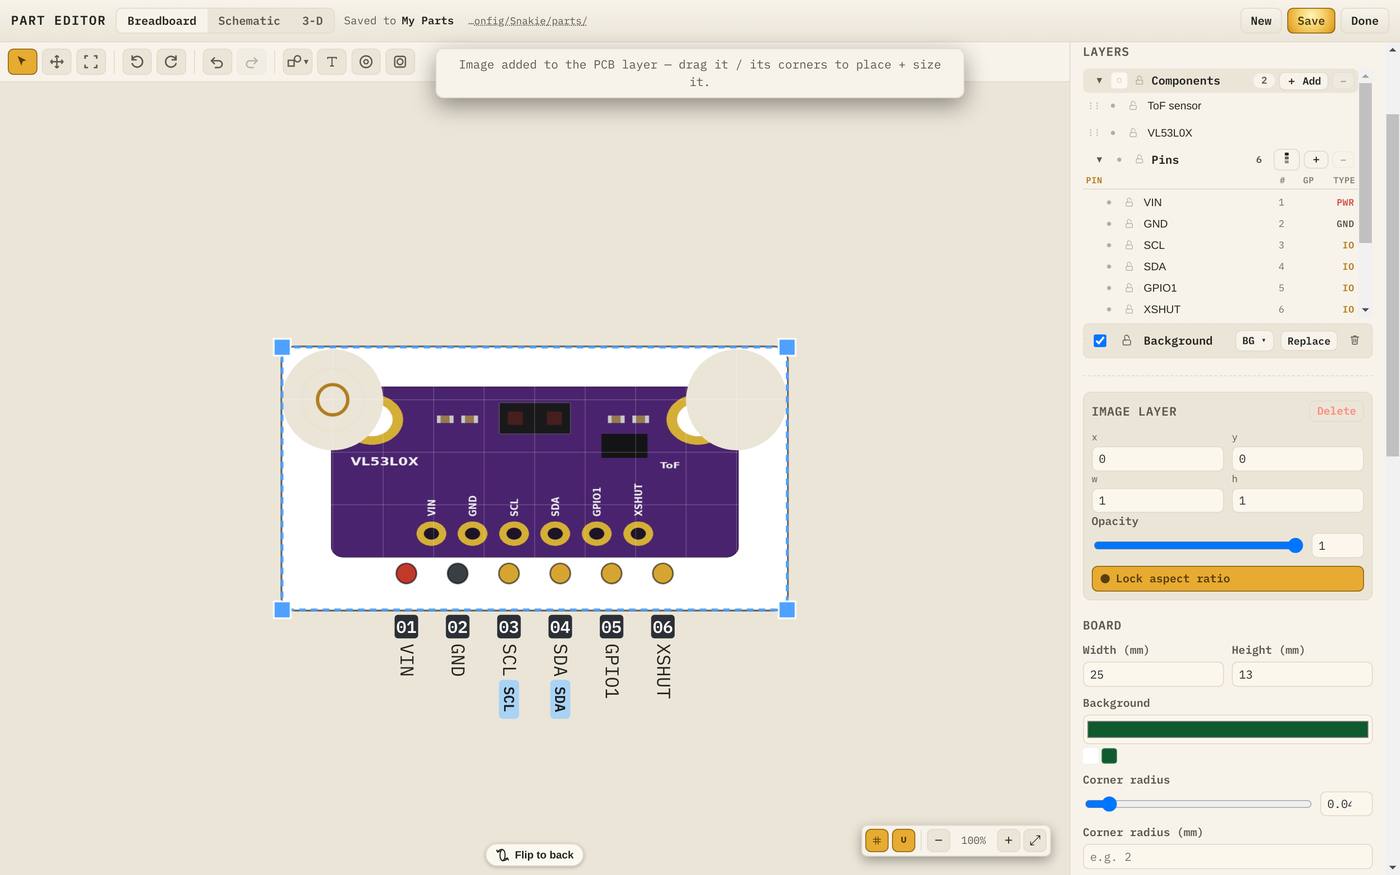
The Inspector now shows Image layer, with x, y, w, h, an Opacity slider and Lock aspect ratio.
Clean it up
Next to Background there’s now a BG button. Click it for the photo tools.
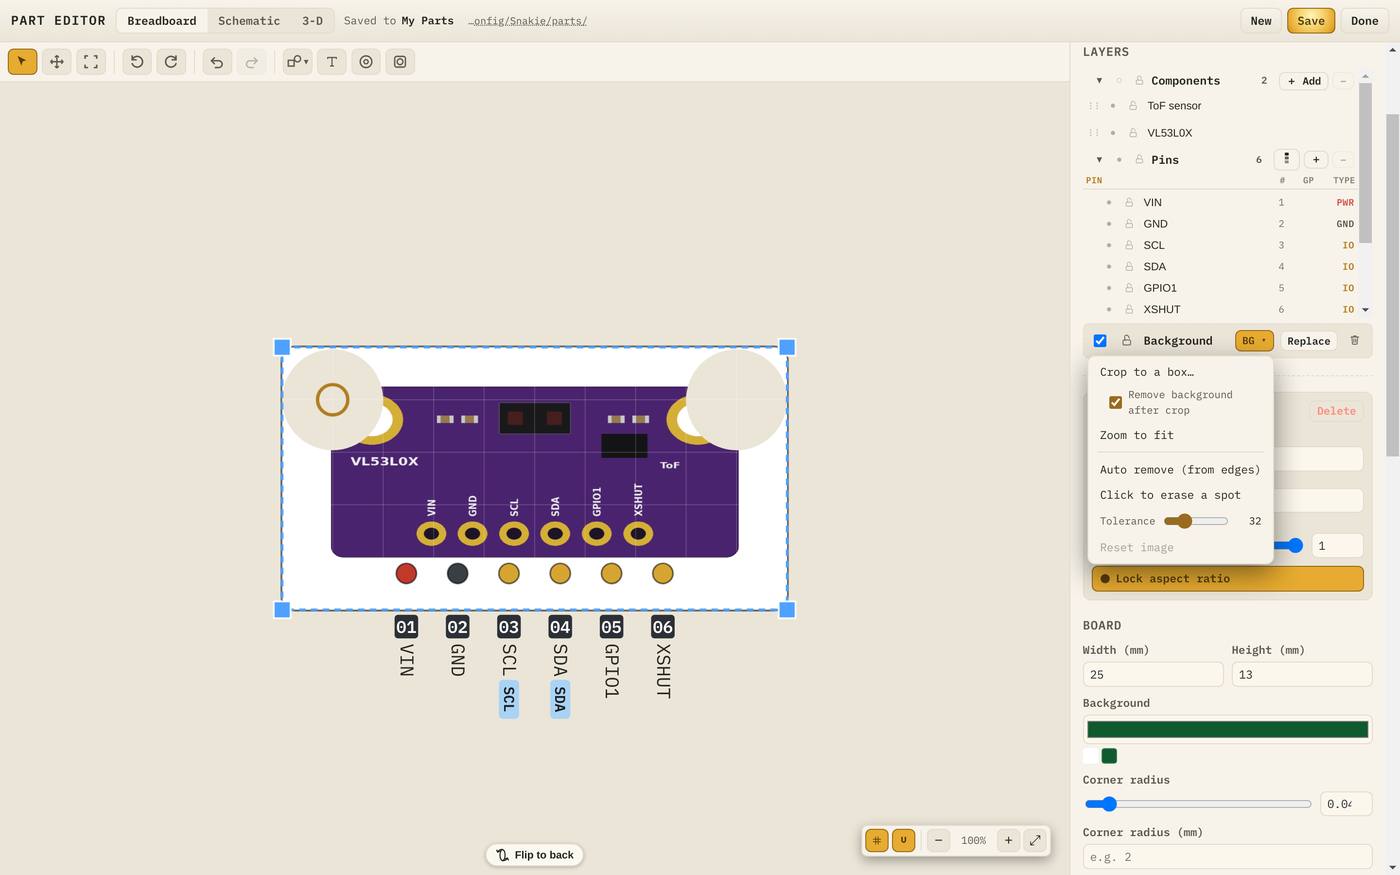
| Tool | What it does |
|---|---|
| Crop to a box… | Drag a box around the part of the photo to keep |
| Remove background after crop | Tick this to clear the background as part of the crop |
| Zoom to fit | Trims the empty margin and scales the photo to fill the board |
| Auto remove (from edges) | Clears the background, working inwards from every edge |
| Click to erase a spot | Click a leftover patch to erase it |
| Tolerance | How different a colour must be to survive. Raise it to erase more |
| Reset image | Undo all the erasing |
For a board on plain paper, two clicks do the job:
- Click Auto remove (from edges). The white disappears.
- Open BG again and click Zoom to fit.
The photo now fills the board exactly, and the pads in the photo sit under the pins you placed.
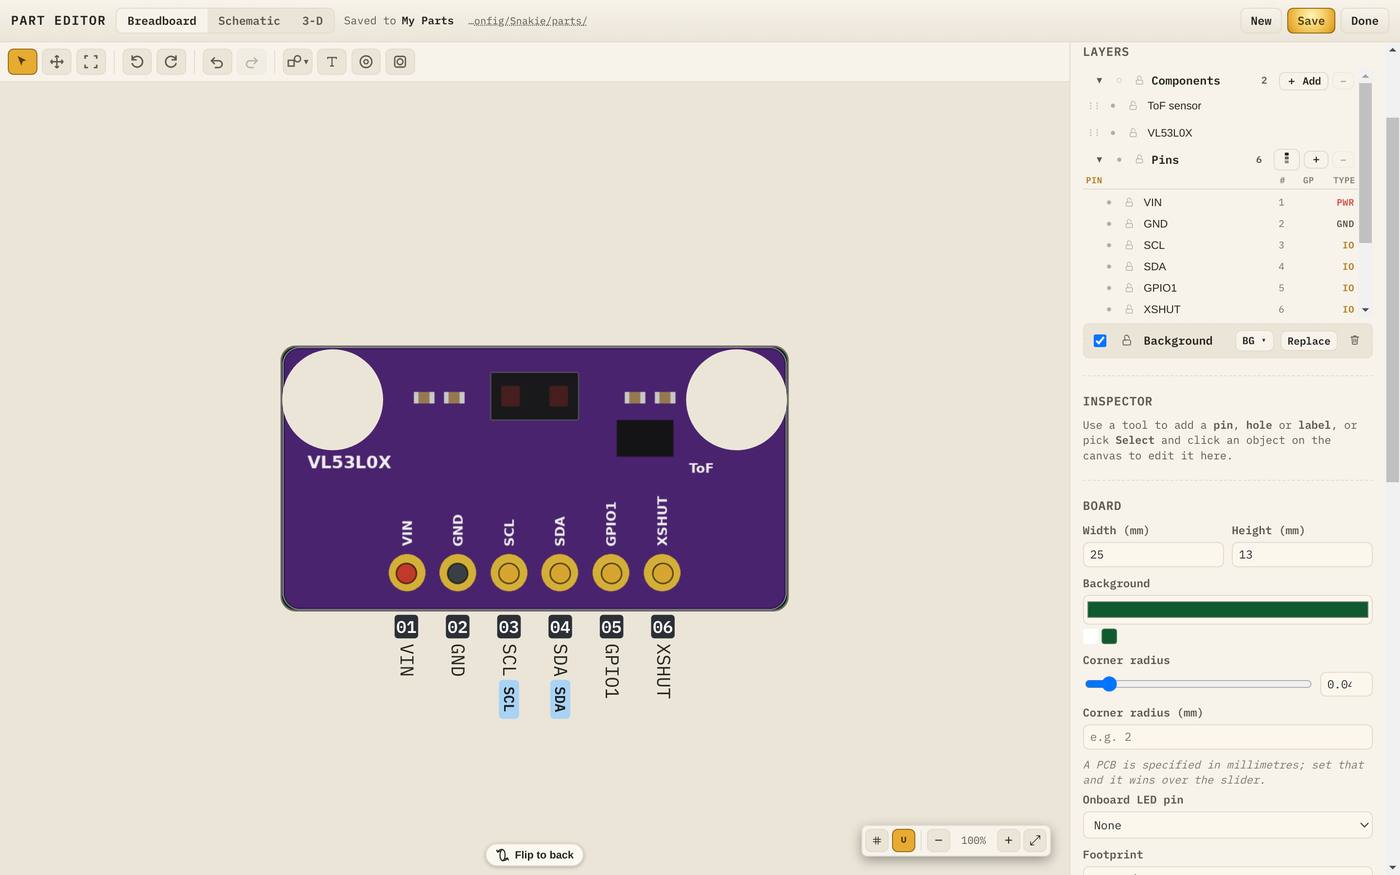
If patches of background are left behind, choose Click to erase a spot and click each one. If it eats into the board, lower Tolerance and try again.
Line up the pins
Zoom in and look at each pin. It should sit in the middle of its pad in the photo.
- If one is off, drag it. Hold Shift to move it freely, off the grid.
- If they’re all off by the same amount, the board size is probably wrong. Measure again and fix Width and Height.
Because we measured first and used the grid, ours lined up straight away.
Tidy the layers
The photo already shows the chip and the printed text, so the shapes from the last lesson are now doubled up.
- Click the eye on the Components row to hide them, or delete them.
- Use the tick box on the Background row to hide the photo while you work on pins.
- Click Replace to swap in a better photo later. Your pins stay where they are.
The other side
Does your board have parts on the back? Click Flip to back below the canvas and add a second photo there. Any pin can be moved to the back by setting Side to Rear in the Inspector.
Try it Yourself
- Add a photo of your board, or our practice picture.
- Remove the background and zoom to fit.
- Slide Opacity down to about half. You can now see the grid through the photo, which helps when checking pins.
- Put Opacity back to full, hide the Components layer and save.
Common Issues
Problem: Auto remove leaves the gaps inside the mounting holes white. Solution: Use Click to erase a spot on each one. Why: Auto remove works inwards from the edges and can’t reach enclosed areas.
Problem: Half my white silkscreen text vanished. Solution: Reset image, lower the Tolerance and try again. A coloured background behind the board helps too. Why: White text and a white background are the same colour to the eraser.
Problem: The photo looks stretched. Solution: Check the board’s width and height match the real board. Why: Zoom to fit fills the board, so a wrong board shape squeezes the photo.
Check your understanding
Quick quiz 1 of 3
What makes a photo easiest to clean up?
Quick quiz 2 of 3
What does Zoom to fit do?
Quick quiz 3 of 3
Every pin is slightly off its pad by the same amount. What’s the likely cause?
You can use the arrows ← → on your keyboard to navigate between lessons.
Comments