Drivers and Built-In Help
Attach a MicroPython driver and bundled help to your Snakie part so the app offers to install the library when the part is used
By Kevin McAleer, 5 Minutes
Page last updated November 21, 2026

A sensor is no use without its driver, the MicroPython library that talks to it. Normally you’d hunt for the right file and copy it to your board. A good part does that for you.
Tell Snakie the import name
Open the Details form with Show and find Code library.
| Field | Value | What it’s for |
|---|---|---|
| Module (import name) | vl53l0x |
The name you import in code |
| Library URL (mip / git) | optional | Where the library lives |
| Docs / README URL | optional | A link to its documentation |
Type vl53l0x into Module (import name). Snakie uses this name to build blocks for your part, as you’ll see in the next lesson.
Add the driver
Scroll the side panel to Drivers. The text there sums it up: these are files the part needs on the board, and placing the part offers to install them. Nothing is copied without you agreeing.
There are two ways to add one.
From the modules catalog
Snakie has a catalog of well-known drivers. Ours is in it.
- Open the + From modules catalog… list.
- Choose VL53L0X ToF (import vl53l0x).
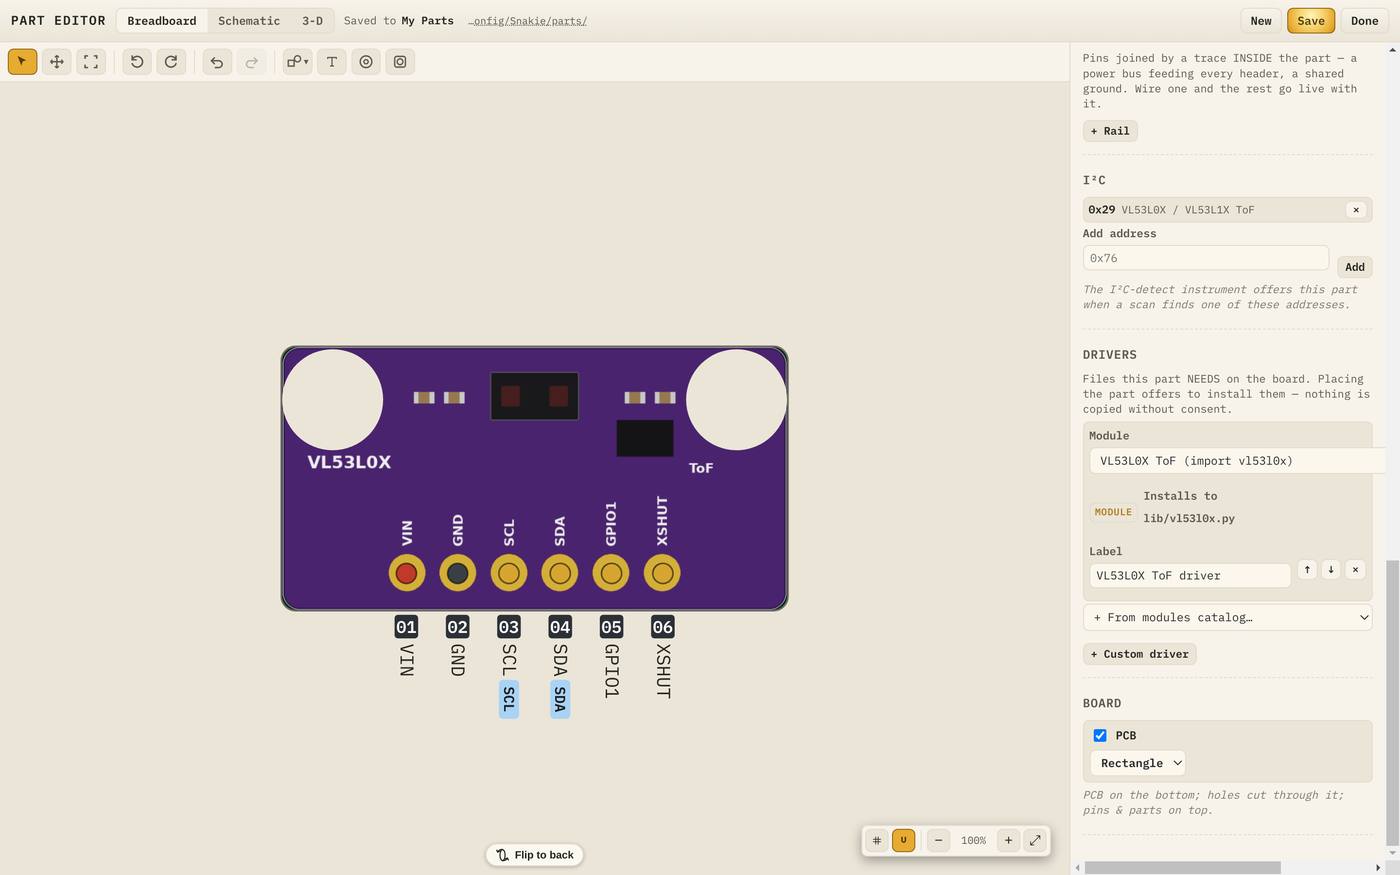
A row appears showing where the file will go, lib/vl53l0x.py, and a Label, which is the text shown when Snakie offers the install. The arrows reorder drivers and the cross removes one.
This driver is Kev’s own vl53l0x library, the same one he uses in his robot videos.
A custom driver
Is your driver not in the catalog? Click + Custom driver and fill in three boxes.
| Box | What to type |
|---|---|
| Source | A file name such as driver.py, a github:user/repo/file.py address, or a web address |
| Install folder | Where it goes on the board, usually lib |
| Label | The text shown in the install prompt |
If the source is just a file name, put that file in the part’s folder, next to parts.yml. The driver then travels with the part.
A row with no source is dropped when you save, so don’t leave one half filled in.
Bundled help
Still in Details, find Mini-help (markdown). This is a short help page that’s saved with the part as help.md and shown in the Electronics workspace’s help panel when the part is on the breadboard. It works offline.
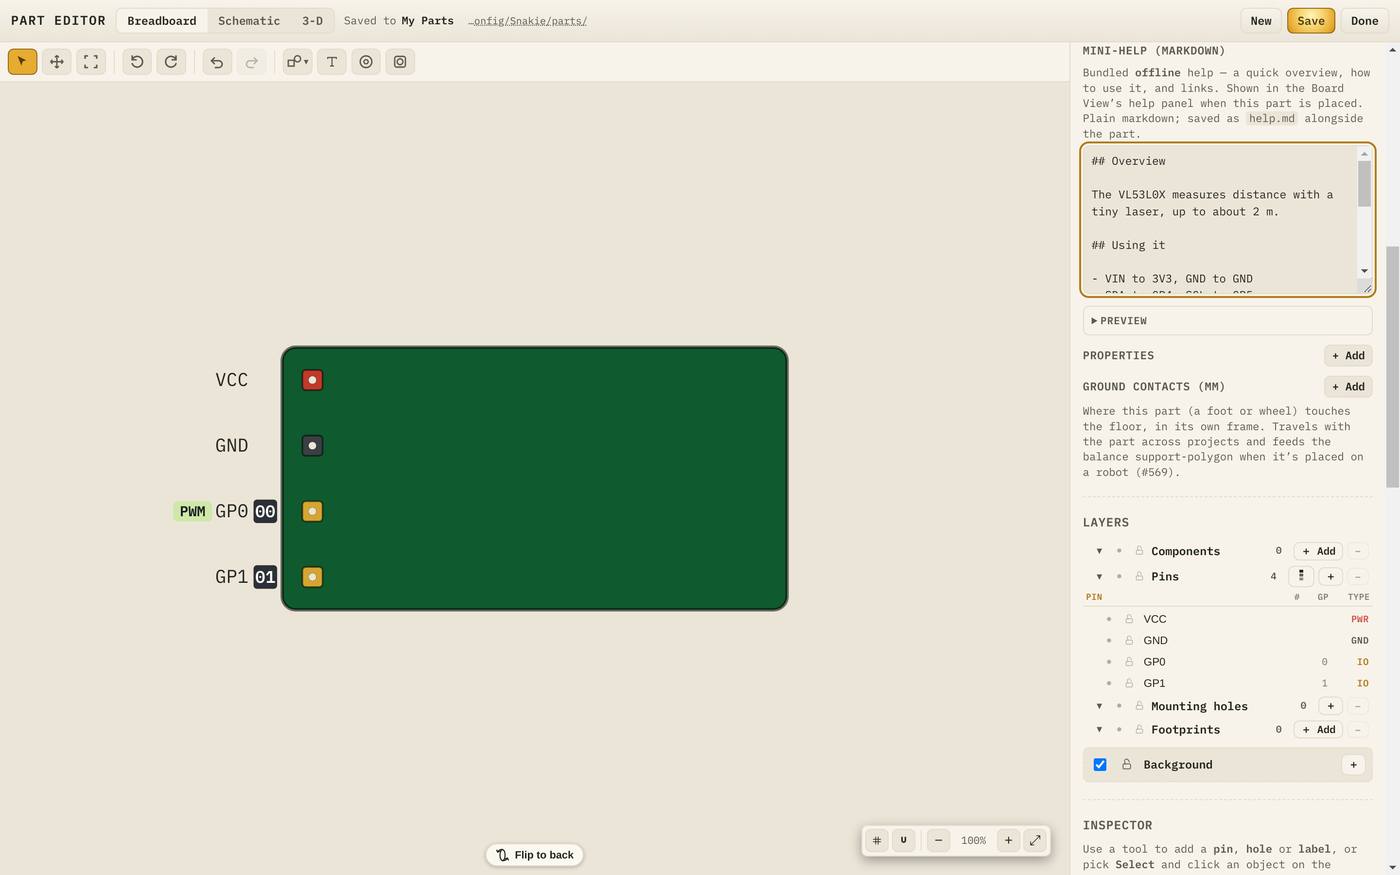
Snakie starts you off with three headings: Overview, Using it and Links. Keep it short and practical. Here’s ours:
## Overview

The VL53L0X measures distance with a tiny laser, up to about 2 m.

## Using it

- VIN to 3V3, GND to GND
- SDA to GP4, SCL to GP5

```python
from machine import I2C, Pin
from vl53l0x import VL53L0X

tof = VL53L0X(I2C(0, sda=Pin(4), scl=Pin(5)))
print(tof.ping())
```
Open Preview under the box to see how it will look.
The best help answers three questions: what is this, how do I wire it, and what’s the shortest program that proves it works?
Try the code
You don’t need the sensor to see what that program does. In the box below, a small stand-in class plays the part of the driver, so it runs right here on the page. Press Run.
The try and except ImportError pattern is worth remembering. Your program runs with the real driver when it’s installed and falls back to pretend readings when it isn’t.
Try it Yourself
- Set the module name to
vl53l0x. - Add the driver from the catalog.
- Write a mini-help page with wiring and a four-line example.
- Save.
- In the code box above, change
45to90. How soon does the robot stop now?
Common Issues
Problem: My custom driver disappeared after saving. Solution: Fill in the Source box before you save. Why: Rows without a source are dropped.
Problem: My driver isn’t in the catalog.
Solution: Use + Custom driver with a github: address or a file in the part folder.
Why: The catalog only lists drivers Snakie already knows about.
Problem: My help doesn’t show for a part that’s already on the breadboard. Solution: Save the part, then open the Help button at the top of the Electronics workspace. Why: Help for the board and every placed part is collected there.
Check your understanding
Quick quiz 1 of 3
When does Snakie copy a part’s driver to your board?
Quick quiz 2 of 3
Where does a catalog driver for the module vl53l0x get installed?
Quick quiz 3 of 3
What is the Mini-help saved as?
You can use the arrows ← → on your keyboard to navigate between lessons.
Comments