Project - A Phone Stand
Design a parametric phone stand in BetterCad from three shapes and five parameters, check it prints with no supports, and export it
By Kevin McAleer, 7 Minutes
Page last updated November 20, 2026

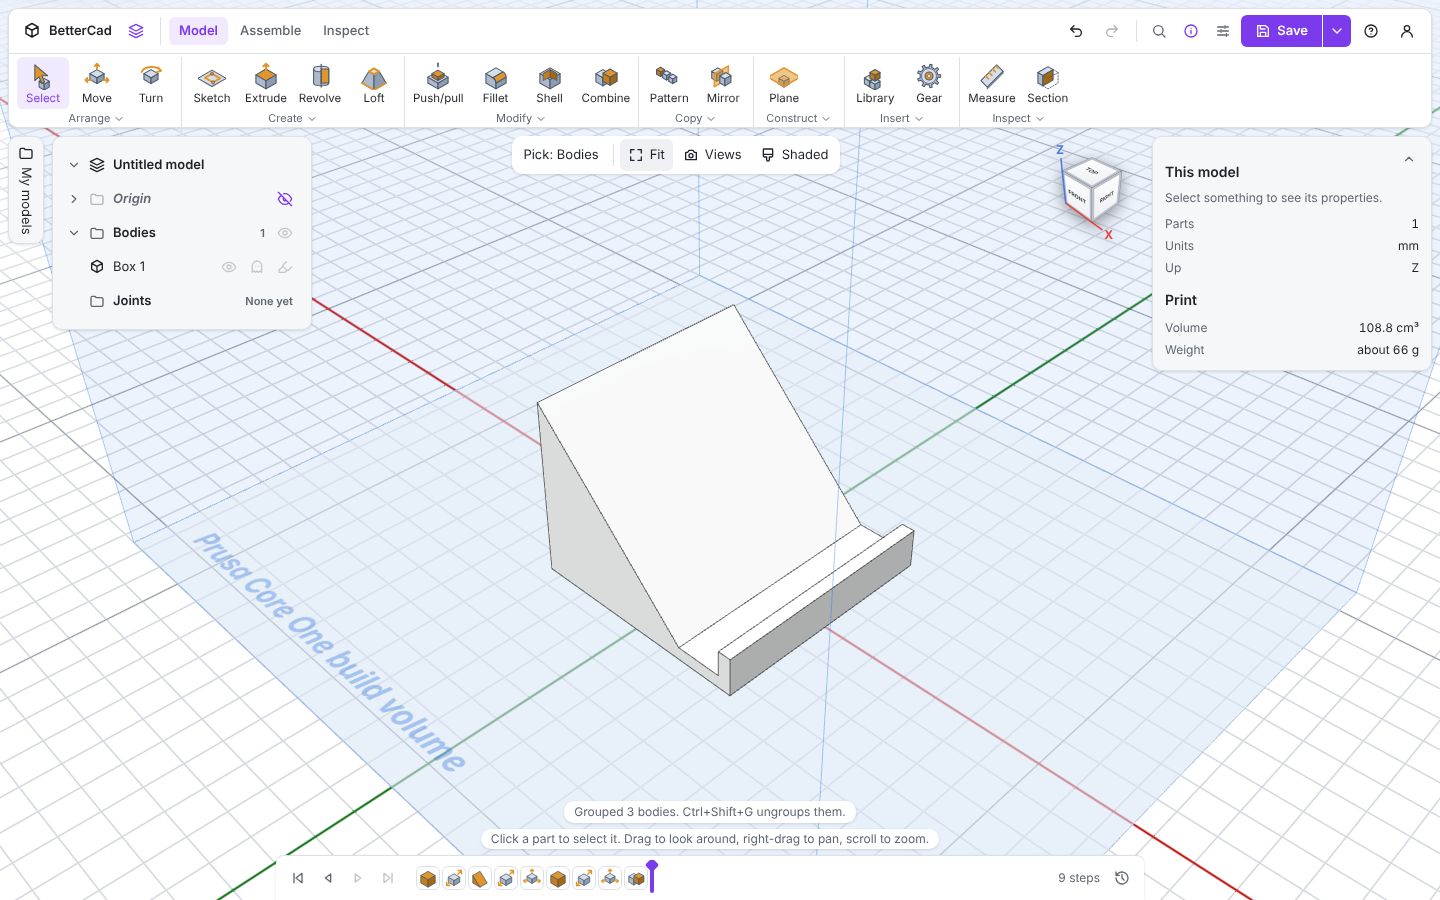
Time to put it all together. You’ll design a phone stand that prints flat with no supports, and because every size comes from a parameter, you can make it fit a phone, a tablet or a Raspberry Pi display by changing a number.
It’s three shapes: a flat base, a wedge for the back rest, and a small lip at the front to stop the phone sliding off.
Step 1: Plan the parameters
Good parametric models start with a list of the sizes that matter. Start a new model (Ctrl+N), open Parameters and add these five.
| Name | Expression | What it controls |
|---|---|---|
width |
70 |
How wide the stand is |
height |
50 |
How high the back rest reaches |
lean |
50 |
How far back the rest leans. Bigger is more laid back |
shelf |
14 |
Room for the phone, in its case, to sit on |
base |
4 |
Thickness of the base |
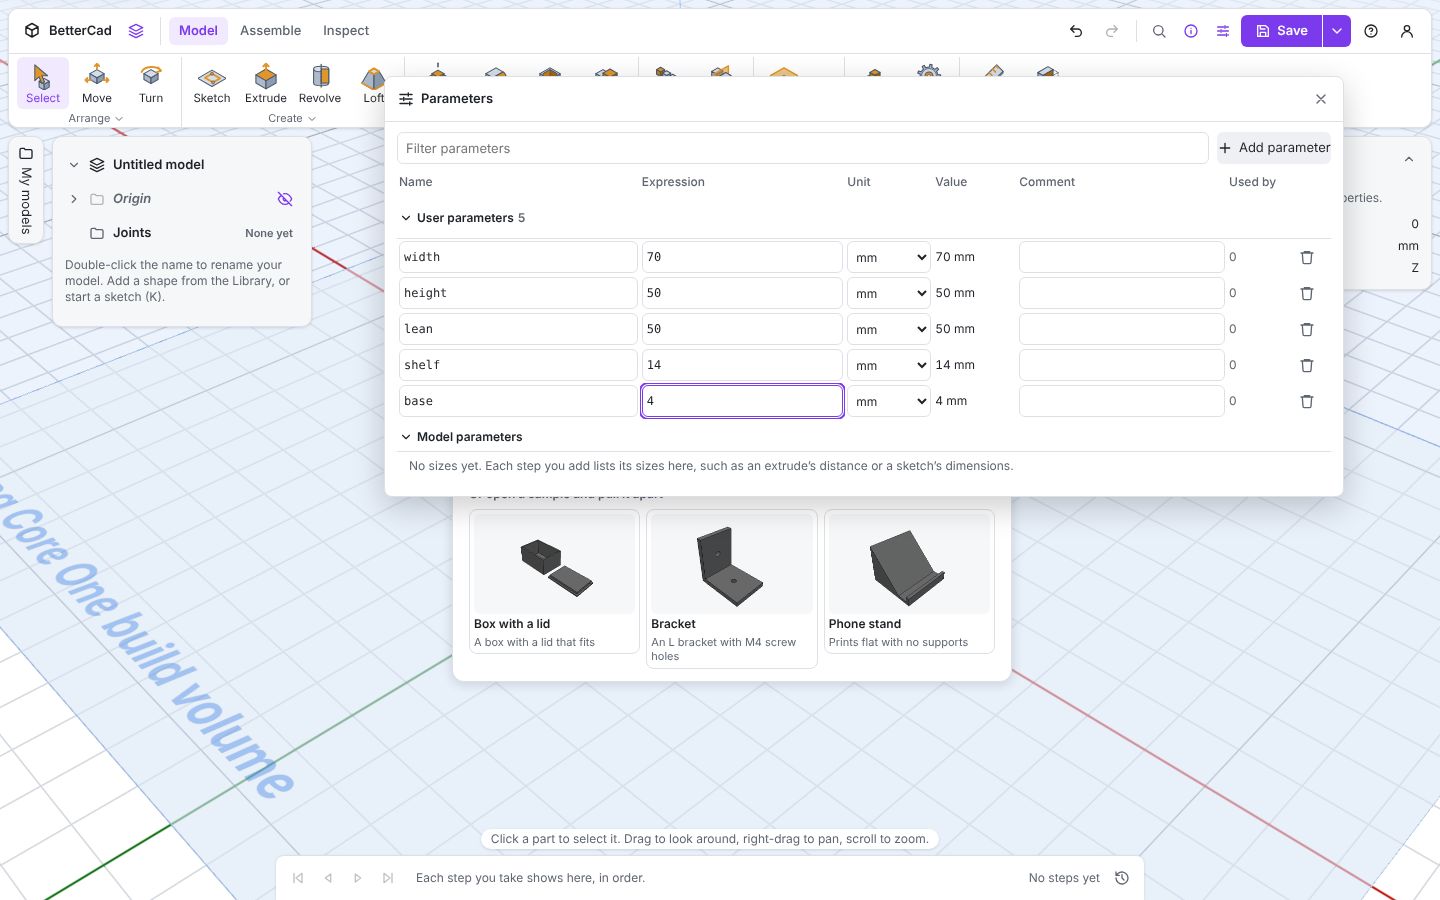
There’s a Comment column too. Fill it in. Future you will not remember what shelf meant.
Close the panel.
Step 2: The base
The base has to be long enough for the back rest, the shelf and the lip, one after another.
- Open the Library and click Box.
- In Properties, set the size:
| Box | Type this |
|---|---|
| W | lean + shelf + 4 |
| D | width |
| H | base |
- Click Fit.
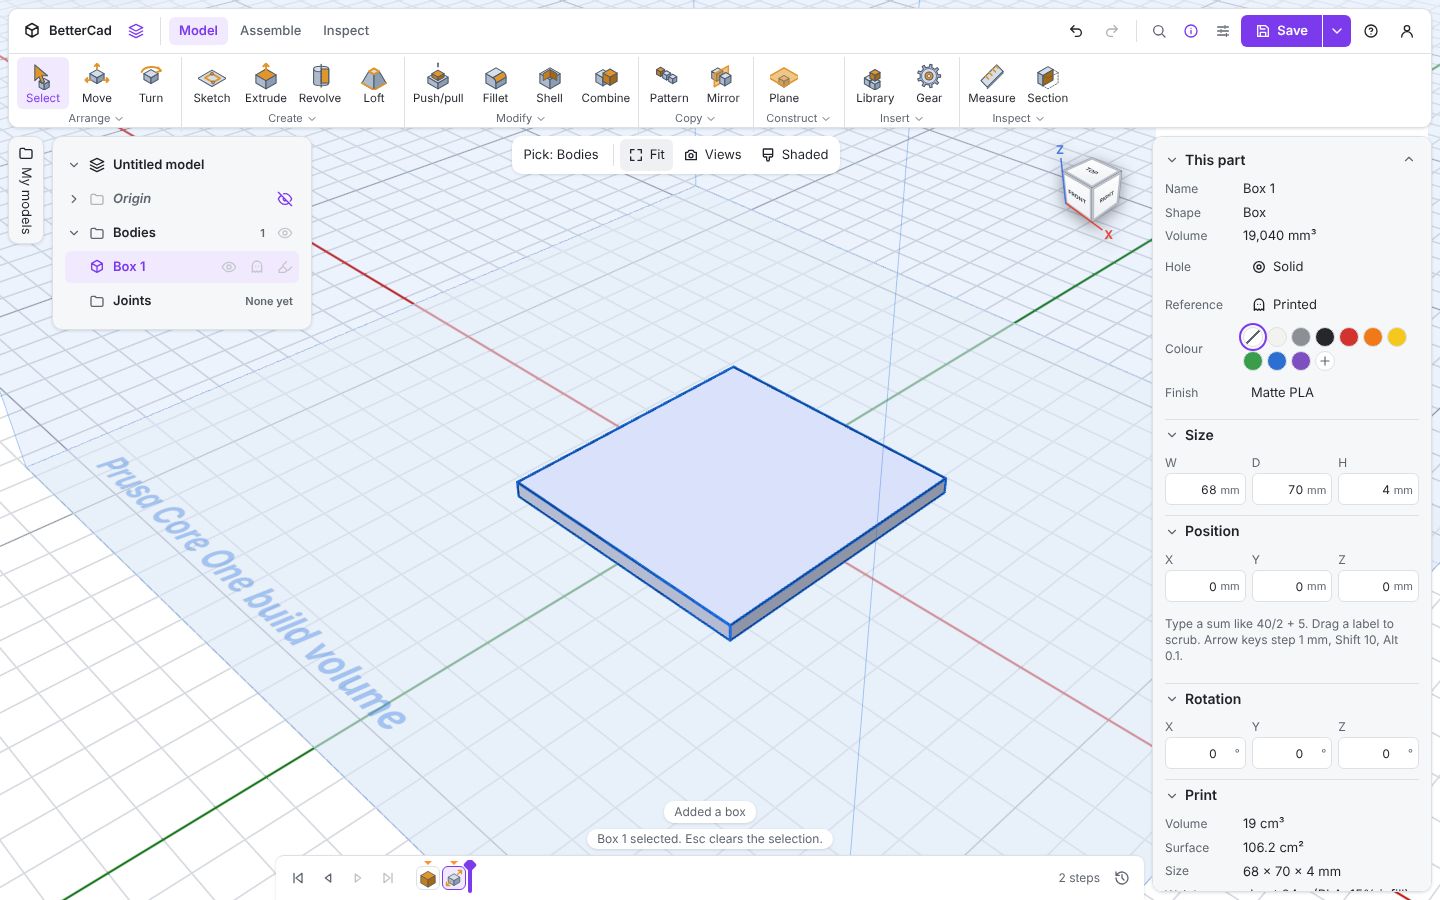
Properties shows a size of 68 × 70 × 4 mm. The 68 is 50 + 14 + 4, worked out for you. The 4 is the thickness of the lip you’re about to add.
Step 3: The back rest
The Wedge from the Library is a ramp: a box sliced corner to corner. Its sloping face is what the phone leans against.
- In the Library, click Wedge.
- Set its size and position:
| Box | Type this |
|---|---|
| W | lean |
| D | width |
| H | height |
| Position X | lean / 2 - (lean + shelf + 4) / 2 |
| Position Z | base |
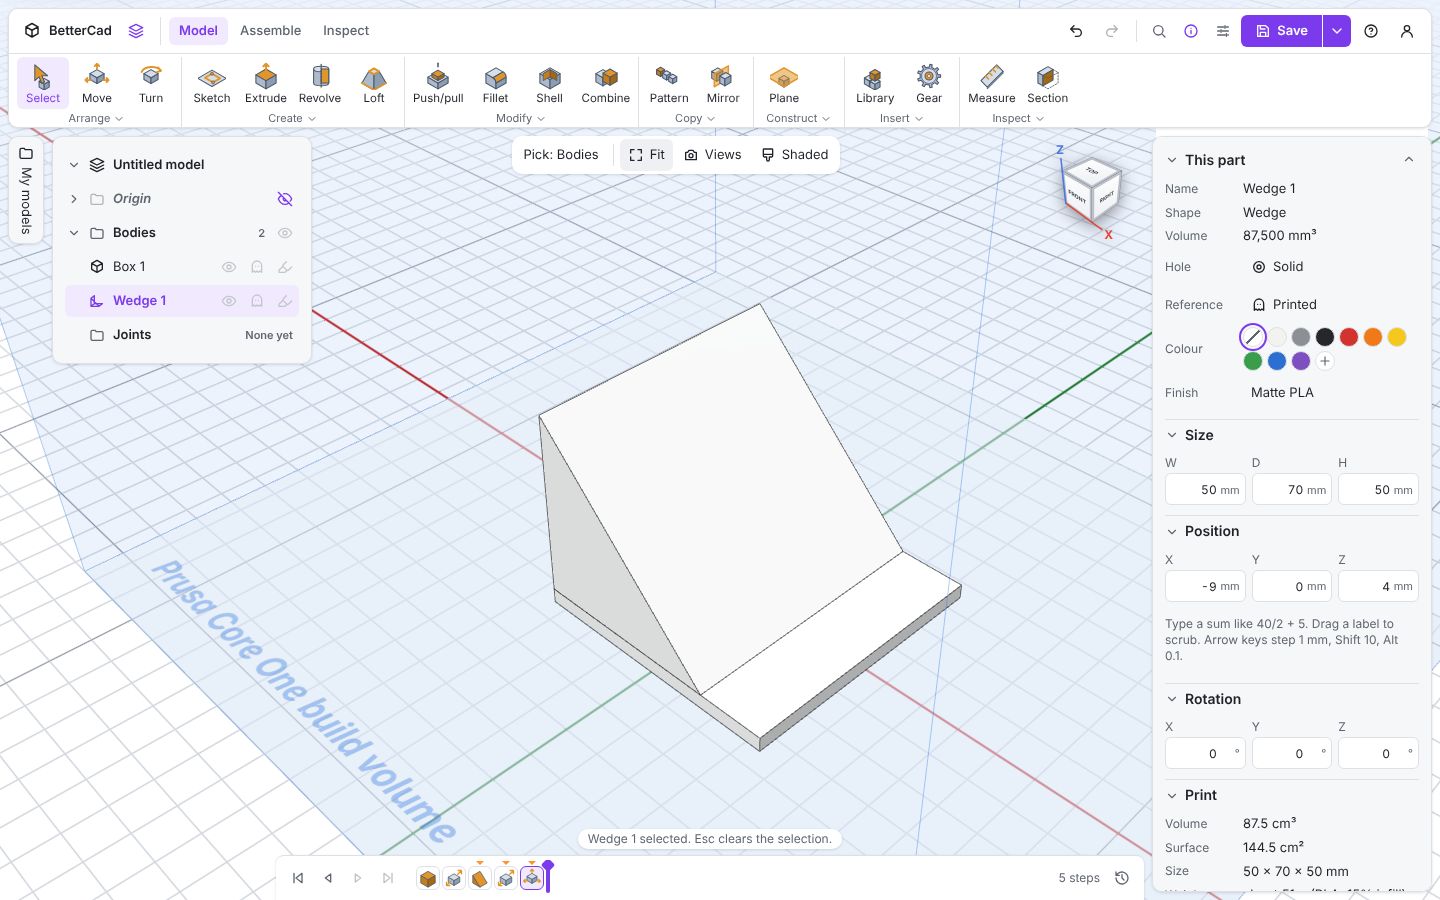
That X position looks fierce, so take it apart. Shapes are placed by their centres. The base is centred on zero, so its back edge is at minus half its length: -(lean + shelf + 4) / 2. The wedge’s centre must be half its own length in from there: add lean / 2. With the starting values that comes to -9 mm, and you can see that number appear in the box.
Position Z is base, which sits the wedge on top of the base plate.
Step 4: The lip
- In the Library, click Box again.
- Set its size and position:
| Box | Type this |
|---|---|
| W | 4 |
| D | width |
| H | base + 8 |
| Position X | (lean + shelf + 4) / 2 - 2 |
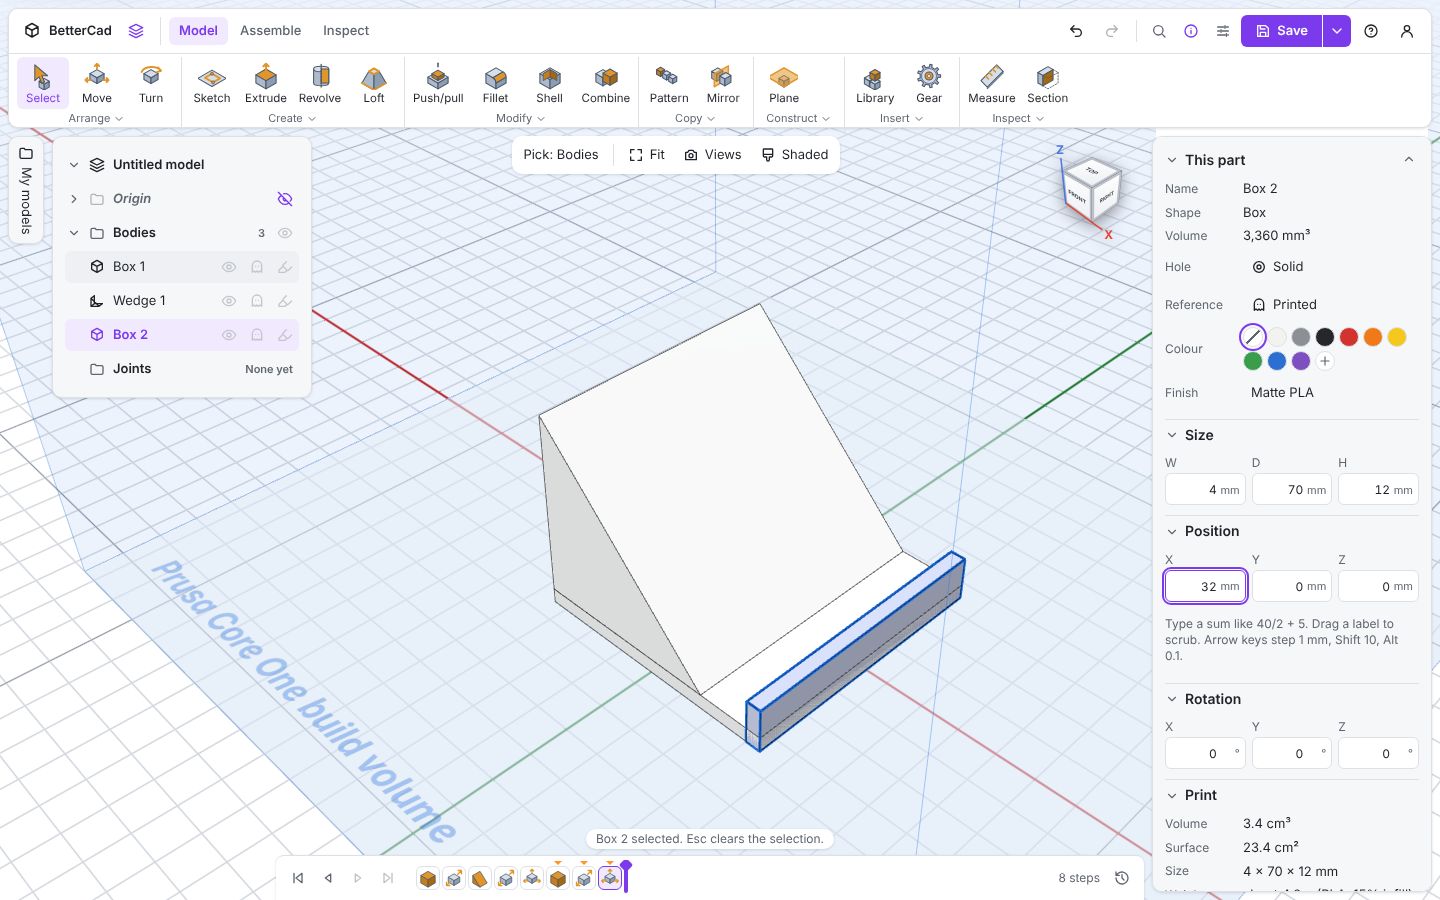
Same idea as before: the front edge of the base is at plus half its length, and the lip’s centre is half its 4 mm thickness back from that. The lip starts at the ground and stands 8 mm above the base.
Step 5: Make it one part
Three shapes that touch are still three shapes. A slicer would print them as three separate objects.
- Click the first body in the Browser, then Shift-click the last so all three are selected.
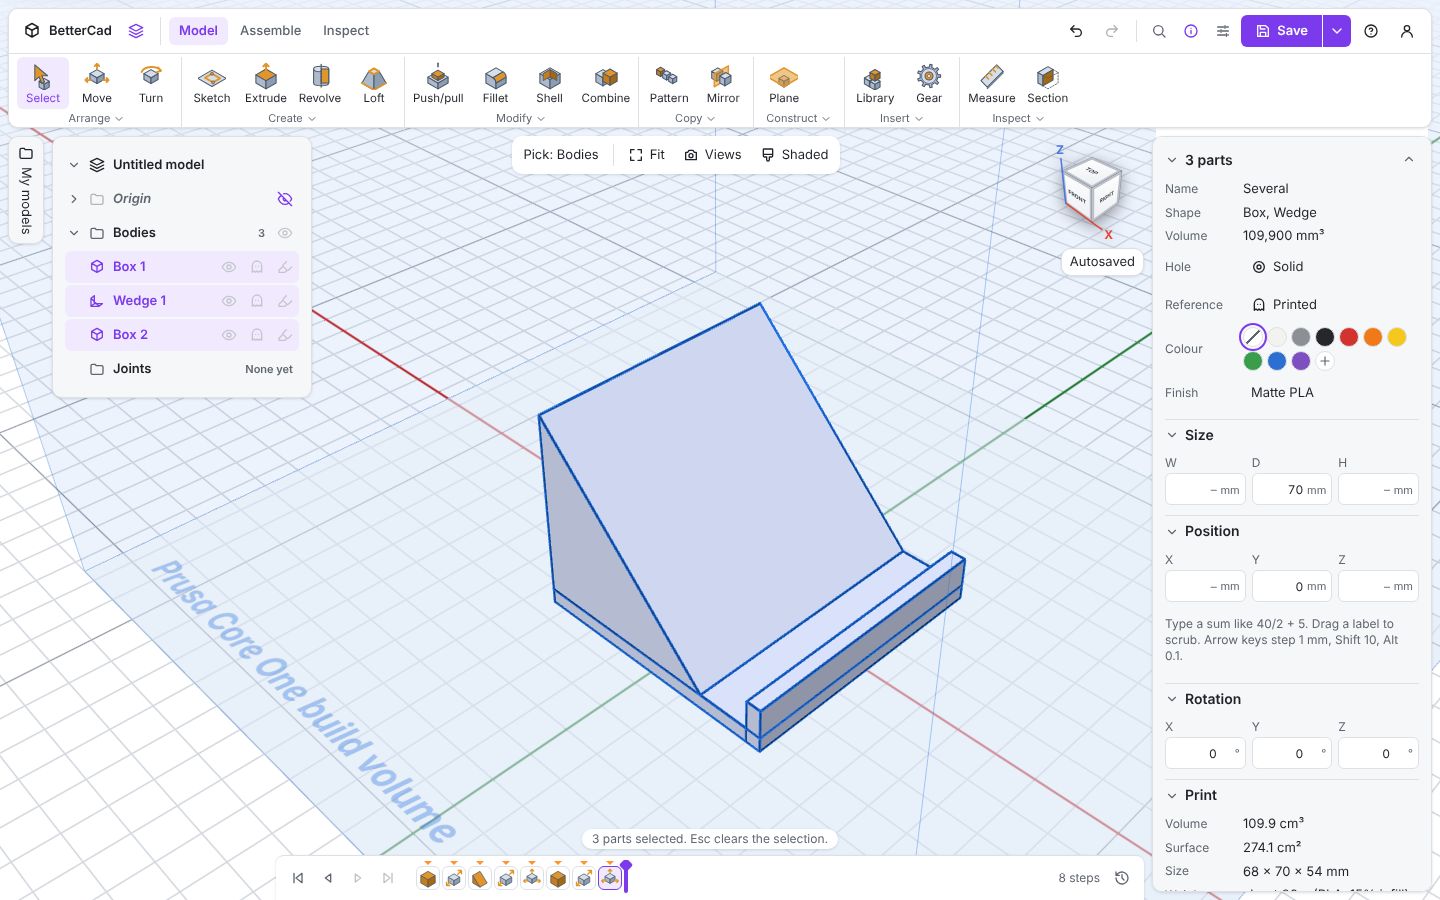
- Press Ctrl+G.
BetterCad reports Grouped 3 bodies, and the stand is one solid.
Step 6: Test the parameters
This is the moment a parametric model pays you back. Open Parameters and change lean to 70.
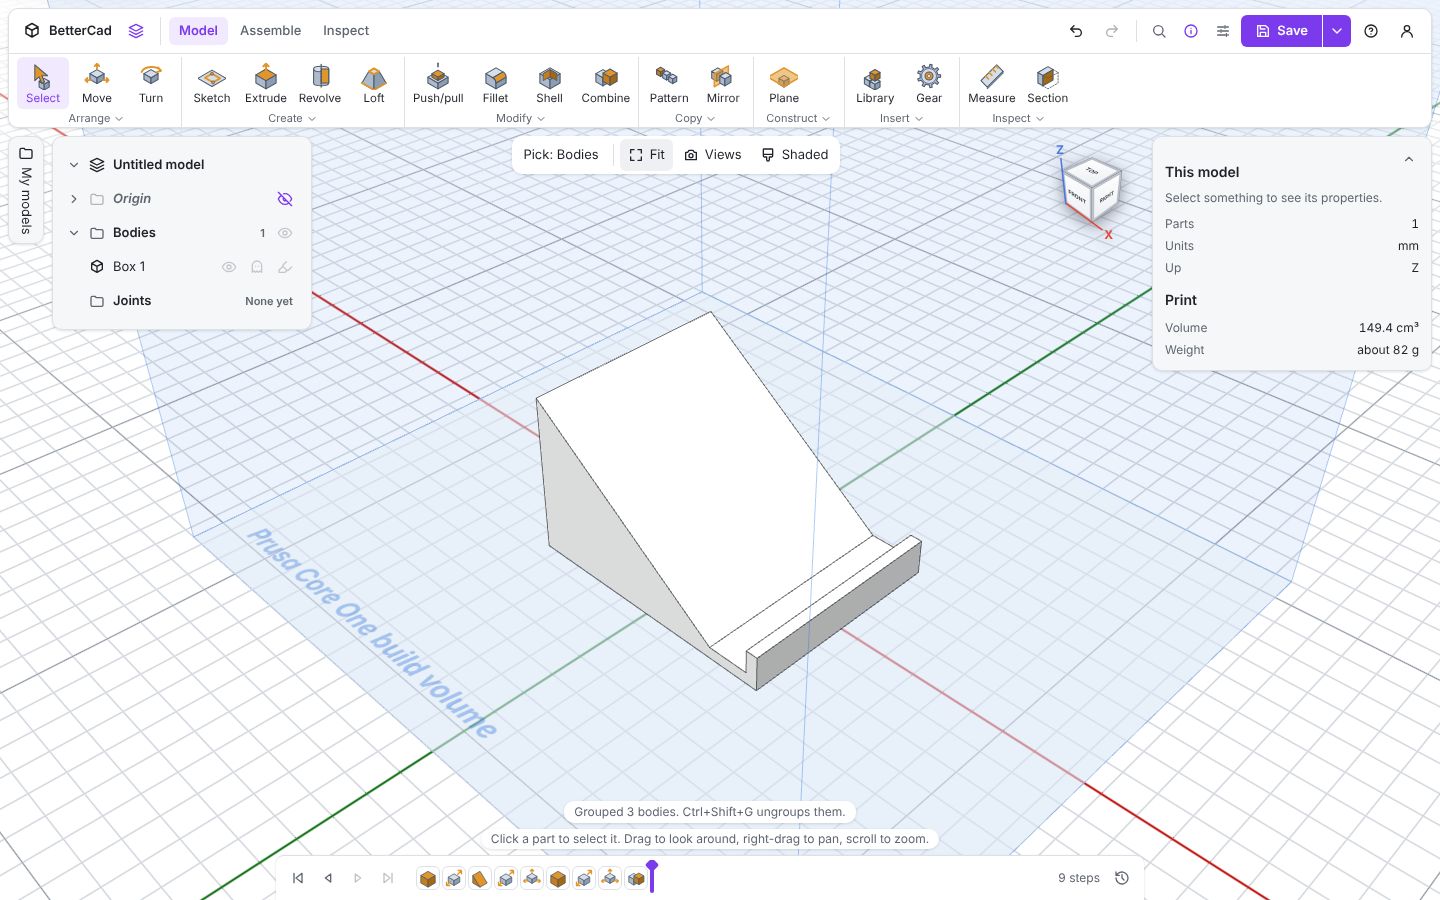
The back rest leans further, the base grows to match, and the lip stays at the front where it belongs. Nothing overlaps and nothing is left behind, because every position was written in terms of the same five names.
Try a few more:
| For | Try |
|---|---|
| A big phone in a thick case | shelf = 18 |
| A small tablet | width = 120, height = 90, lean = 80 |
| A desk display that sits upright | lean = 25 |
Set lean back to 50 when you’ve finished exploring.
Step 7: Check it prints
Open Print settings from the account menu and click Overhangs.
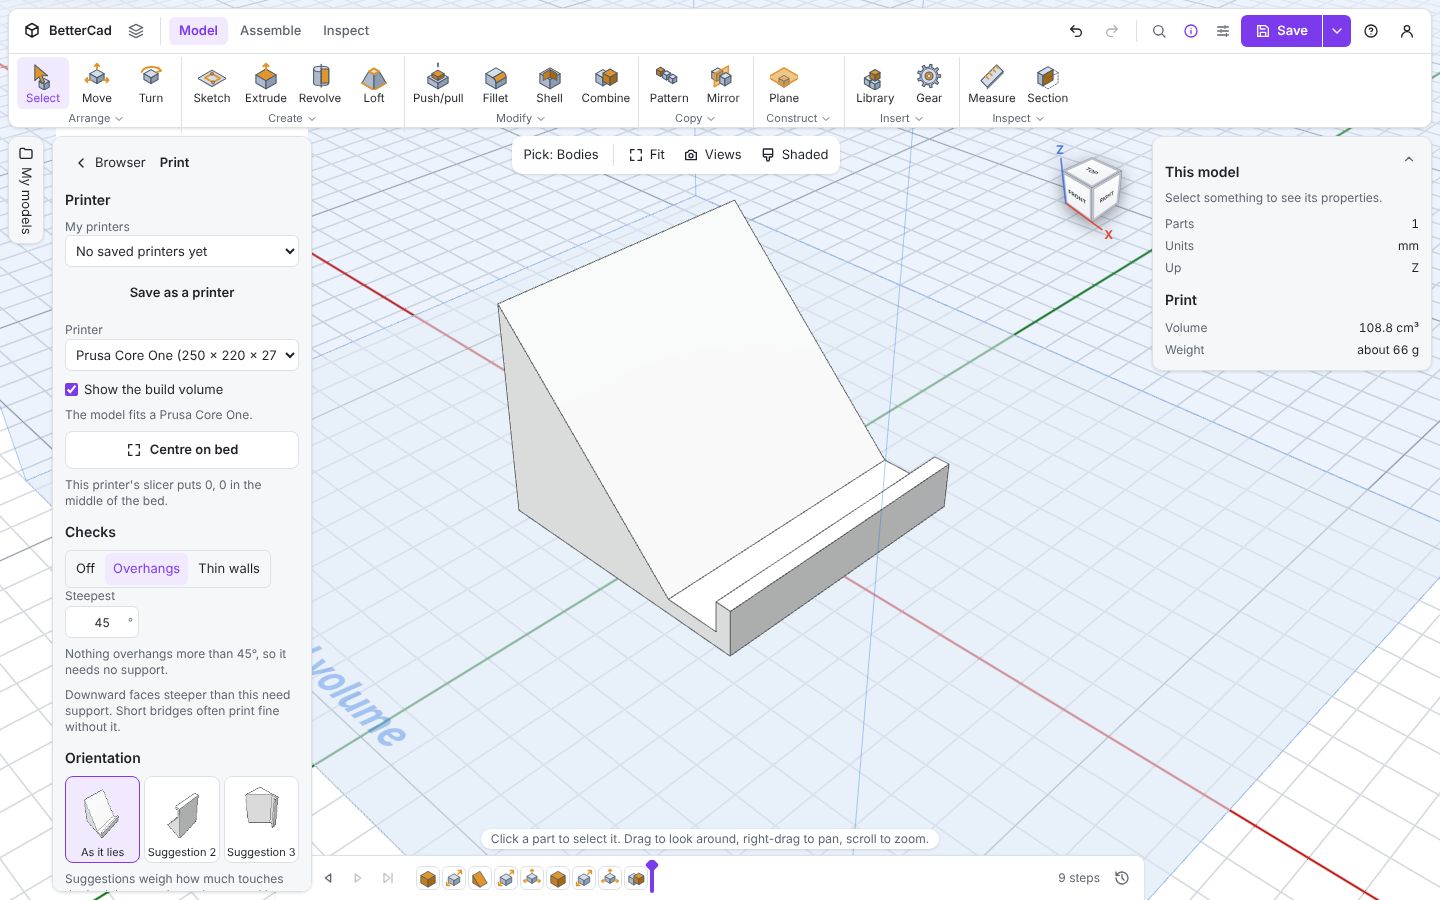
Nothing overhangs more than 45°, so it needs no support. That’s by design. Lying on its base, every face of the stand either sits on the bed, stands upright or slopes upwards. The wedge is doing the job that a thin leaning panel would need supports for.
Run Thin walls too. The thinnest part is the 4 mm base and lip, far above the 0.8 mm limit.
Step 8: Export
- Press Ctrl+E.
- Choose 3MF, leave Place on the bed ticked and click Export.
- Press Ctrl+S and save the
.bcadas well.
Properties puts the stand at about 66 g of PLA at 15% infill. Slice it with three walls and it will hold a phone for years.
Make it yours
A few ways to take it further, all with tools you already know:
- Round it off. Fillet the upright edges of the lip and the top edge of the rest. Leave the bottom edges sharp, or chamfer them
- Add a cable slot. Put a Box in the middle of the lip, make it a hole and group it, so a charging cable can pass through
- Save plastic. Cut a large hole shape through the back rest from side to side
- Compare notes. Open the built-in Phone stand sample and read its timeline and parameters. It’s built the same way
Try it Yourself
- Add a
lipparameter for the lip thickness and replace every4that refers to it. How many places need changing? - Add a cable slot 12 mm wide in the lip. Which parameters should its position use so it stays central?
- Challenge: make a second, wider stand for a tablet by changing only parameters, and check its overhangs.
Common Issues
Problem: The wedge slopes the wrong way.
Solution: Set its Rotation Z to 180.
Why: A wedge has a high end and a low end. The high end goes at the back.
Problem: There’s a gap between the wedge and the base.
Solution: Check the wedge’s Position Z is base, not a typed number.
Why: If Z is a plain 4 and you change base, the wedge stays where it was.
Problem: After changing a parameter, one shape is left behind. Solution: Select it and look for a position or size that’s a plain number where a name should be. Why: Only boxes containing a parameter name follow that parameter.
Check your understanding
Quick quiz 1 of 3
Why is the base’s width set to lean + shelf + 4 and not 68?
Quick quiz 2 of 3
Why does this stand print with no supports?
Quick quiz 3 of 3
What does grouping the three shapes do?
You can use the arrows ← → on your keyboard to navigate between lessons.
Comments