Fillets, Chamfers and Shells
Round and bevel edges, then hollow a solid into a thin-walled enclosure with the BetterCad Shell tool
By Kevin McAleer, 6 Minutes
Page last updated November 20, 2026

Your enclosure is still a solid brick with holes in it. Two tools finish it: Fillet softens the corners, and Shell scoops out the inside. The order you use them in matters, and this lesson shows why.
Round the upright edges
You met Fillet in lesson 2. This time you’ll round the four upright corners of the box.
- Press G.
- Click the three upright edges you can see.
- Drag to turn the view, or tap the ← arrow key a few times, until the fourth edge comes round. Click it. Turning the view doesn’t put the tool down.
- Type
3.
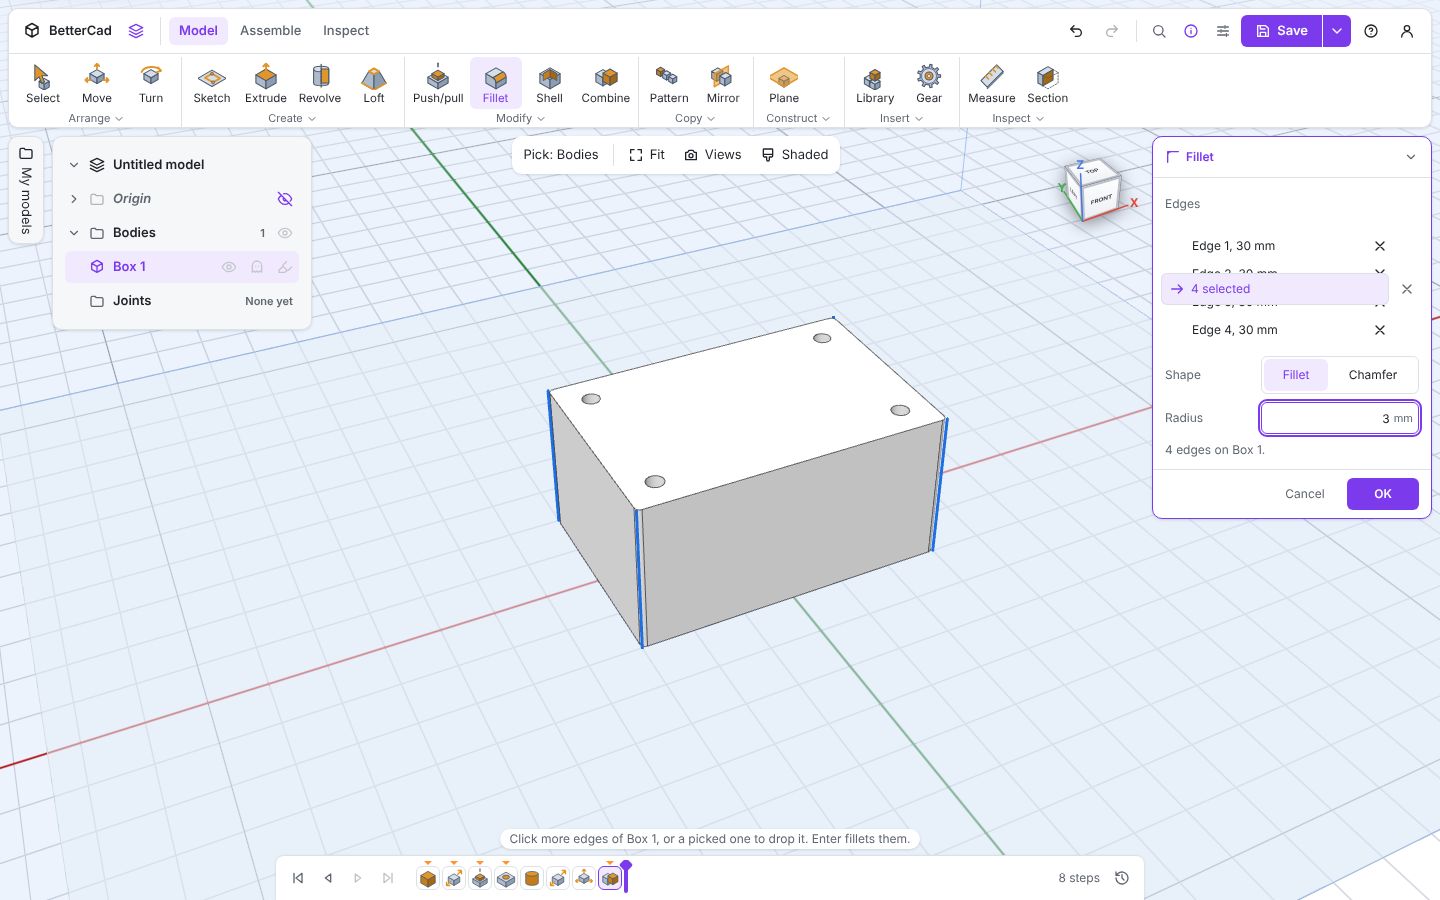
The panel lists the four edges and says 4 edges on Box 1.
- Press Enter.
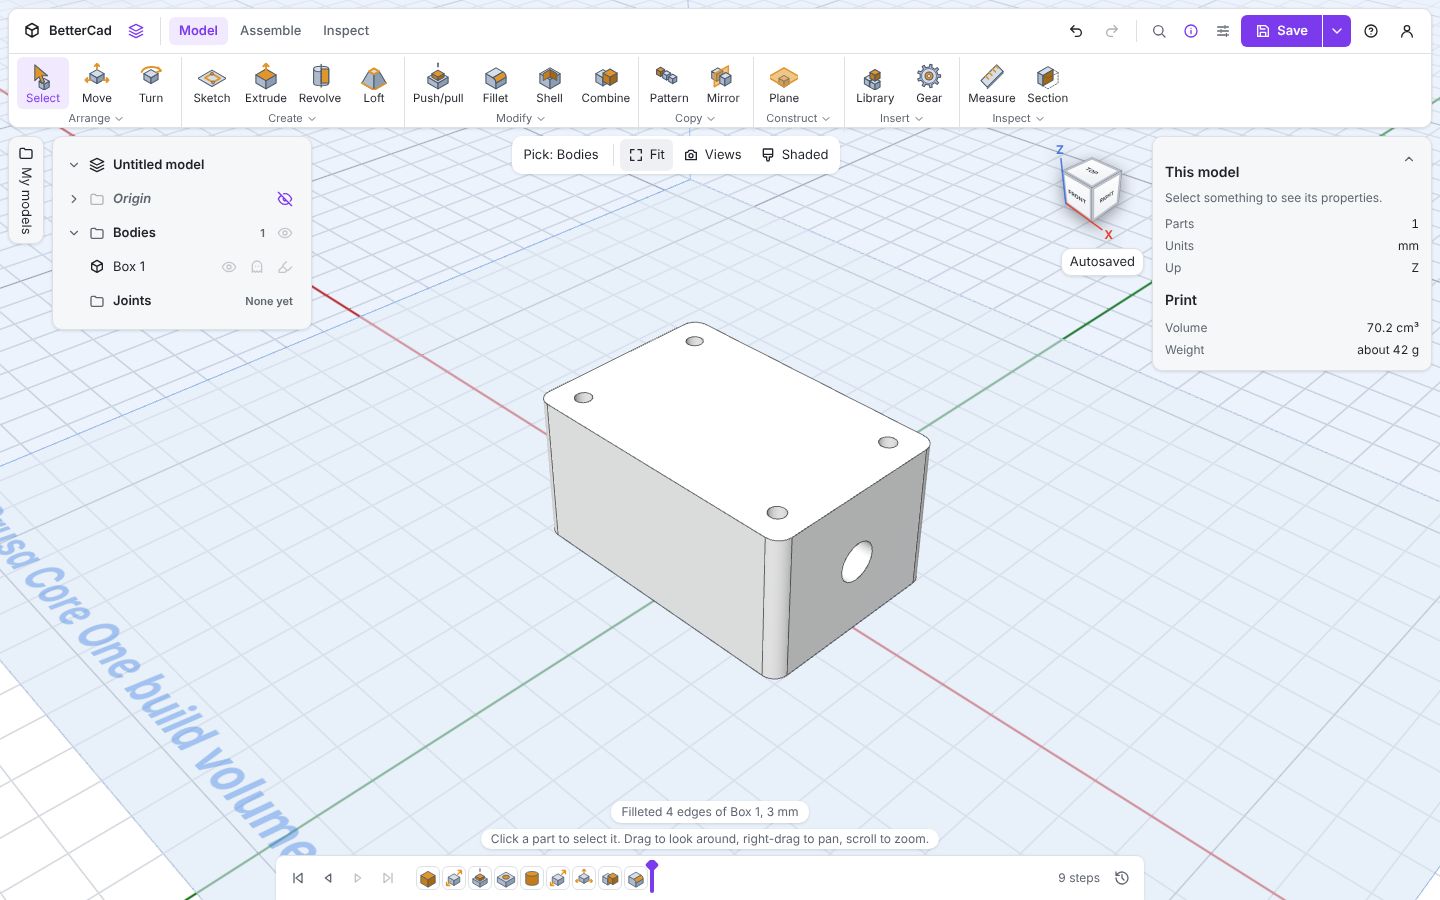
Fillet or chamfer?
The Fillet panel has a Shape switch with two settings.
| Shape | What you get | Good for |
|---|---|---|
| Fillet | A rounded edge | Upright corners, top edges, anywhere you’ll touch |
| Chamfer | A flat 45° bevel | Bottom edges, and edges that face down when printing |
The reason is the way printers work. Each layer needs something underneath it. A fillet on a bottom edge starts almost flat, so its first layers hang in the air and droop. A chamfer rises at 45°, which every printer can manage.
A simple rule: fillet what faces up or sideways, chamfer what faces down.
Hollow it out
Press Shell (S), click the face to leave open, type a wall thickness and press Enter.
- Press S.
- Click the top face. That’s the face that will be left open.
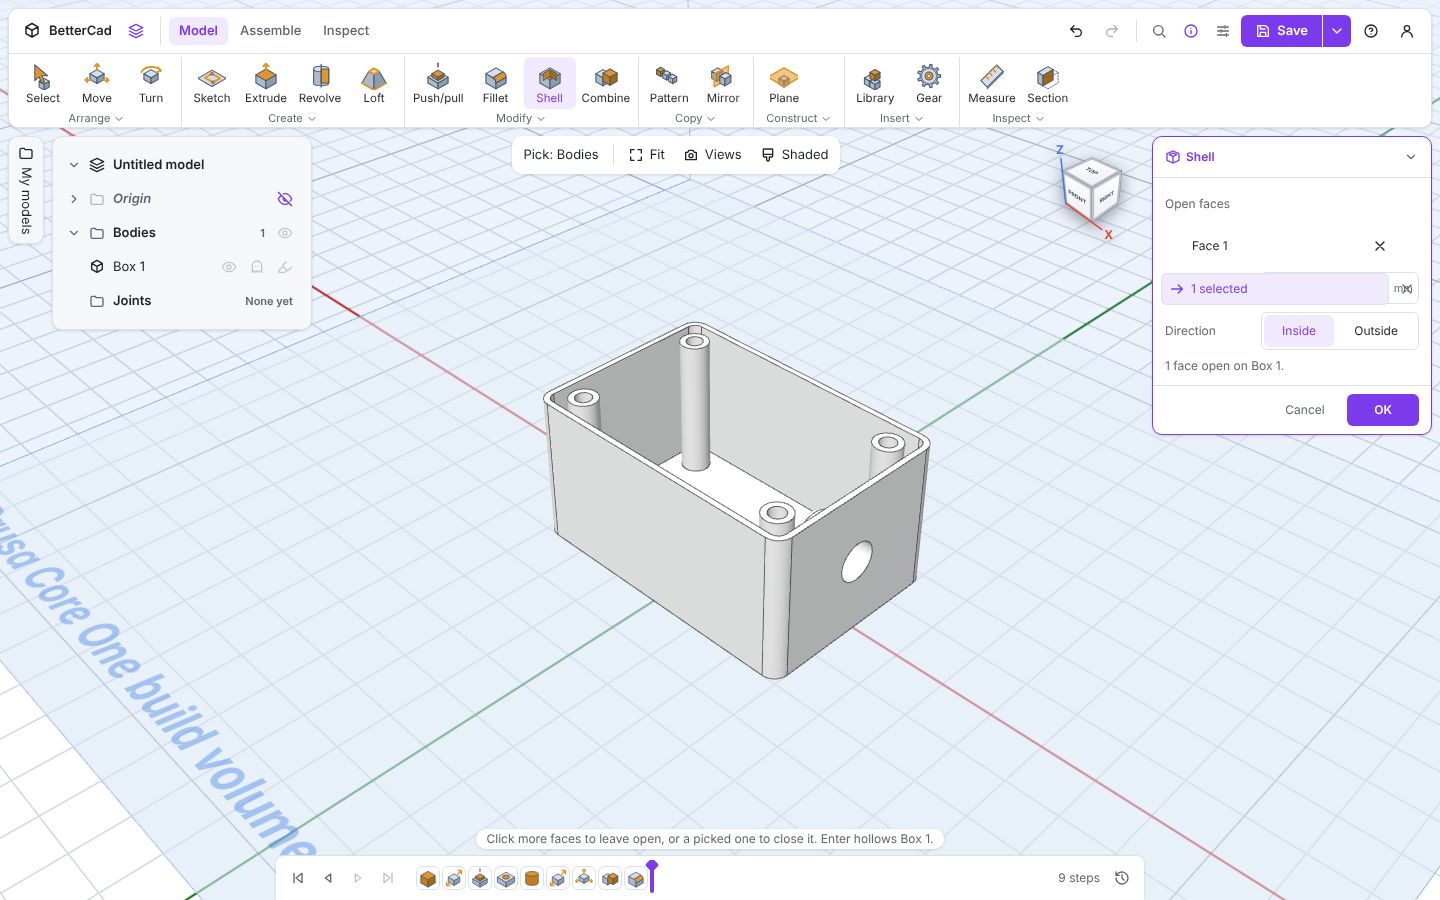
- Type
2for a 2 mm wall and press Enter.
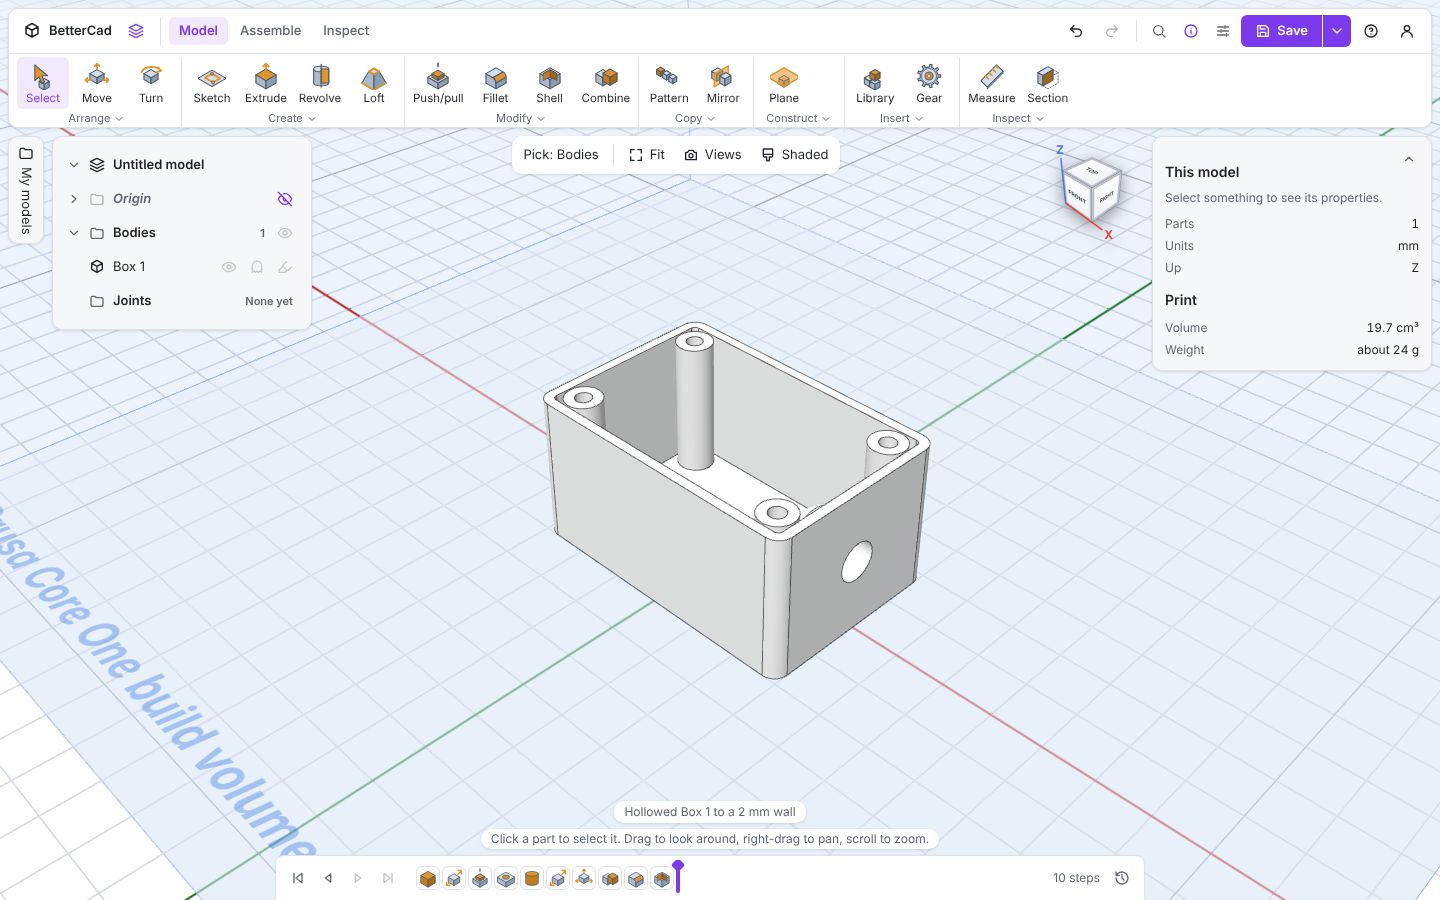
BetterCad reports Hollowed Box 1 to a 2 mm wall, and look at what you got for free. Shell keeps a 2 mm wall around everything, including the four screw holes, so each one is now a screw post running the full height of the box. The cable hole goes cleanly through the wall, and the rounded corners are rounded inside as well as out.
That’s why the holes came first. Had you shelled the box and then added holes, you’d have four holes in a thin floor and nothing to screw a lid into.
Shell settings
| Setting | What it does |
|---|---|
| Open faces | The faces to remove. Click more than one for a tube or a tray with an open end |
| Wall | The wall thickness |
| Direction: Inside | Keeps the outside size and hollows inwards |
| Direction: Outside | Keeps the inside size and adds the wall around it |
Use Outside when the inside is what must fit, such as a box around a circuit board you’ve measured.
How thick should a wall be? Walls are printed as whole lines of plastic, so multiples of your nozzle width work best. With a standard 0.4 mm nozzle, 1.2 mm is light, 1.6 mm is a good everyday wall and 2 mm is sturdy.
When a fillet won’t fit
Try to round the thin top rim. Press G, click one of the long top edges and type 3.
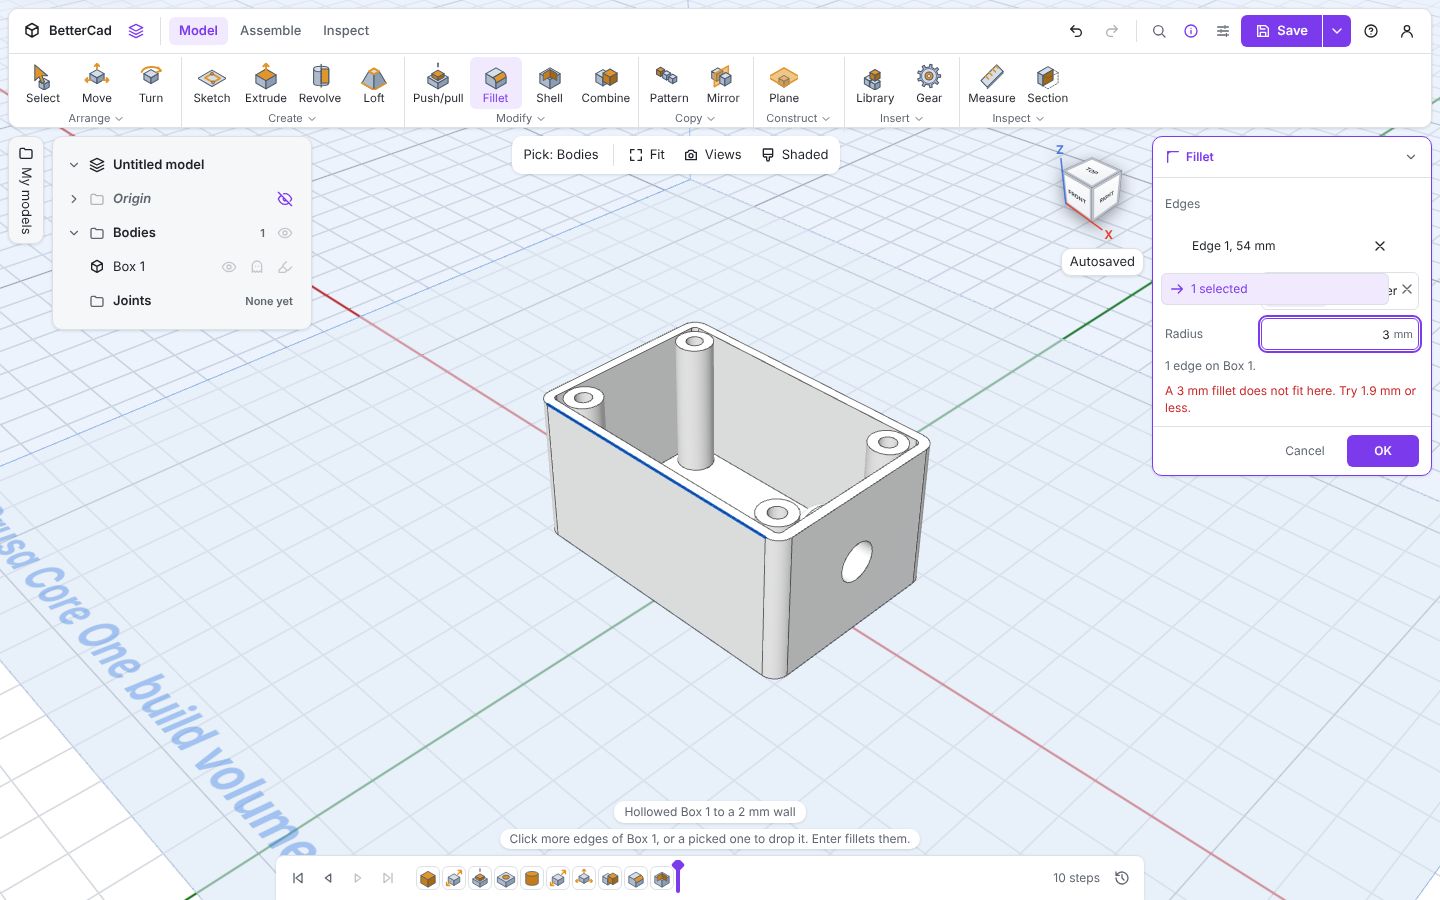
A 3 mm fillet does not fit here. Try 1.9 mm or less. The wall is only 2 mm thick, so there isn’t room for a 3 mm curve. BetterCad tells you the largest size that will work. Type 1 and it previews happily. Press Esc to back out without keeping it.
See how the samples do it
The Box with a lid sample on the start card is a finished example of the same ideas, with a lid that fits. You can also open it directly.
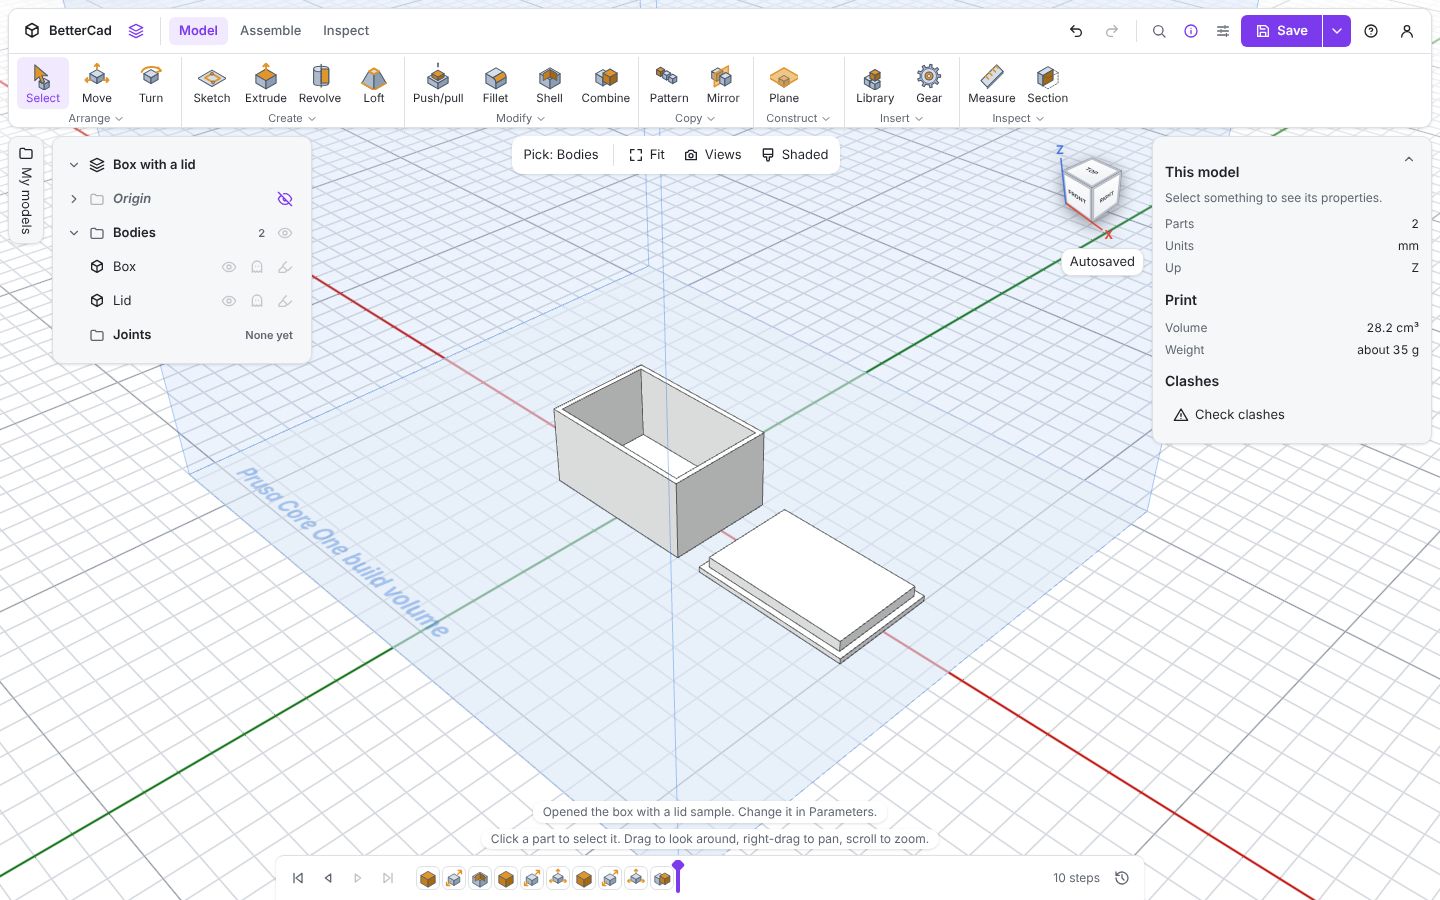
You’ll want your enclosure for the next lesson, so save the sample for afterwards. When you do open it, step through its timeline with Alt+← to watch it being built.
Try it Yourself
- Use Section (X) to slice through the enclosure and look at the wall and a screw post from the side.
- On a spare box, switch Shape to Chamfer and bevel the four bottom edges by 1 mm.
- Shell a spare box with two opposite faces open. What have you made?
Common Issues
Problem: I can’t reach the edge at the back. Solution: Turn the view with a drag or the arrow keys while the Fillet tool is on, then click it. Why: You can only pick what’s in view. The tool waits while you look around.
Problem: Shell failed, or the inside looks broken. Solution: Use a thinner wall, or make the fillets larger than the wall. Why: The inside is the outside shrunk by the wall thickness. If a feature is smaller than the wall, there’s nothing left of it to shrink.
Problem: I shelled first and my holes have no posts. Solution: Drag the Shell step to after the Hole step on the timeline, or undo and do them in the other order. Why: Shell only wraps a wall around what exists when it runs.
Check your understanding
Quick quiz 1 of 3
Which edge treatment suits the bottom edge of a print?
Quick quiz 2 of 3
You shell a box that already has four through holes. What happens to the holes?
Quick quiz 3 of 3
You need a box whose inside is exactly 50 mm wide. Which Shell direction do you use?
You can use the arrows ← → on your keyboard to navigate between lessons.
Comments