Sketching With Constraints
Learn what constraints and degrees of freedom are, and how to draw a BetterCad sketch that can't drift out of shape
By Kevin McAleer, 6 Minutes
Page last updated November 20, 2026

Your first block worked because you typed its size as you drew it. This lesson explains what was going on underneath, because it’s the idea that makes a CAD sketch different from a drawing: a sketch is a set of rules, not a set of lines.
A rectangle that can still move
Start a new model (Ctrl+N), press K and click the ground to start a sketch.
- Press R for Rectangle.
- Click somewhere to the lower left of the centre, then click again to the upper right. Don’t type anything.
- Press Esc to put the tool down.
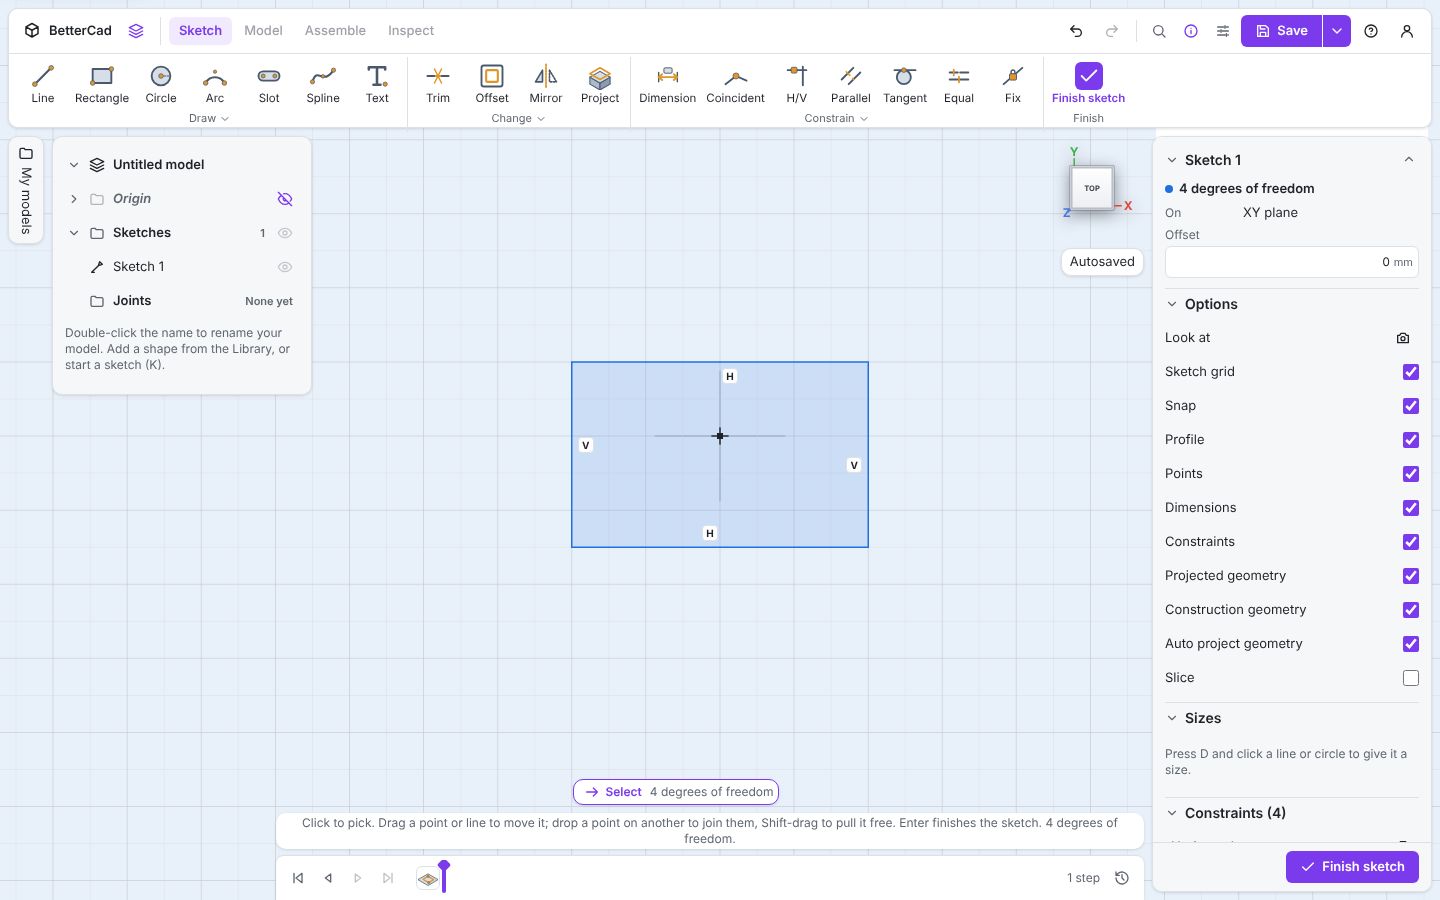
The rectangle is blue, and the Properties panel says 4 degrees of freedom. Drag one of its corners. It stretches. Drag an edge. It slides.
A degree of freedom is one way the sketch can still move. This rectangle has four: it can slide left and right, slide up and down, get wider and get taller.
Notice what it can’t do. It can’t lean over or turn into a kite. The little H and V badges on its sides are why.
Constraints are rules
A constraint is a rule the sketch must obey. BetterCad added four when you drew the rectangle: two sides must stay Horizontal and two must stay Vertical. However you drag it, those rules hold.
Open the Constrain group on the toolbar to see the whole set.
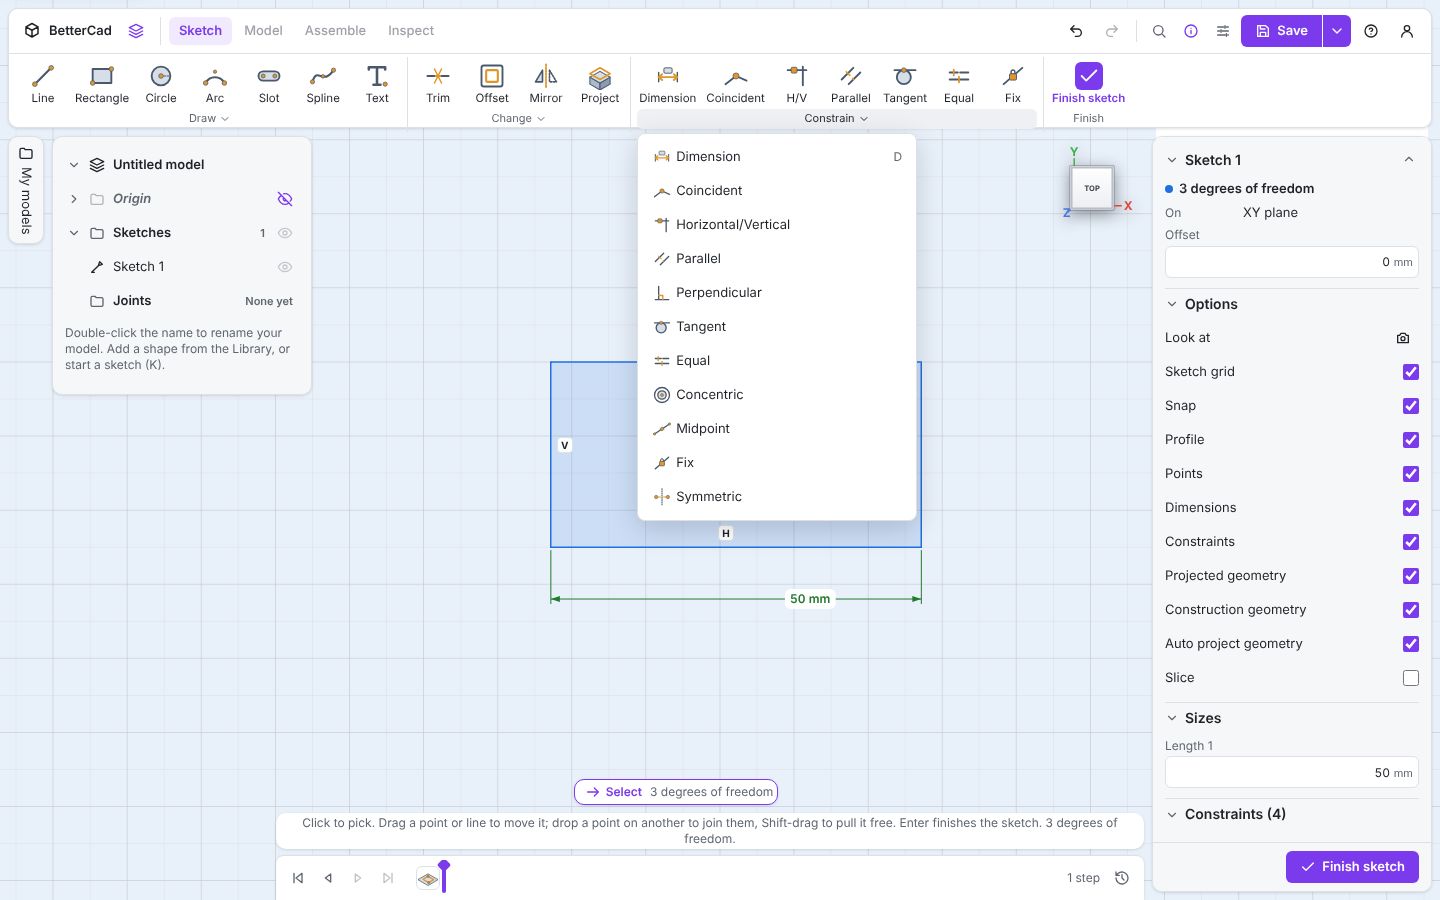
| Constraint | The rule it makes |
|---|---|
| Dimension | This length, distance or angle is exactly this number |
| Coincident | These two points are the same point |
| Horizontal / Vertical | This line stays level or upright |
| Parallel | These two lines point the same way |
| Perpendicular | These two lines meet at 90° |
| Tangent | This line touches this curve smoothly |
| Equal | These two lines are the same length, or these circles the same size |
| Concentric | These circles share a centre |
| Midpoint | This point sits halfway along this line |
| Fix | This point stays exactly where it is |
| Symmetric | These two points mirror each other across a line |
To add one, pick the constraint, then click the things it applies to. Every constraint in the sketch is listed under Constraints in Properties, where you can delete any of them.
Take away a degree of freedom
Each rule you add removes ways the sketch can move.
- Press D for Dimension.
- Click the bottom line of the rectangle, then click below it to place the dimension.
- Type
50and press Enter. Press Esc.
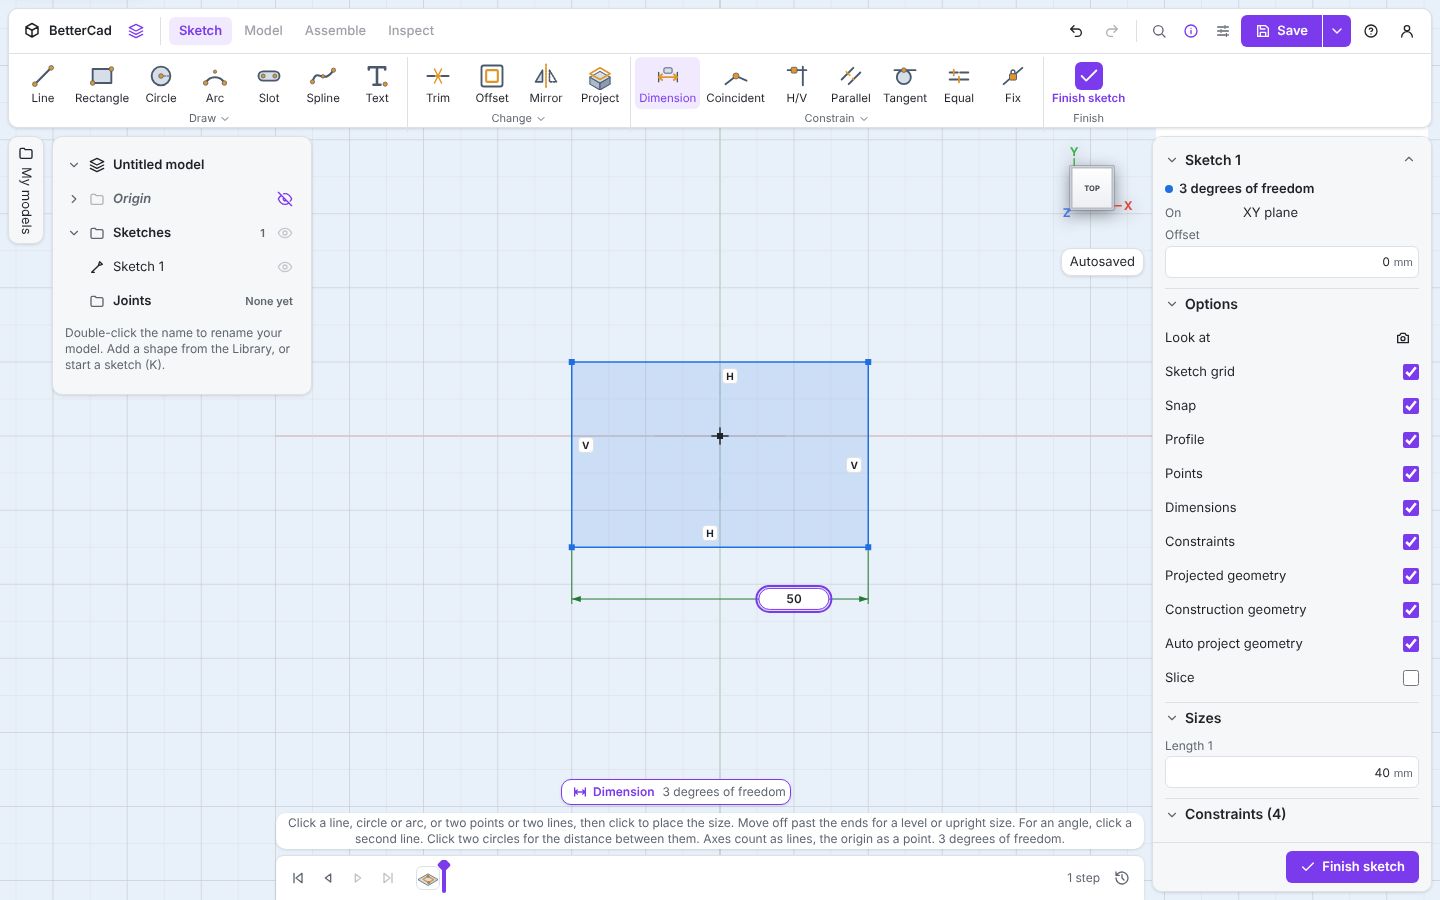
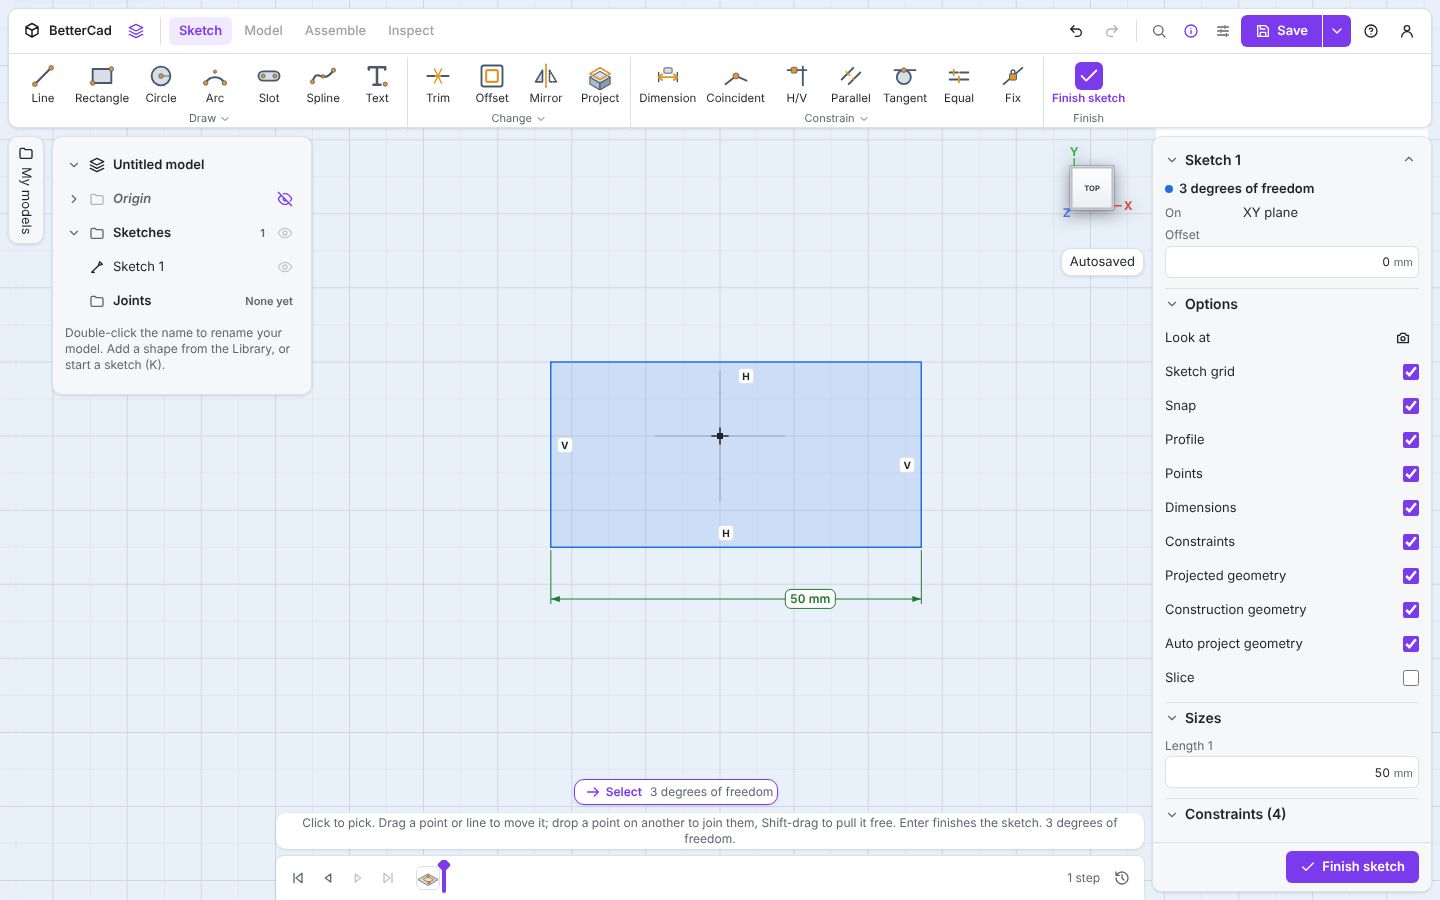
3 degrees of freedom. The width is locked at 50 mm. Drag a corner and the rectangle still slides about and changes height, but it will not get wider.
Fully constrained
When there are no degrees of freedom left, the sketch is fully constrained. Every line turns black, and nothing can be dragged out of place. That’s the goal for any sketch you plan to keep, because a sketch that can’t move by accident is one you can trust later when you change it on purpose.
The quickest way there is to start in the right place. Start another new model and sketch, then:
- Press R and move the pointer to the middle of the sketch, where the two axes cross. A label says Origin.
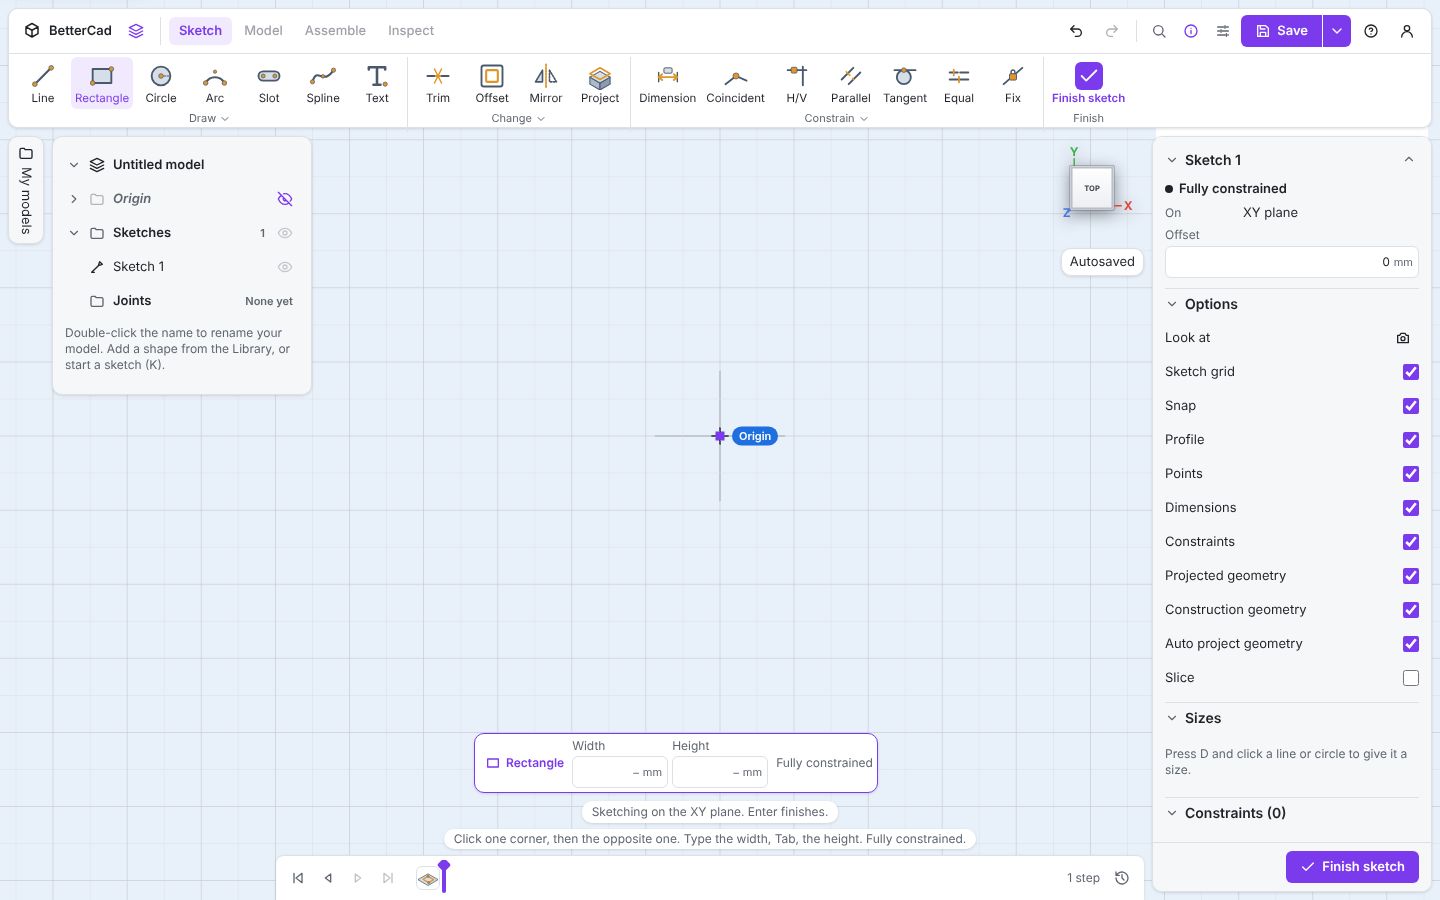
- Click, then move up and to the right.
- Type
50, press Tab, type30, press Enter. Press Esc.
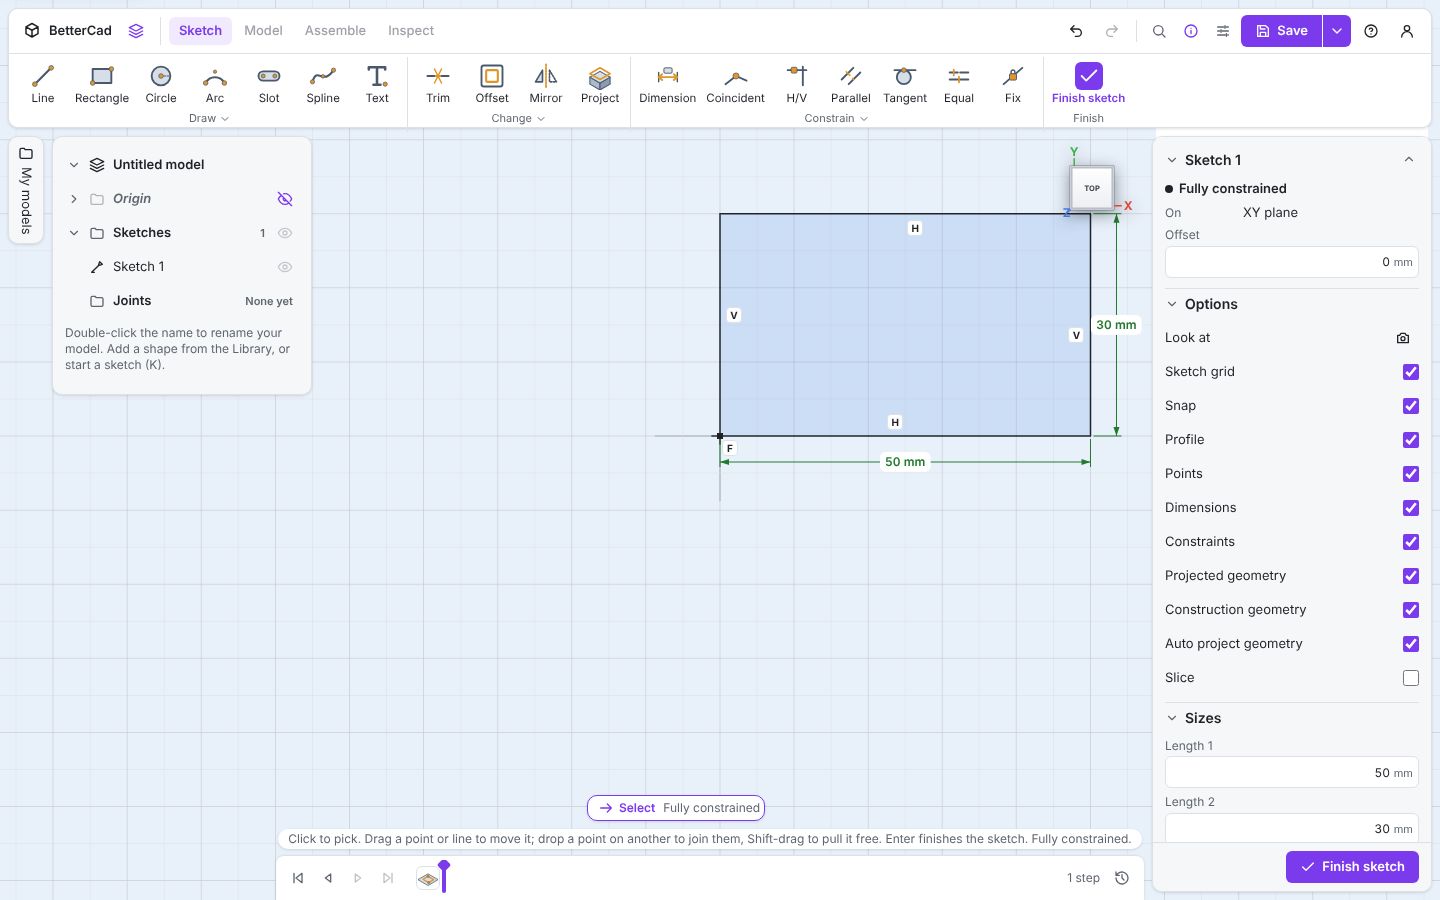
Black lines, and Properties says Fully constrained. Starting on the origin pinned one corner in place (the F badge is a Fix), and typing the sizes locked the width and height. Position, width, height: all four degrees of freedom gone in one move.
Keep this sketch open. You’ll add a hole to it in the next lesson.
What the colours mean
| Colour | Meaning |
|---|---|
| Blue | Can still move. Needs more constraints or dimensions |
| Black | Fully constrained. Can’t move |
| Red | Two rules fight each other. Properties marks them “(fights)”, so delete one |
Try it Yourself
- In a fresh sketch, draw two separate lines with the Line tool (L). Make them Parallel, then Equal. Drag an end and watch both follow.
- Draw a rectangle by eye, then add a Fix to one corner. How many degrees of freedom are left?
- Add a dimension to a rectangle that is already fully constrained. What does BetterCad say?
Common Issues
Problem: My rectangle is still blue after I typed its width and height. Solution: It knows its size but not its position. Start it on the Origin, or add a Fix to one corner. Why: Sliding left-right and up-down are two degrees of freedom that sizes don’t remove.
Problem: The sketch turned red. Solution: Press Ctrl+Z, or delete one of the constraints marked “(fights)” in Properties. Why: Two rules can’t both be true, such as a line that is 50 mm and also equal to a 30 mm line.
Problem: I pressed D twice and the Dimension tool went away. Solution: Press D once more. Why: A tool’s key switches it on and off. Dimension stays on after each size so you can add several in a row.
Check your understanding
Quick quiz 1 of 3
What does a blue line in a sketch tell you?
Quick quiz 2 of 3
A rectangle drawn by eye has four degrees of freedom. What are they?
Quick quiz 3 of 3
Why start a rectangle on the Origin?
You can use the arrows ← → on your keyboard to navigate between lessons.
Comments