The Timeline and Parameters
Go back and change any step of a BetterCad model, and drive its sizes from named parameters so one number resizes the whole part
By Kevin McAleer, 7 Minutes
Page last updated November 20, 2026

The strip along the bottom of the screen has been quietly filling up with icons. That’s the timeline: the recipe for your model. BetterCad doesn’t store the finished shape. It stores the steps and rebuilds the shape from them. So you can go back and change step 2 of 10, and steps 3 to 10 simply run again.
Read the timeline
Your enclosure has ten steps. Hover any icon to see what it did.
Click the History button at the right-hand end of the timeline for the same thing as a list.
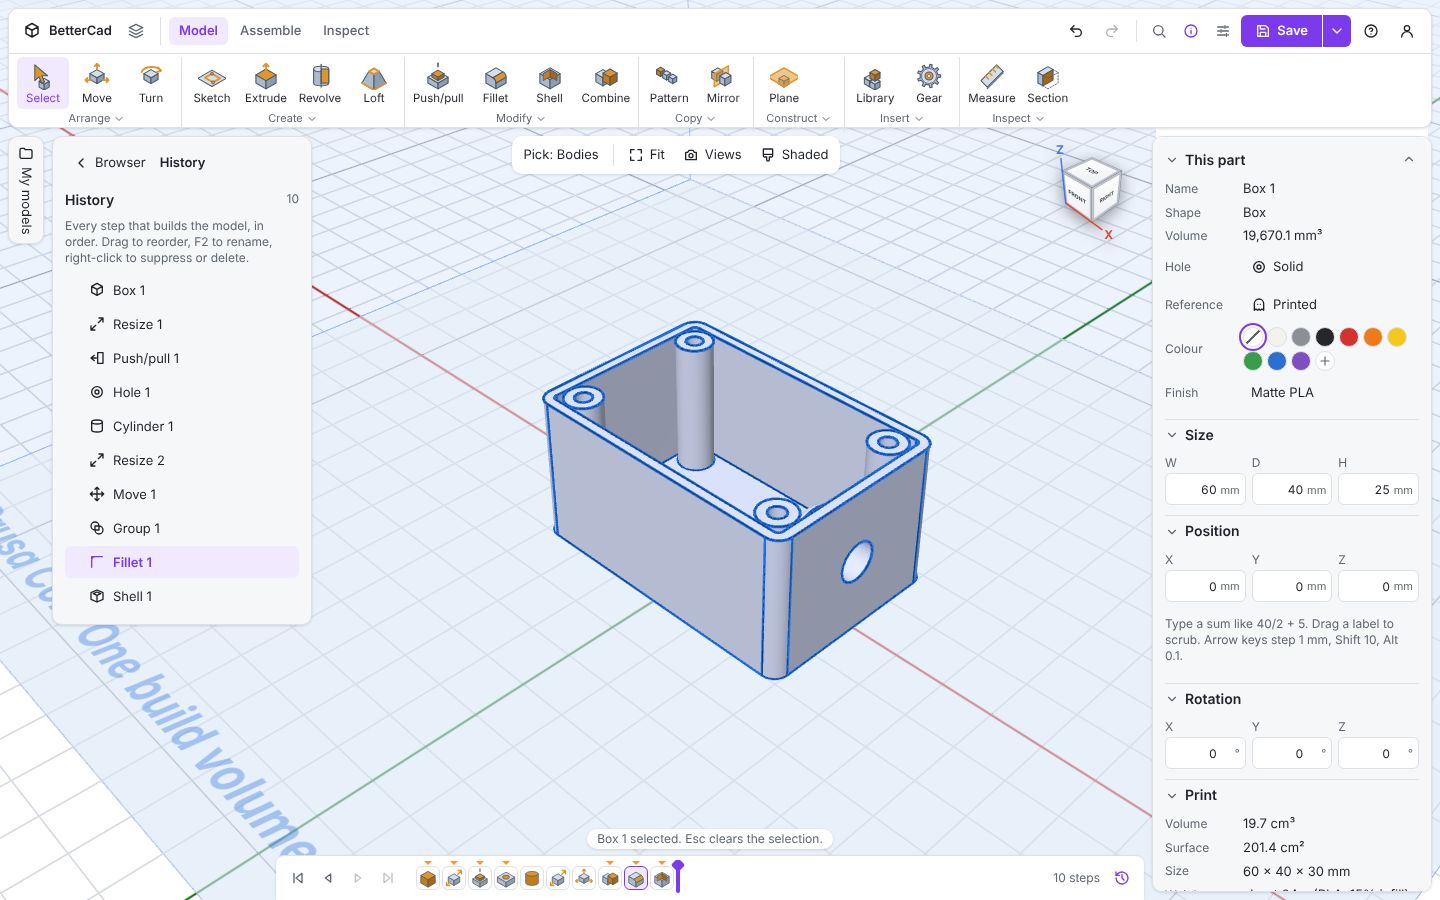
Box, Resize, Push/pull, Hole, Cylinder, Resize, Move, Group, Fillet, Shell. That’s everything you did in the last three lessons, in order. In this list you can drag a step to reorder it, press F2 to rename it, or right-click to suppress or delete it. A suppressed step is skipped but not lost, which is a quick way to ask “what would this look like without the fillet?”
Change an earlier step
Double-click the Fillet 1 step on the timeline.
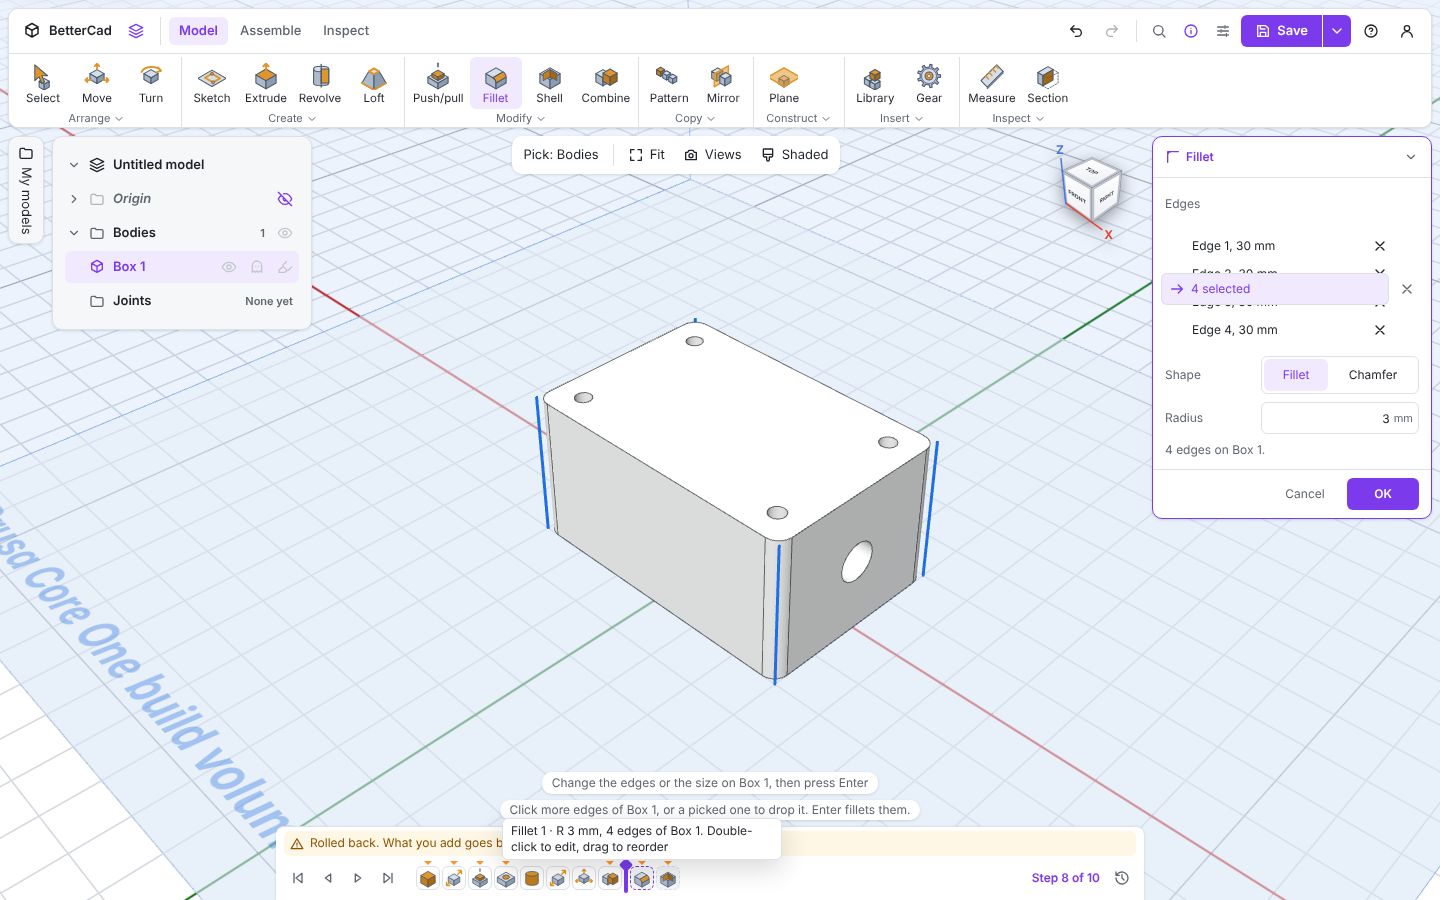
Two things happen. The Fillet panel opens with the settings you used, ready to change. And the model rolls back to how it was at that moment: solid, before the shell.
Change the radius to 5 and press Enter. The shell step runs again on the new shape and you’re back at the end, with rounder corners inside and out. Press Ctrl+Z if you preferred 3 mm.
Roll back and add a step
You can also step back without editing anything. The four buttons at the left of the timeline are Roll back to the start, Step back (Alt+←), Step forward (Alt+→) and Go to the end.
Click Step back once.
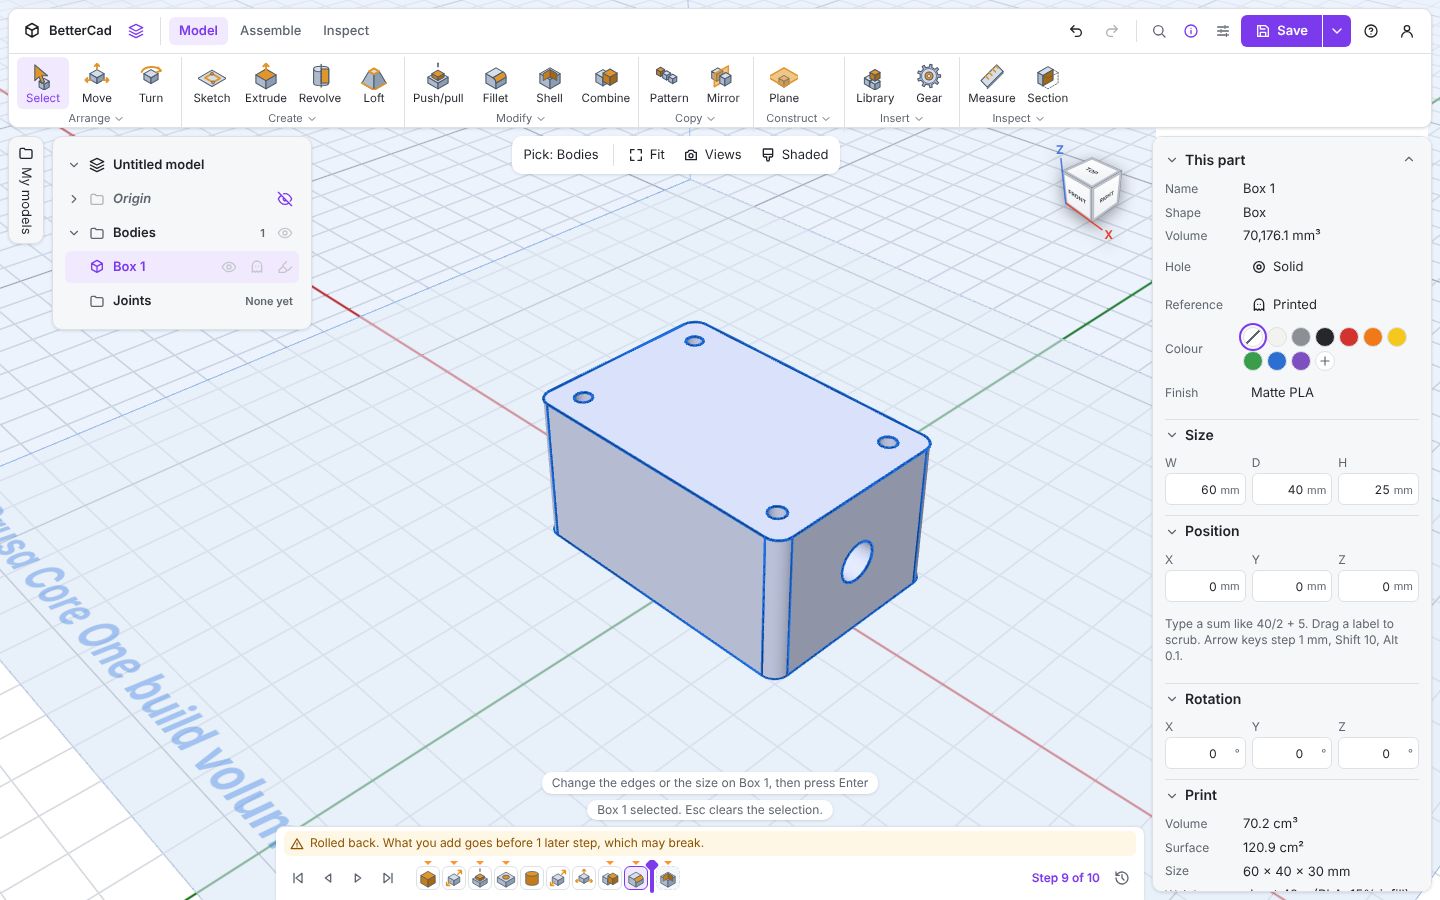
The marker moves to step 9 of 10, the shell is undone for now, and a warning appears: Rolled back. What you add goes before 1 later step, which may break.
Anything you do now is slotted in before the shell. This is how you’d add a fifth screw hole and still get a post around it. Click Go to the end when you’re done.
“May break” is honest. A later step might depend on something you change. If you delete an edge that a fillet was rounding, that fillet has nothing to work on, and BetterCad marks the step so you can fix it.
Give a size a name
Suppose you want the enclosure 80 mm wide. You could edit the Resize step. But widths have a habit of mattering in several places, so give this one a name.
- Click Parameters on the top bar.
- Click Add parameter.
- Name it
widthand give it the expression60.
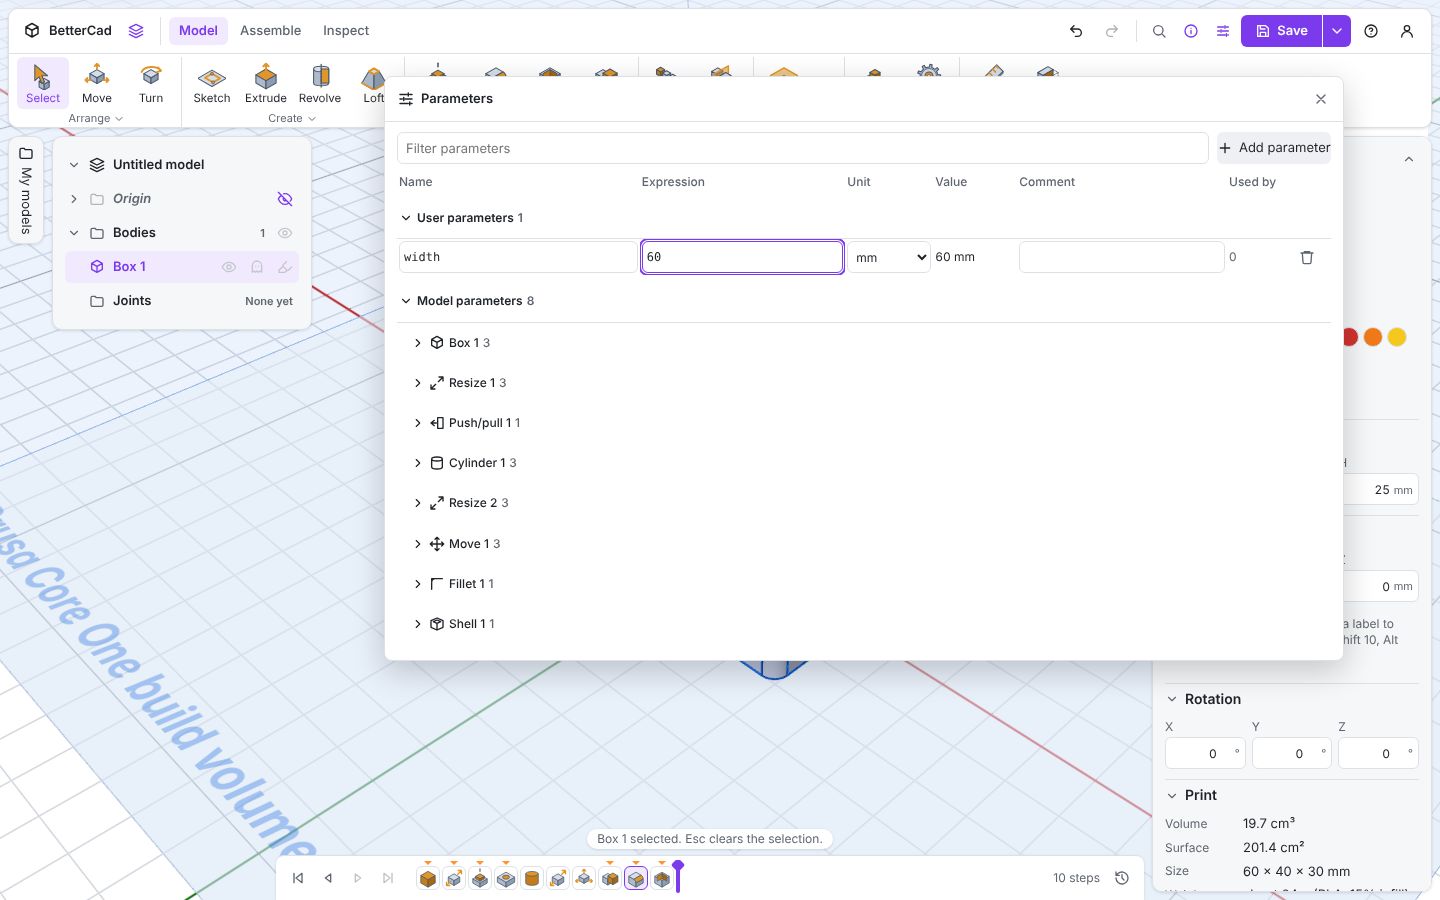
Below your parameter, Model parameters lists every number already in the model, step by step. Close the panel.
- Double-click the Resize 1 step on the timeline. BetterCad says Change Resize 1 in Properties. 8 later steps rebuild after it and may break.
- In Properties, click W, type
widthand press Enter.
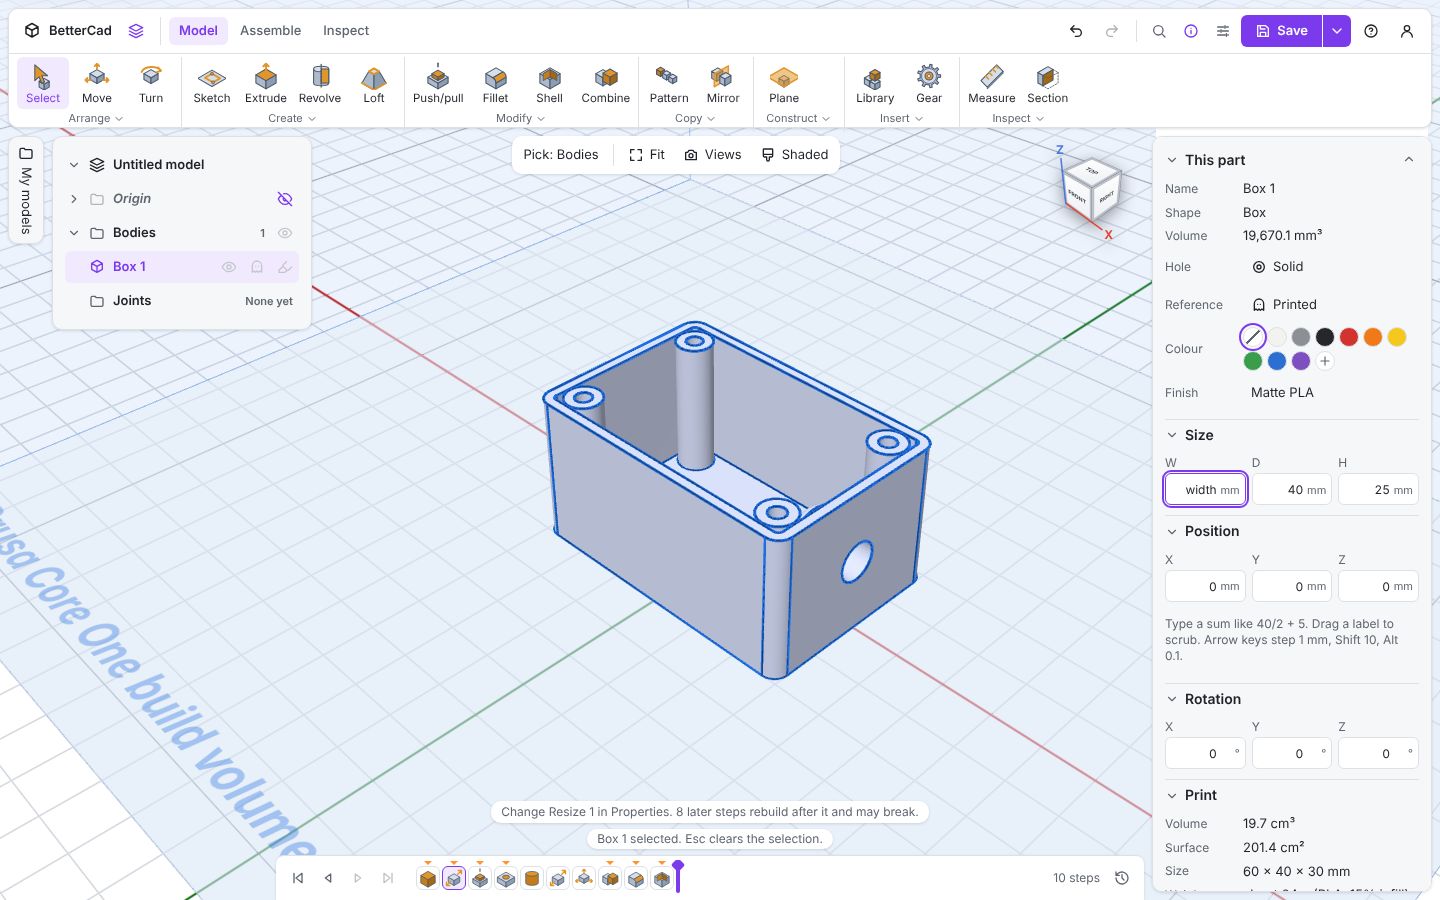
Nothing moves, because width is 60. But the box’s width is no longer the number 60. It’s whatever width is.
Change it once
- Open Parameters again.
- Change the expression for
widthto80and press Enter.
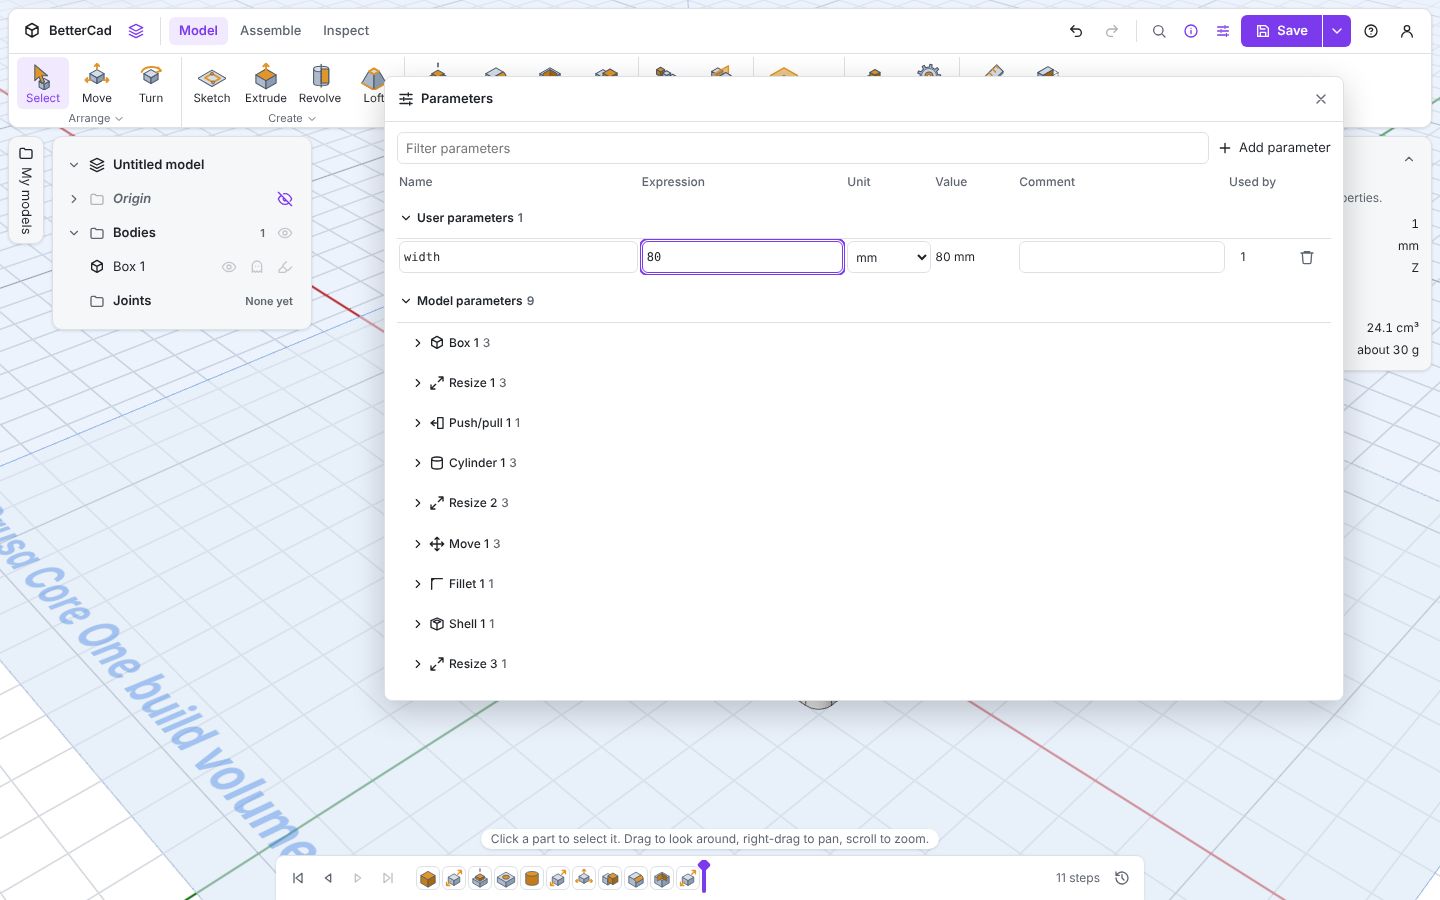
- Close the panel and click Fit.
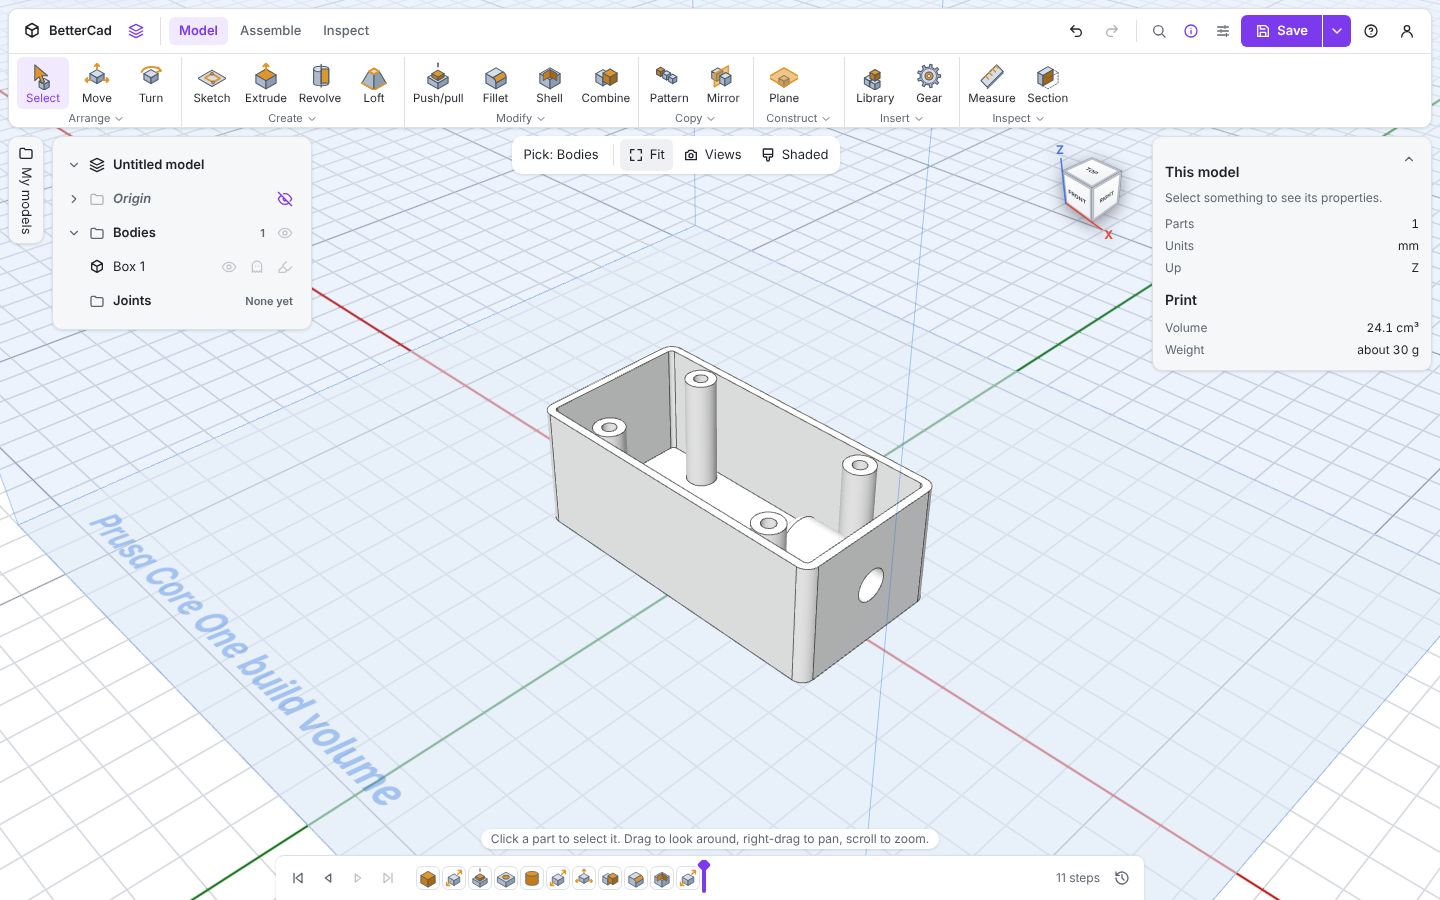
The whole recipe ran again: a wider box, pulled up 5 mm, holes, cable cut-out, fillets and shell.
Now look at the screw posts and the cable hole. The posts are still 24 mm either side of the centre and the cable hole is still 20 mm along, because those are the numbers you typed in lesson 7. It’s the same lesson as the hole in the plate: a typed number stays put.
The cable hole is easy to fix. Double-click the Move 1 step and, in Properties, replace the X position 20 with width / 2 - 10. From now on it follows the end wall.
The Hole tool is different. Its boxes take numbers and sums but not parameter names, so edit the Hole 1 step and type the new positions. When holes really must follow a size, draw them as circles in a sketch, dimension them with the parameter, and extrude the sketch as a cut.
That’s a parametric model. The more sizes you tie to parameters, the more of the design survives a change of mind.
What a parameter can be
| Expression | Meaning |
|---|---|
60 |
A plain number |
width / 2 |
Half of another parameter |
width - 2 * wall |
Sums using several parameters |
(width + 10) / 3 |
Brackets work as you’d expect |
Parameter names work in these places:
- The size, position and rotation boxes in Properties
- Sketch dimensions
- Extrude distances
The Hole, Fillet and Shell panels take plain numbers and sums. If you type a name there, BetterCad says “No value called width”.
The Used by column in the Parameters panel shows how many places each parameter drives.
Good parameters to make first are the ones you’d change for a different job: the overall width, the wall thickness, the size of the thing that has to fit inside.
Try it Yourself
- Add a
depthparameter of40and type it into D of the Resize 1 step. Then try50. - Make the cable hole follow the width as described above, then set
widthto100. - Suppress the Shell step from the History panel. What does the model look like? Bring it back.
Common Issues
Problem: I changed an early step and a later one now shows a warning. Solution: Double-click the marked step and pick its edges or faces again. Why: The step referred to something that no longer exists in the same form.
Problem: “No value called width” when I type a parameter name. Solution: Check the spelling in the Parameters panel, and that you’re in a box that takes names: sizes and positions in Properties, sketch dimensions and extrude distances. Why: The name must match a parameter exactly, and some tool panels only take numbers.
Problem: I added a step and it ended up in the middle of the timeline. Solution: Click Go to the end before you carry on working. Why: New steps go wherever the marker is. After a roll back, that’s not the end.
Check your understanding
Quick quiz 1 of 3
What does BetterCad store for your model?
Quick quiz 2 of 3
You roll back two steps and add a hole. Where does the new step go?
Quick quiz 3 of 3
Why type width into a size box in place of 60?
You can use the arrows ← → on your keyboard to navigate between lessons.
Comments