Saving, Sharing and Printing
Save BetterCad models to a file or your account, share a link, and use the Print panel to check a part before it reaches the printer
By Kevin McAleer, 7 Minutes
Page last updated November 20, 2026

You can design a part now. This lesson is about looking after it: where your work is kept, how to hand it to someone else, and how to catch print problems while they’re still free to fix.
Where your work lives
BetterCad autosaves. A few seconds after you stop making changes, the model is written to your browser’s storage, and a small Autosaved note appears. Close the tab by accident and the next visit offers to recover it.
That’s a safety net, not a filing system. Browser storage belongs to one browser on one computer, and clearing your browsing data clears it. For anything you care about, save it properly.
Save to a file
Press Ctrl+S, or click Save. Your model is saved as a .bcad file.
| Browser | What Save does |
|---|---|
| Chrome, Edge | Asks where to put the file the first time, then writes straight back to it on every save |
| Safari, Firefox | Downloads a fresh .bcad each time |
A .bcad file holds the recipe: your timeline, sketches and parameters. It’s small, and it opens with the whole history intact. An STL is the finished shape only. Keep the .bcad. You can always make another STL from it, but never the other way round.
The arrow beside Save opens the rest of the file menu.
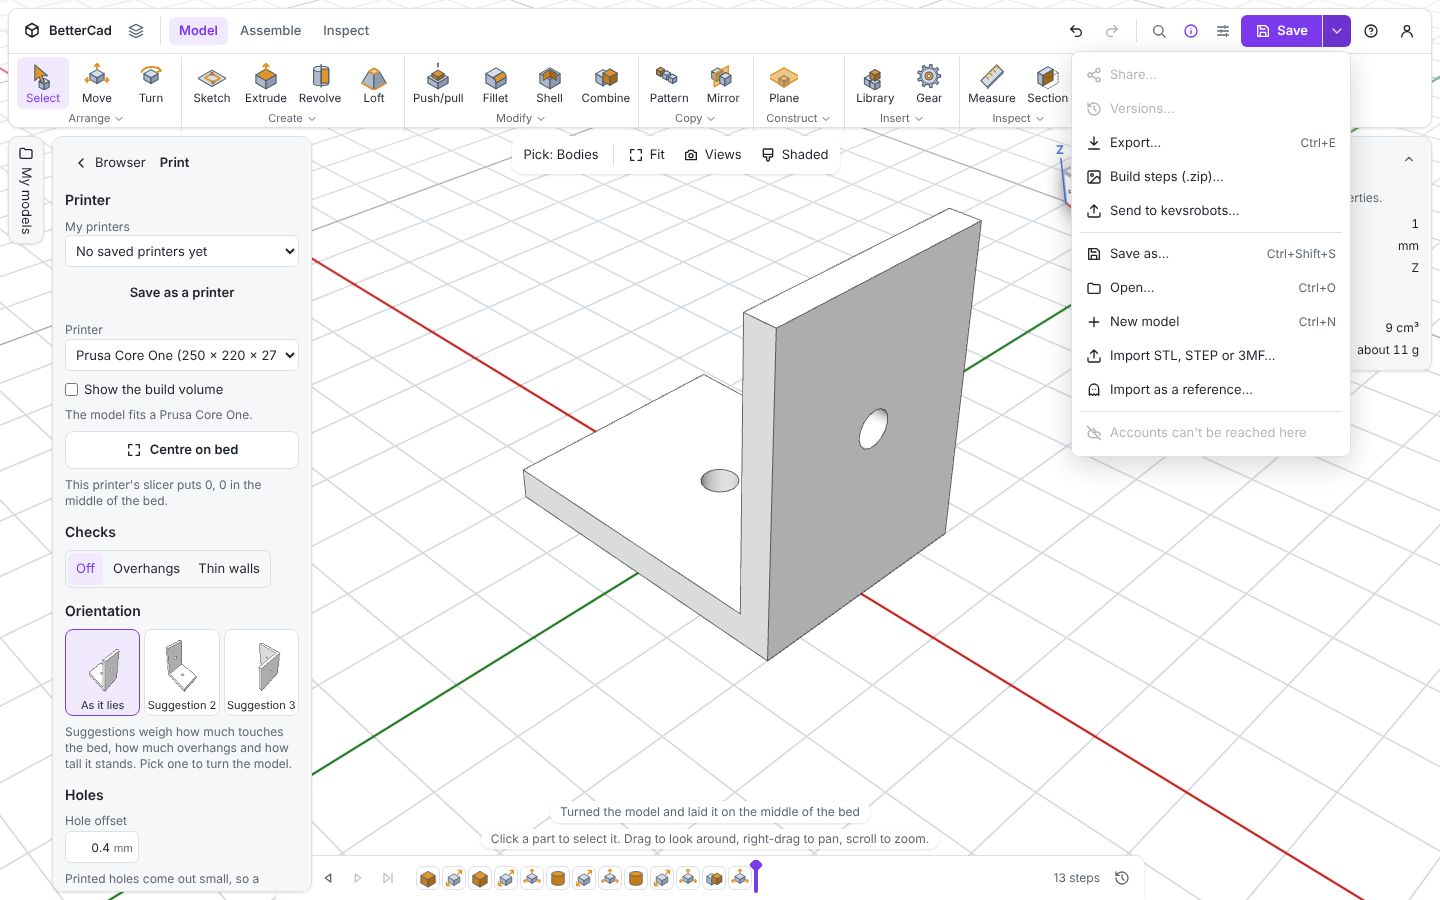
| Item | What it does |
|---|---|
| Share… | Makes a link to a model in your account |
| Versions… | Earlier saves of a model in your account |
| Export… | STL, 3MF, STEP and more, as in lesson 3 |
| Build steps (.zip)… | A picture of every timeline step with a written guide |
| Send to kevsrobots… | Sends those build steps to one of your kevsrobots projects |
| Save as…, Open…, New model | The usual file commands |
| Import STL, STEP or 3MF… | Brings someone else’s part into your model |
Build steps deserves a second look. It turns your timeline into illustrated instructions, which is most of a build guide written for you.
Save to your account
BetterCad never needs an account. But if you sign in with your kevsrobots.com account, three things are added:
- My models: your designs on any computer, not just this one
- Versions: every save is kept, so you can look at last Tuesday’s attempt and restore it
- Share links: a link anyone can open to spin the model round, measure it, download it or open their own copy
A shared link opens read-only and needs no account to view. It’s a good way to show a design in a Discord chat or ask “will this print?”
Get ready to print
Open the account menu at the top right and choose Print settings. The Print panel opens where the Browser was. Open the Bracket sample to follow along.
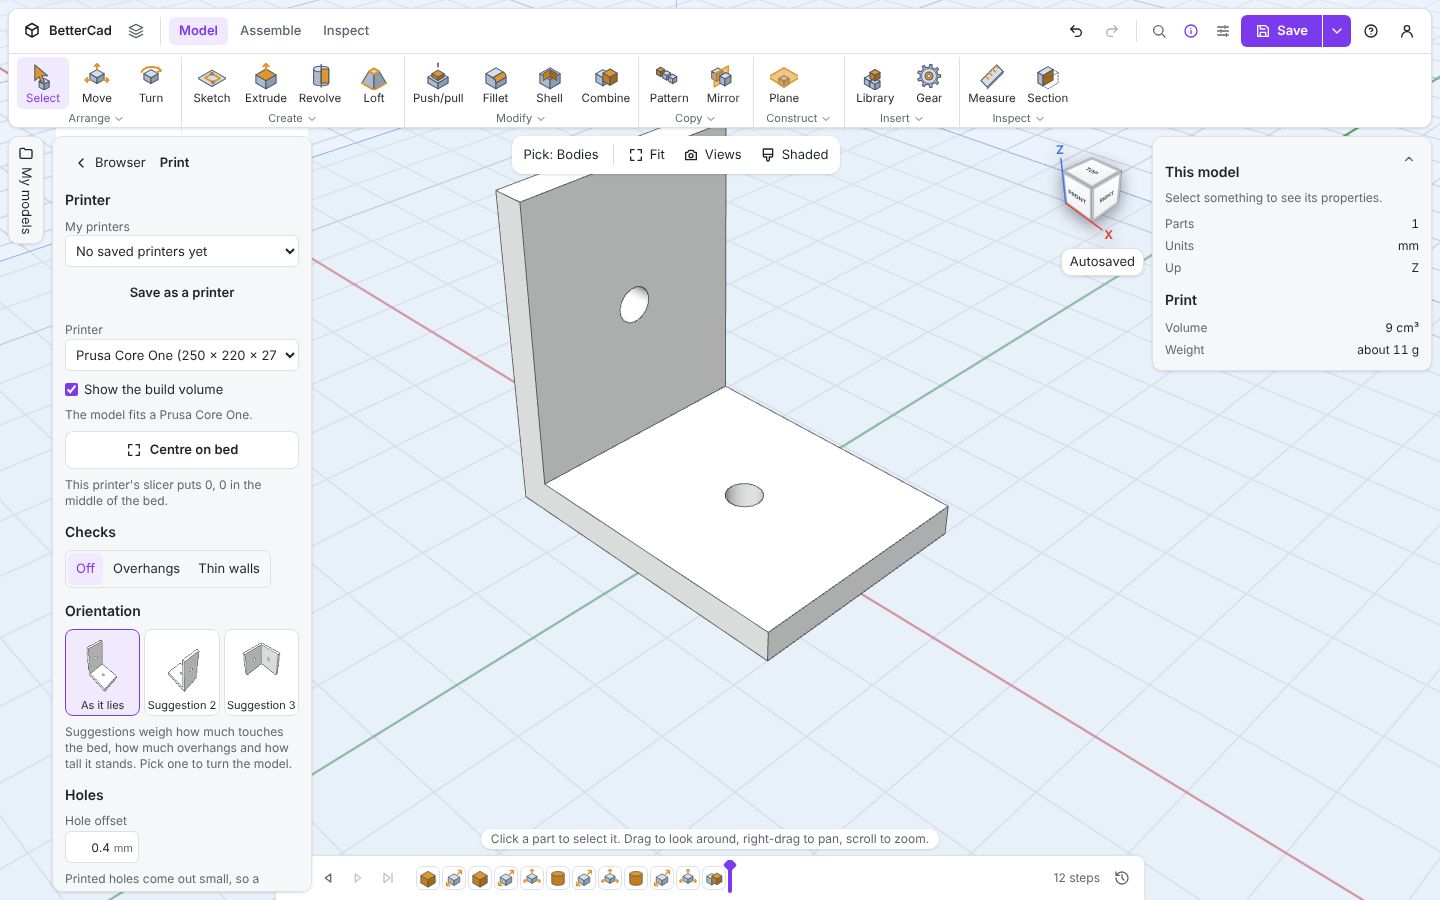
Start at the top. Pick your Printer from the list, or choose Custom and type your bed size. BetterCad draws the build volume around the model and tells you whether it fits: The model fits a Prusa Core One. Centre on bed moves the model to the middle with its lowest point on the plate.
Overhangs
Under Checks, click Overhangs.
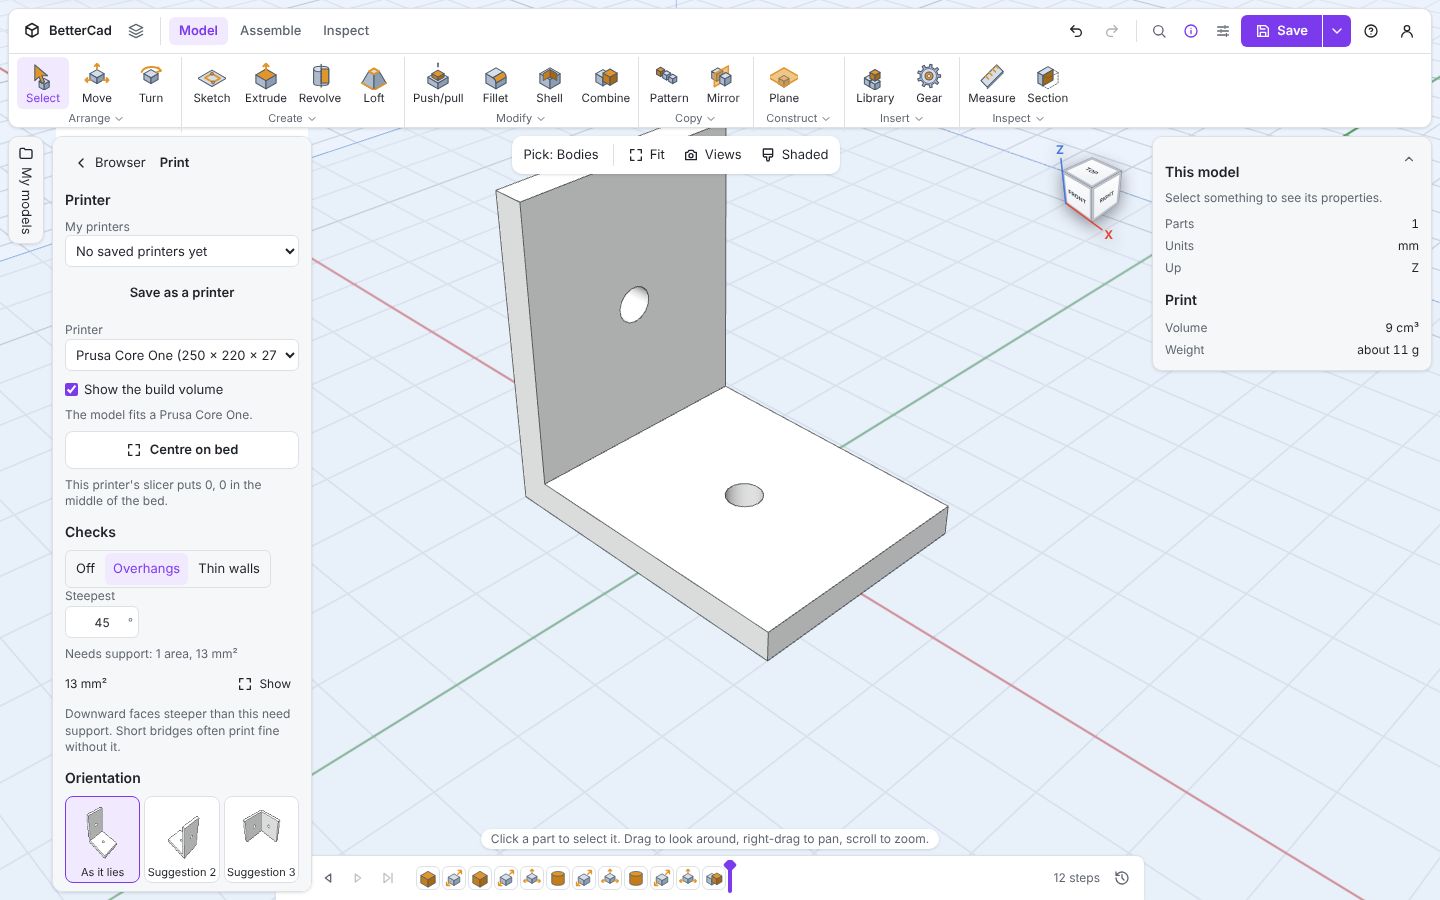
Anything that would print in mid-air is tinted and listed. The bracket reports Needs support: 1 area, 13 mm². That’s the top of the hole in the upright: a small roof with nothing under it. An area that size will bridge without trouble, and now you know it’s there before the printer finds it for you.
The limit is 45° by default, which suits most printers.
Thin walls
Click Thin walls.
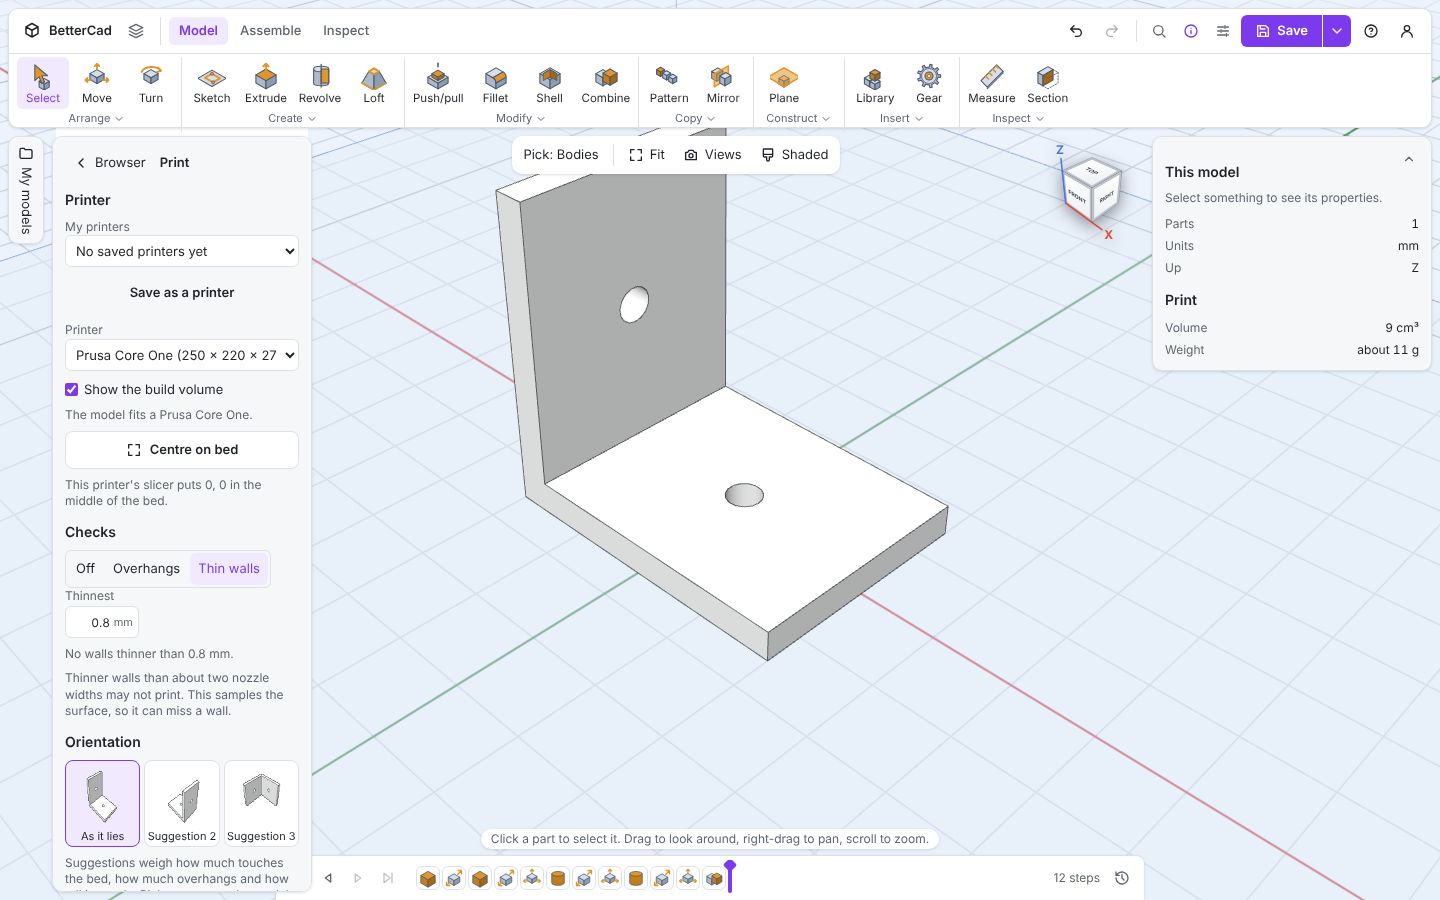
Walls thinner than about two nozzle widths (0.8 mm with a standard nozzle) may not print at all. The bracket passes: No walls thinner than 0.8 mm.
Orientation
How a part lies on the bed changes its strength, its finish and whether it needs support. Under Orientation, BetterCad offers the model as it lies and two alternatives. Click Suggestion 2.
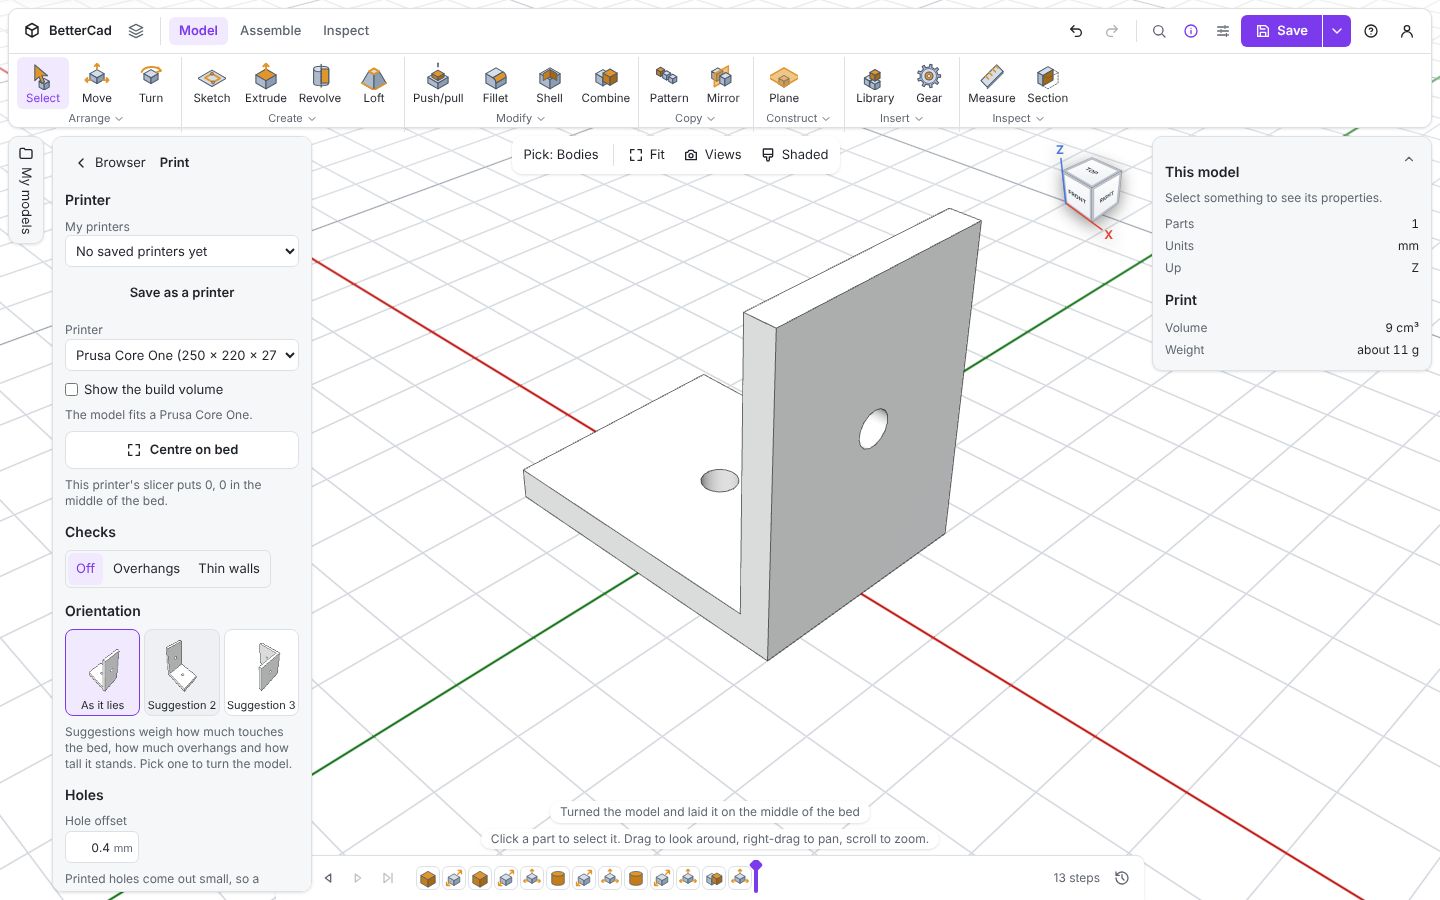
BetterCad reports Turned the model and laid it on the middle of the bed. The suggestions weigh how much touches the bed, how much overhangs and how tall the part stands. Turning the model is a step on the timeline, so Ctrl+Z puts it back.
The rest of the panel
Further down are the Hole offset and Fits settings that tune holes and push-fits to your own printer, and Material and Infill, which feed the weight estimate in Properties. The follow-on course, Print It Right, covers those properly.
A pre-flight checklist
Before any print:
- Does it fit the bed?
- Is the biggest flat face down?
- Overhang check: anything large that needs support, and can a chamfer or a turn remove it?
- Thin wall check: anything under 0.8 mm?
- Export a 3MF, and keep the
.bcad.
Try it Yourself
- Run both checks on your enclosure from lessons 6 to 9. Does the cable hole show up as an overhang?
- Open the Phone stand sample and run the overhang check. What does BetterCad say?
- Use Build steps (.zip)… on your enclosure and open the guide it writes.
Common Issues
Problem: I closed the tab without saving. Solution: Open BetterCad again in the same browser and accept the offer to recover the model. Why: Autosave keeps your recent models in the browser’s storage.
Problem: Share is greyed out, or asks me to sign in. Solution: Sign in and save the model to your account first. Why: A share link points at a model stored on the server. A file on your computer can’t be linked to.
Problem: The overhang check flags a flat span between two walls. Solution: If it’s short, ignore it. Printers can bridge a gap of a few centimetres. Why: The check doesn’t recognise bridges yet, so it flags every downward face.
Check your understanding
Quick quiz 1 of 3
Why keep the .bcad file as well as the STL?
Quick quiz 2 of 3
What does the overhang check highlight?
Quick quiz 3 of 3
Do you need an account to design and export a part in BetterCad?
You can use the arrows ← → on your keyboard to navigate between lessons.
Comments