Look Around and Sketch
Learn to move around the 3D view in BetterCad, then draw your first sketch, a 40 by 20 mm rectangle
By Kevin McAleer, 5 Minutes
Page last updated November 20, 2026

Every part in this course starts the same way: a flat drawing, called a sketch, that you then pull into 3D. In this lesson you’ll learn to move around and draw one.
Look around
Start with an empty model. If the start card is in the way, press Esc.
Drag to look around. Right-drag or drag two fingers to pan, scroll or pinch to zoom.
Try all three:
| To | Mouse | Trackpad or touch |
|---|---|---|
| Turn the view | Drag | Drag with one finger |
| Slide the view (pan) | Right-drag | Drag with two fingers |
| Zoom | Scroll | Pinch |
Lost? Click Fit above the view to bring everything back into frame, or click a face of the view cube. The arrow keys turn the view too.
The red line is the X axis, green is Y, and Z points up. Everything in BetterCad is in millimetres.
Start a sketch
Press Sketch (K) and click the ground. Draw a rectangle with R, then press Enter to finish the sketch.
Let’s take that one piece at a time.
- Press K, or click Sketch in the toolbar.
BetterCad asks where to draw: Click a face or a plane to sketch on it. As you move the pointer, the three planes light up.
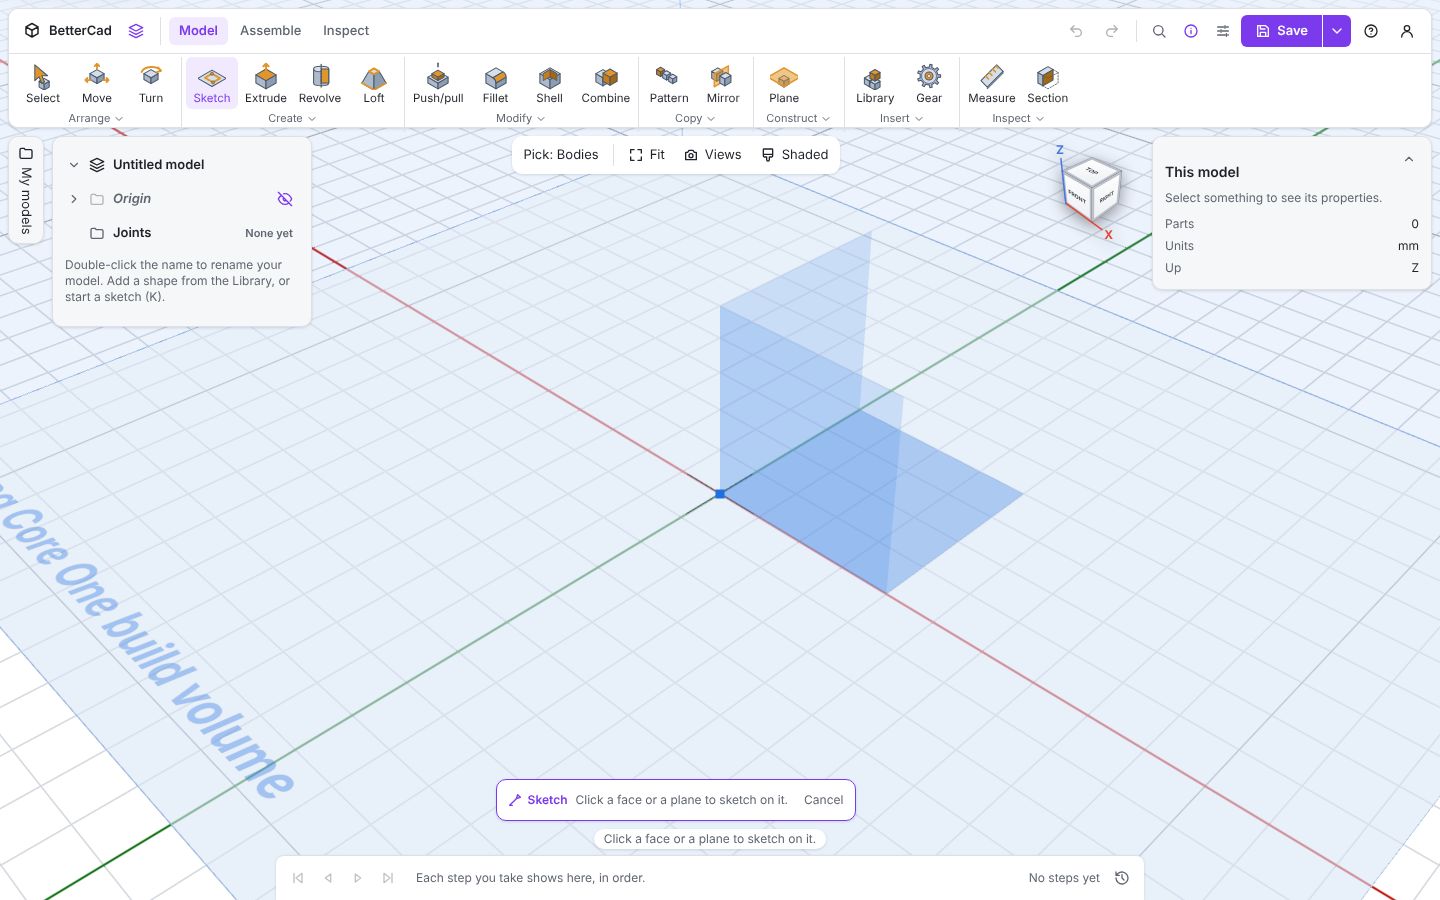
- Click the ground, the flat plane.
The view turns to look straight down, and the toolbar changes to the Sketch tools: Line, Rectangle, Circle, Arc and friends.
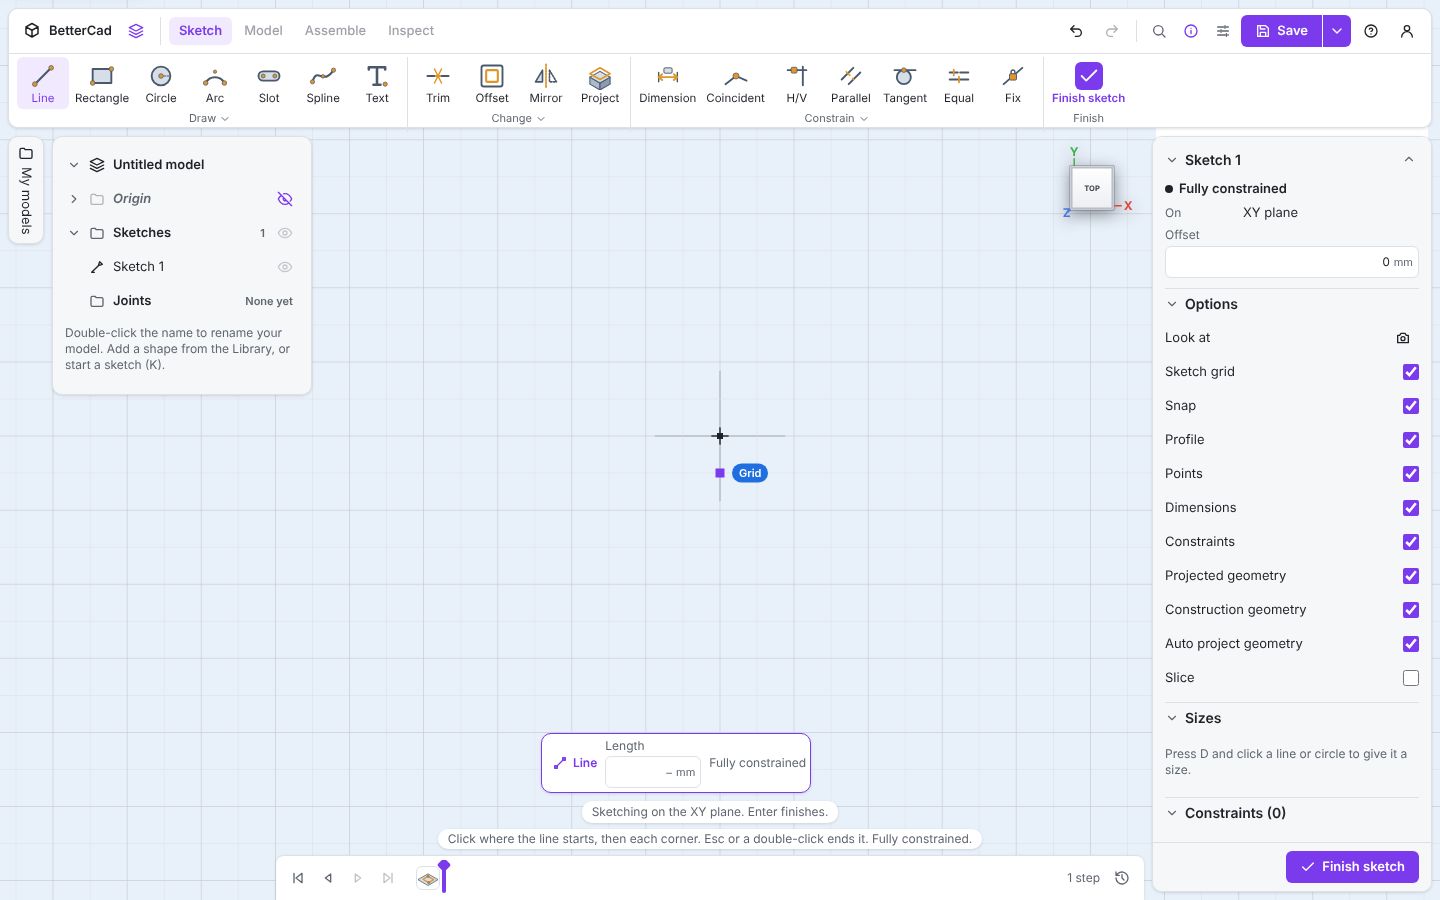
The black cross in the middle is the origin, the centre of your model’s world.
Draw a rectangle
- Press R for the Rectangle tool.
- Click once for the first corner.
- Move the pointer away. Don’t click yet.
- Type
40, press Tab, type20.
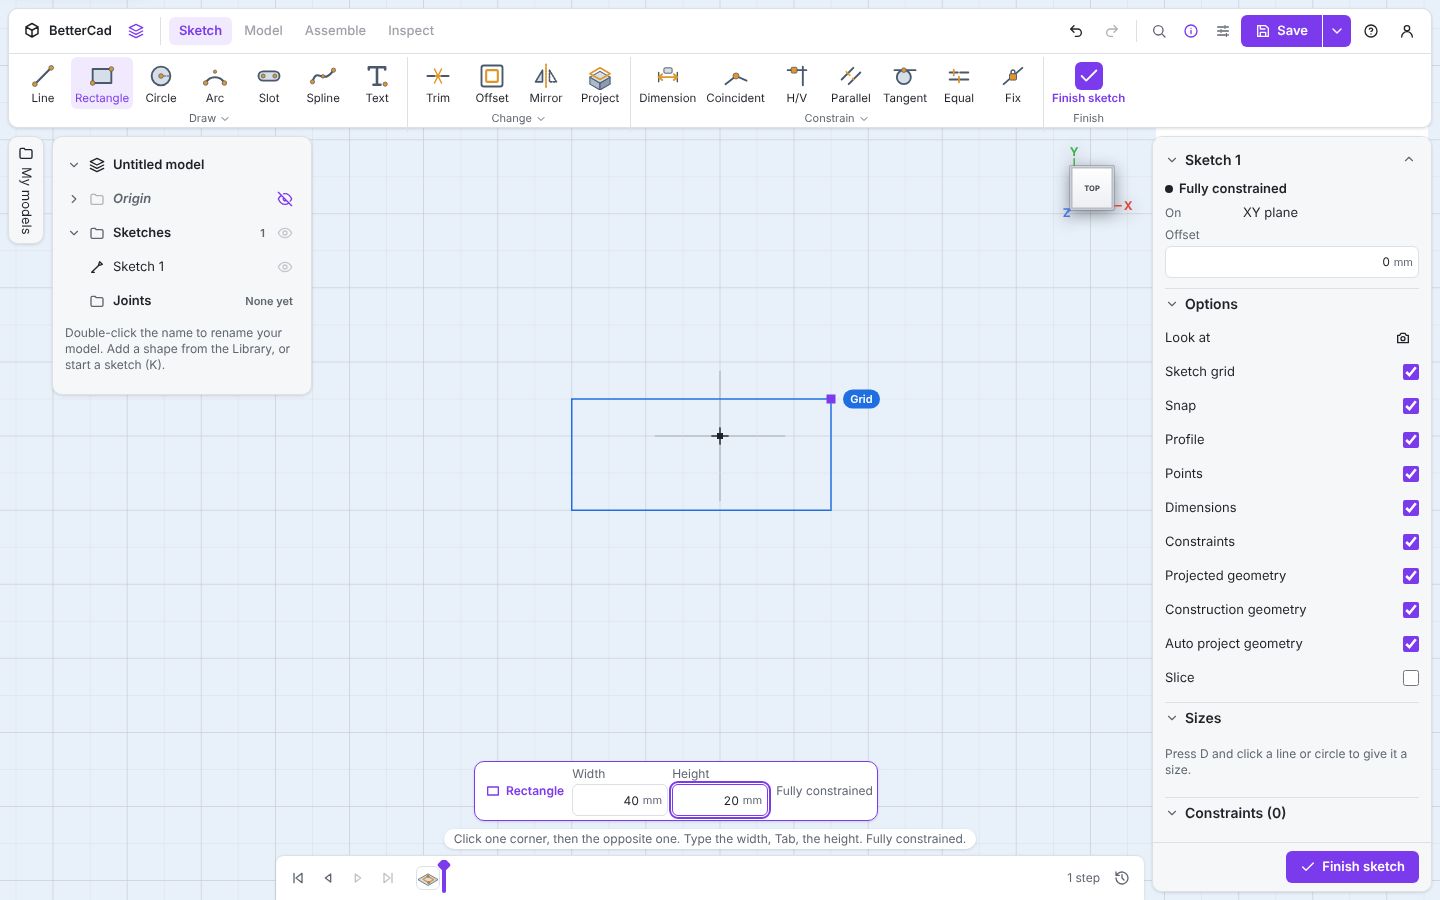
- Press Enter.
You have a 40 × 20 mm rectangle, with its sizes shown in green.
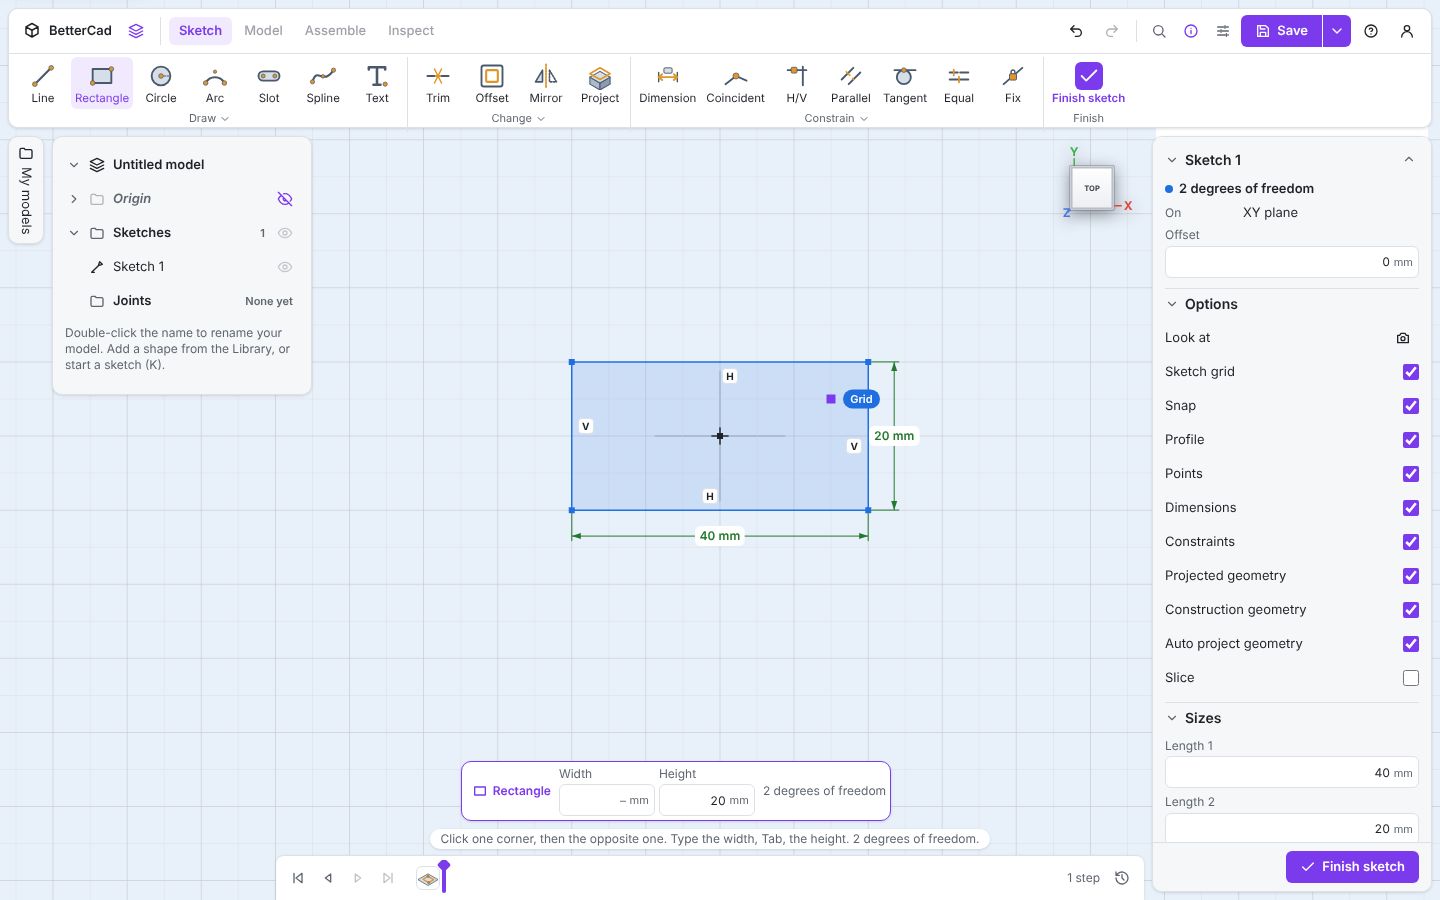
Typing sizes as you draw is the BetterCad way. You can click the second corner by eye and fix the size later, but typing is quicker and the number is exact.
The little H and V marks say the lines are horizontal and vertical. The status line says 2 degrees of freedom. Lesson 4 explains both. For now, they mean the rectangle is the right size but could still slide about.
Finish the sketch
- Press Esc to put the Rectangle tool down.
- Press Enter, or click Finish sketch.
The view swings back to 3D, and your rectangle is lying on the ground. Look at the Browser: there’s a Sketches folder with Sketch 1 in it. Look at the timeline: one step.
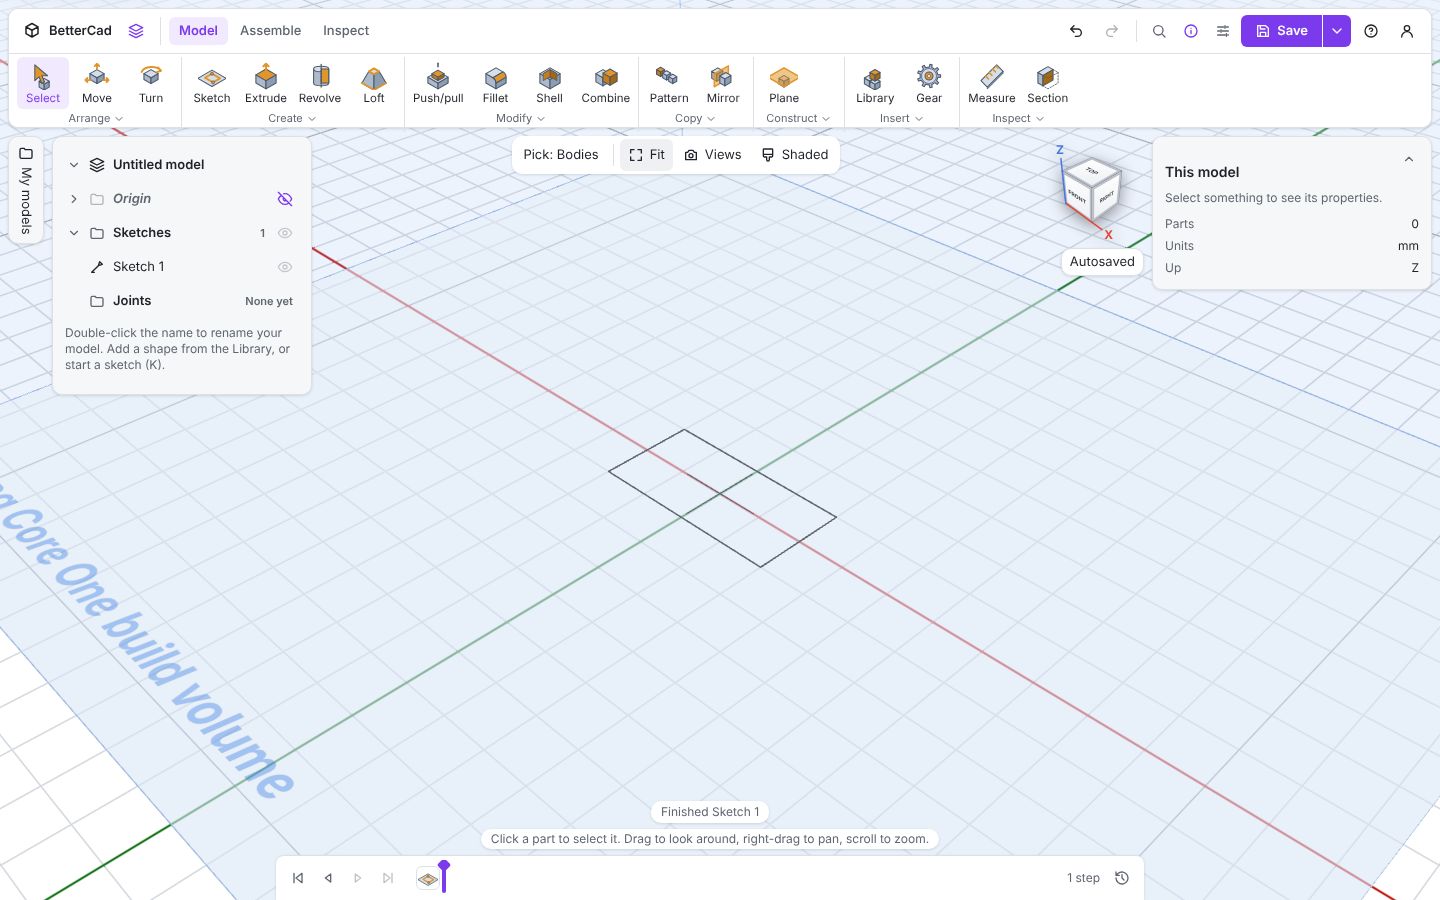
That flat outline is called a profile. In the next lesson you’ll pull it up into a solid.
Try it Yourself
- Double-click Sketch 1 in the Browser to open it again. Double-click the
40 mmsize and change it to50. - Start a second sketch and draw a circle with C. Click the centre, move away, type a diameter and press Enter.
- Press Ctrl+Z until you’re back to one 40 × 20 rectangle. You’ll need it for the next lesson.
Common Issues
Problem: Pressing K or R does nothing. Solution: Click on the 3D view first, then press the key. Why: Single-letter shortcuts are switched off while the cursor is in a text box, so typing a size never fires a tool by accident.
Problem: BetterCad asks about an open shape when I finish. Solution: Make sure the ends of your lines meet. Drag one end onto the other to join them. Why: Only a closed shape can become a solid. An open one has no inside.
Problem: My rectangle is tiny or off screen. Solution: Scroll to zoom, or right-drag to pan. This works while you’re sketching too. Why: The view starts zoomed out so the whole printer bed fits.
Check your understanding
Quick quiz 1 of 3
Which key starts a sketch?
Quick quiz 2 of 3
How do you give a rectangle an exact size while drawing it?
Quick quiz 3 of 3
What must a sketch shape be before it can become a solid?
You can use the arrows ← → on your keyboard to navigate between lessons.
Comments