Wire It Up - Electronics in Snakie
Learn to plan, wire and check a circuit on screen in Snakie's Electronics workspace, then build a two-wheeled obstacle-avoiding robot
By Kevin McAleer, 4 Minutes
Page last updated November 20, 2026

Overview
Most wiring mistakes are made in the first five minutes: a wire one pin along, power and ground the wrong way round, two supplies joined that should never meet. On a real breadboard you find out when something gets hot.
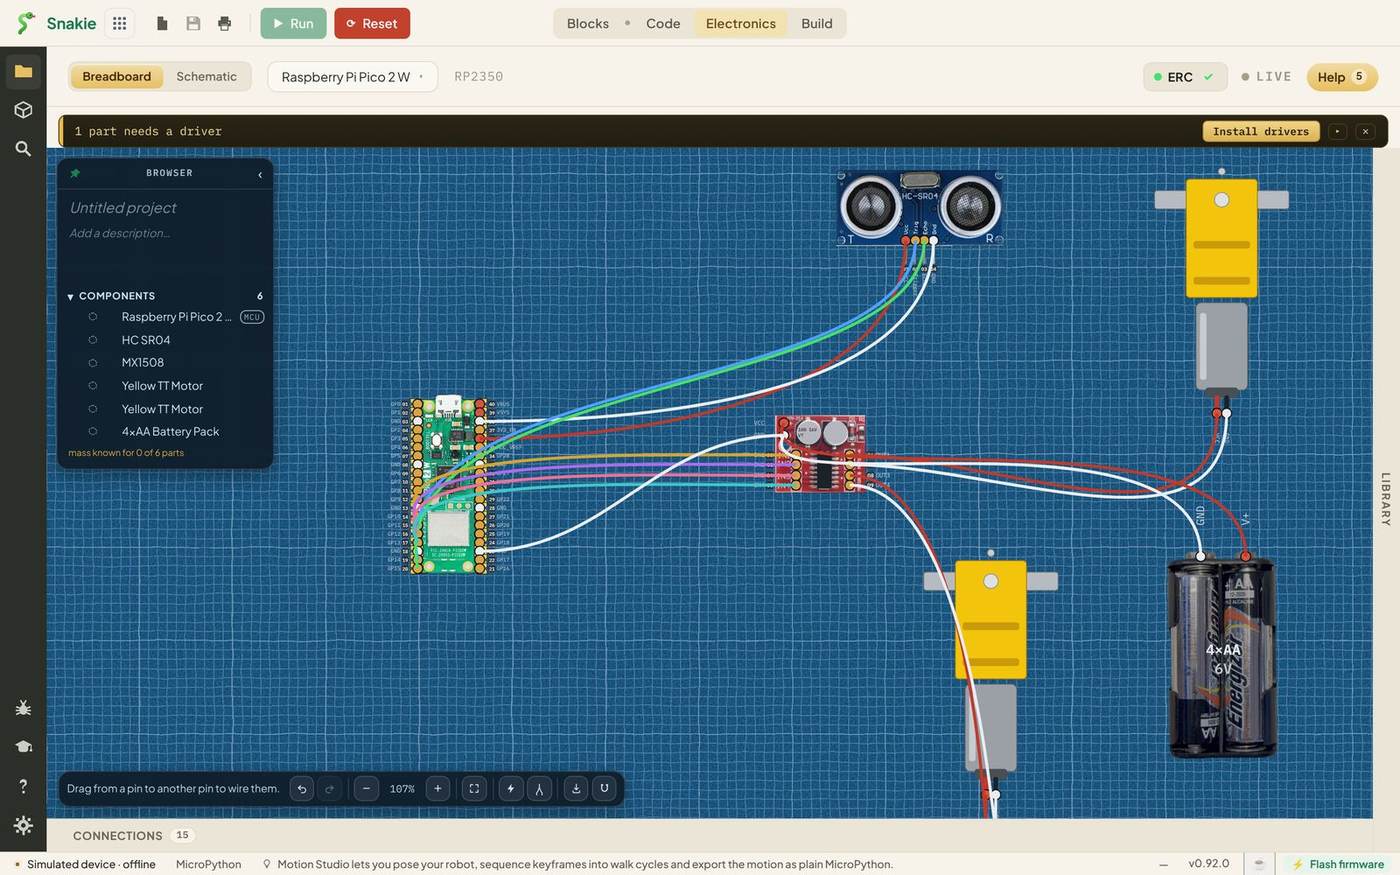
Snakie’s Electronics workspace lets you make those mistakes on screen instead. You pick real parts from a library, drag wires between their pins, and Snakie keeps a list of every connection. It checks the wiring for electrical faults, draws the schematic for you, and prints a build guide with a parts list and a tick-box for every wire.
In this course you’ll learn the workspace one tool at a time, and finish by wiring and coding a two-wheeled robot that turns away from walls.
Course Content
- A tour of the Electronics workspace
- The Parts Library: browsing, searching and the full catalog
- Placing a board and parts, and arranging them
- Wiring pin to pin, wire colours, undo and redo
- The Schematic view
- The Electrical Rules Check, and the faults it catches
- Drivers, part help and getting from wiring to code
- The Connections table, node voltages and the on-screen multimeter
- Exporting a picture, a parts list or a complete PDF build guide
- Project: wire and code a 2WD obstacle-avoiding robot
Key Results
After this course you will be able to:
- Find any part in the library and read its pinout
- Wire a sensor and a motor driver to a Raspberry Pi Pico on screen
- Explain what power, ground and signal wires do
- Use the rules check to catch a short circuit before it happens
- Turn a wiring diagram into a printable build guide
- Write MicroPython that matches your wiring pin for pin
What you’ll need
- Snakie, in your browser or the desktop app
- Nothing else for the wiring lessons. Everything happens on screen
To build the robot for real at the end, you’ll also want:
| Qty | Part | Notes |
|---|---|---|
| 1 | Raspberry Pi Pico, Pico W or Pico 2 W | With MicroPython on it |
| 1 | HC-SR04 ultrasonic range finder | A 3.3 V version is easiest. See lesson 3 |
| 1 | MX1508 dual motor driver | Small, cheap and fine for two TT motors |
| 2 | Yellow TT gear motors | The kind in every robot car kit |
| 1 | 4×AA battery pack | Powers the motors |
| 15 | Jumper wires | One for each connection |
How the course works
Each lesson teaches one part of the workspace, with screenshots of every step so you can follow along in your own copy of Snakie. The circuit grows as the course goes on. By lesson 4 you’ll already have the robot wired.
Where a lesson has code, it’s in a live Snakie box that you can run and change on the page.
Every lesson ends with things to try, fixes for common problems and a short quiz.
Teachers: the whole course up to the final build works on a laptop or Chromebook with no hardware. Students can design, check and print a circuit before any parts are handed out.
Prerequisites
You should know your way around Snakie and be happy running a short program.
- Getting Started with Snakie shows you around the app
- Snakie Blocks is the gentlest way to start programming a Pico
No electronics knowledge is needed. We’ll cover power, ground and signals as we meet them.
Let’s wire something up.
You can use the arrows ← → on your keyboard to navigate between lessons.
Comments