Named Poses
Save the positions that matter in BetterCad as named poses, go back to them in a click and update them later
By Kevin McAleer, 4 Minutes
Page last updated November 21, 2026

Some positions matter more than others. Folded up for the shelf. Reaching out as far as it goes. Gripper over the pen pot. You’ll come back to these again and again, to check clearances, to take a screenshot, to show someone how it works.
A named pose saves every joint’s angle under a name.
Save a pose
- In the Pose section, set Shoulder to
40and Elbow to60. - Click Save pose in the Motion group.
A new row appears in the Browser’s Poses folder, ready for a name. The bar says “Saved Pose 1. Type a name, or press Enter to keep it.”
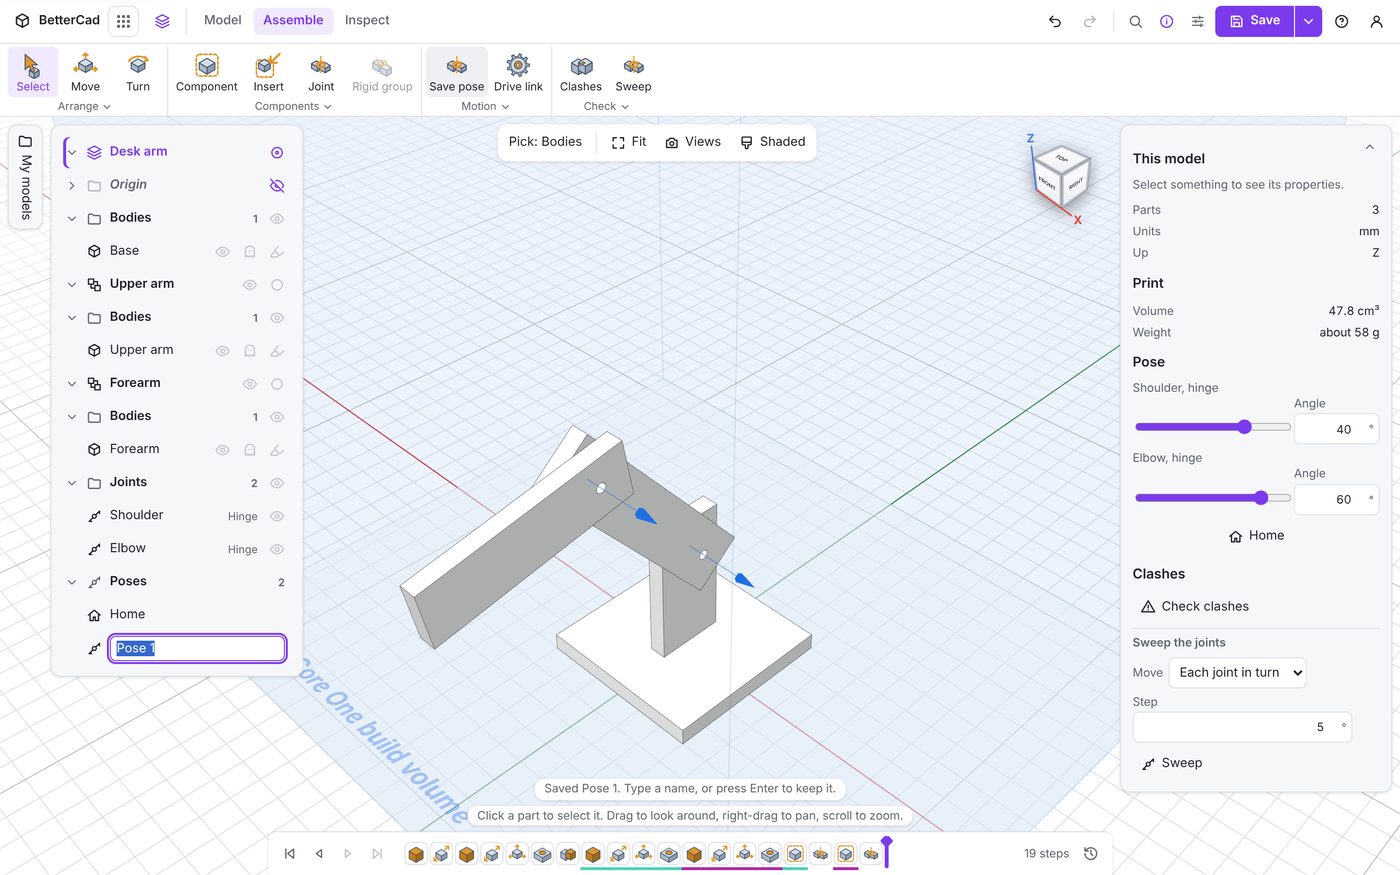
- Type
Reachand press Enter.
Now a second one:
- Set Shoulder to
-60and Elbow to-90. - Click Save pose, type
Foldedand press Enter.
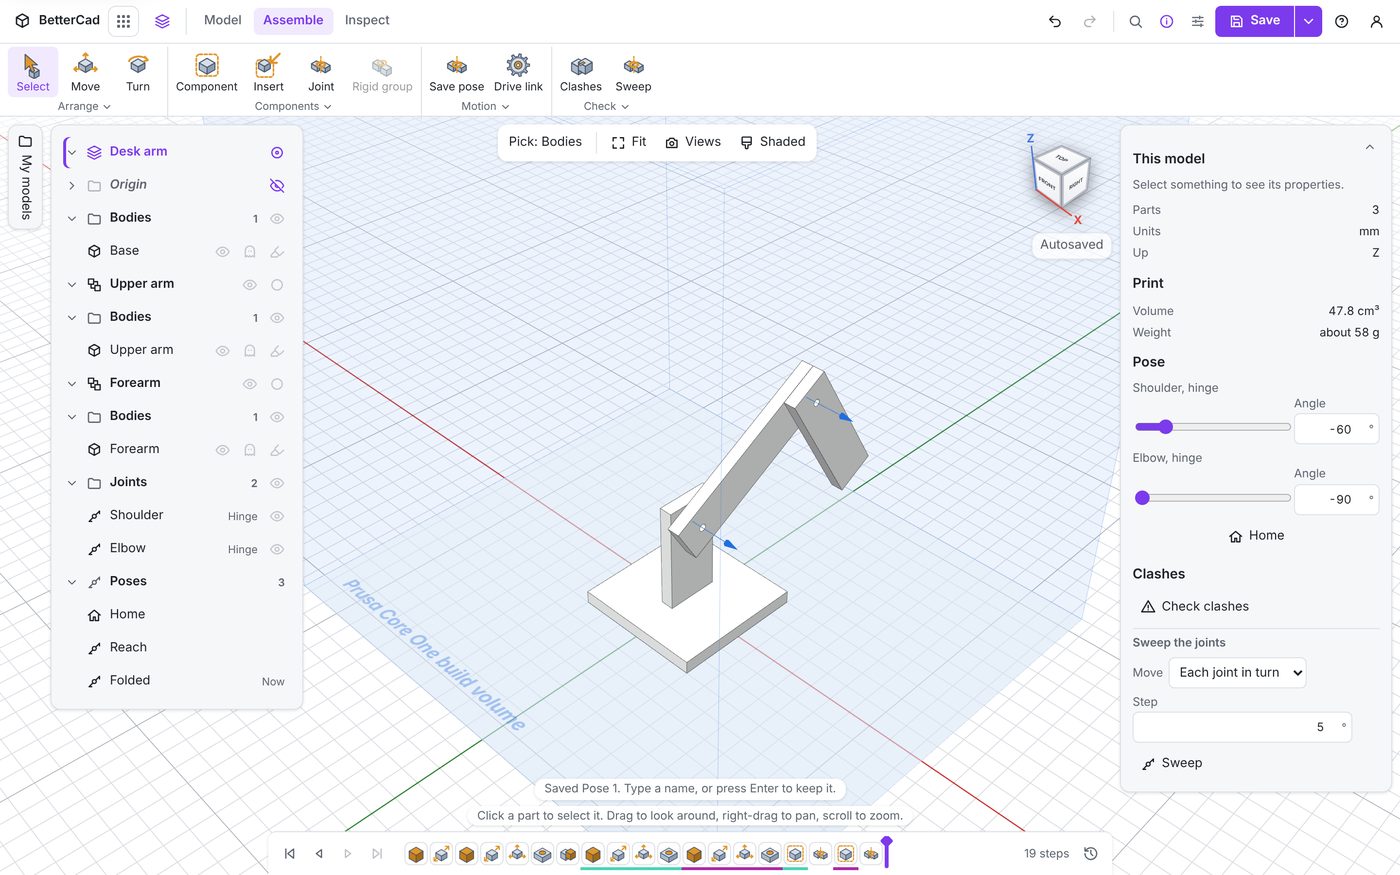
Go to a pose
- Click Reach in the Browser.
The arm moves to it and the bar says “Went to Reach”. A small Now beside a pose’s name shows the model is in that pose. Move any joint and the Now disappears.
Home is always in the list. It’s the pose with every joint at zero, and it can’t be deleted.
Change a pose
Right-click a pose:
| Item | What it does |
|---|---|
| Go to | The same as clicking it |
| Update to the joints now | Replaces the saved angles with where the joints are at this moment |
| Rename | The same as F2 |
| Delete | Removes the pose. The joints stay where they are |
To adjust a pose: go to it, move the joints, then right-click it and choose Update to the joints now.
What poses are for
Checking. The clash check can test any named pose without you going to it first. Save the awkward ones and you can test them all after every design change.
Showing. A pose is the quickest way to show how a thing moves. Click Folded, click Reach, and someone who has never seen the design understands it.
Printing a mock-up. An STL export can be made in the current pose, with Export as posed ticked, if you want a one-piece model of the arm mid-reach.
Planning code. The angles in a pose are the angles your servos need. Read them from the Pose section and you have the numbers for your first MicroPython test.
Try it Yourself
- Save a pose called
Upwith the shoulder at 0 and the elbow at 90. - Go to Reach, change the elbow to 45, and update the pose. Click Home, then Reach, to check it kept the change.
- Click through all your poses in turn. Does any of them put the forearm through the base? You’ll have a tool for that question shortly.
Common Issues
- Problem: Save pose is greyed out
- Solution: Make a joint first
-
Why: A pose is a set of joint angles, and a model without joints has none
- Problem: Clicking a pose moved the arm and you lost the position you were setting up
- Solution: Press Ctrl+Z, then save the position as a pose before clicking another
-
Why: Going to a pose sets every joint
- Problem: A pose looks wrong after you edited a joint
- Solution: Go to the pose, fix it, and update it
- Why: A pose stores angles from home. Change a joint’s line-up and home moves, so the same angles give a different shape
Check your understanding
Quick quiz 1 of 3
What does a named pose store?
Quick quiz 2 of 3
What does the small “Now” beside a pose mean?
Quick quiz 3 of 3
How do you change the angles in a saved pose?
You can use the arrows ← → on your keyboard to navigate between lessons.
Comments