Bigger and Smarter
Scale the eyes up to fill the screen and make the robot face react to a light sensor
By Kevin McAleer, 6 Minutes
Page last updated November 21, 2026

Small eyes on a big screen
Your eyes are 16 pixels square on a screen 128 wide. They look a bit lost. You could redraw them at 48×48, but that’s 2,304 pixels per frame to place by hand.
There’s a cheaper trick: draw every sprite pixel as a block. At a scale of 3, each pixel becomes a 3×3 square and the eye becomes 48×48. It keeps its chunky pixel-art look, which suits a robot rather well.
How scaling works
blit can’t scale, so we’ll write our own. For each pixel of the sprite, ask “is it lit?”, and if it is, draw a filled square in the right place.
See it in text first. This box scales the top of the eye by 2:
Each pixel is printed SCALE times across, and each row is printed SCALE times down. Change SCALE to 3 and run it again.
Big eyes
The exported module’s eye.pixel(i, x, y) answers “is it lit?” for you. Make a new file, bigface.py:
import time
from simscreen import SimScreen
import eye

OPEN, HALF, CLOSED, LEFT, RIGHT = 0, 1, 2, 3, 4

screen = SimScreen()


def draw_big(i, left, top, scale):
    for y in range(eye.HEIGHT):
        for x in range(eye.WIDTH):
            if eye.pixel(i, x, y):
                screen.fill_rect(left + x * scale, top + y * scale, scale, scale, 1)


def face(i, shift=0):
    screen.fill(0)
    draw_big(i, 12 + shift, 8, 3)
    draw_big(i, 68 + shift, 8, 3)
    screen.show()


face(OPEN)
time.sleep(1)
for i in [HALF, CLOSED, HALF, OPEN]:
    face(i)
Run it.
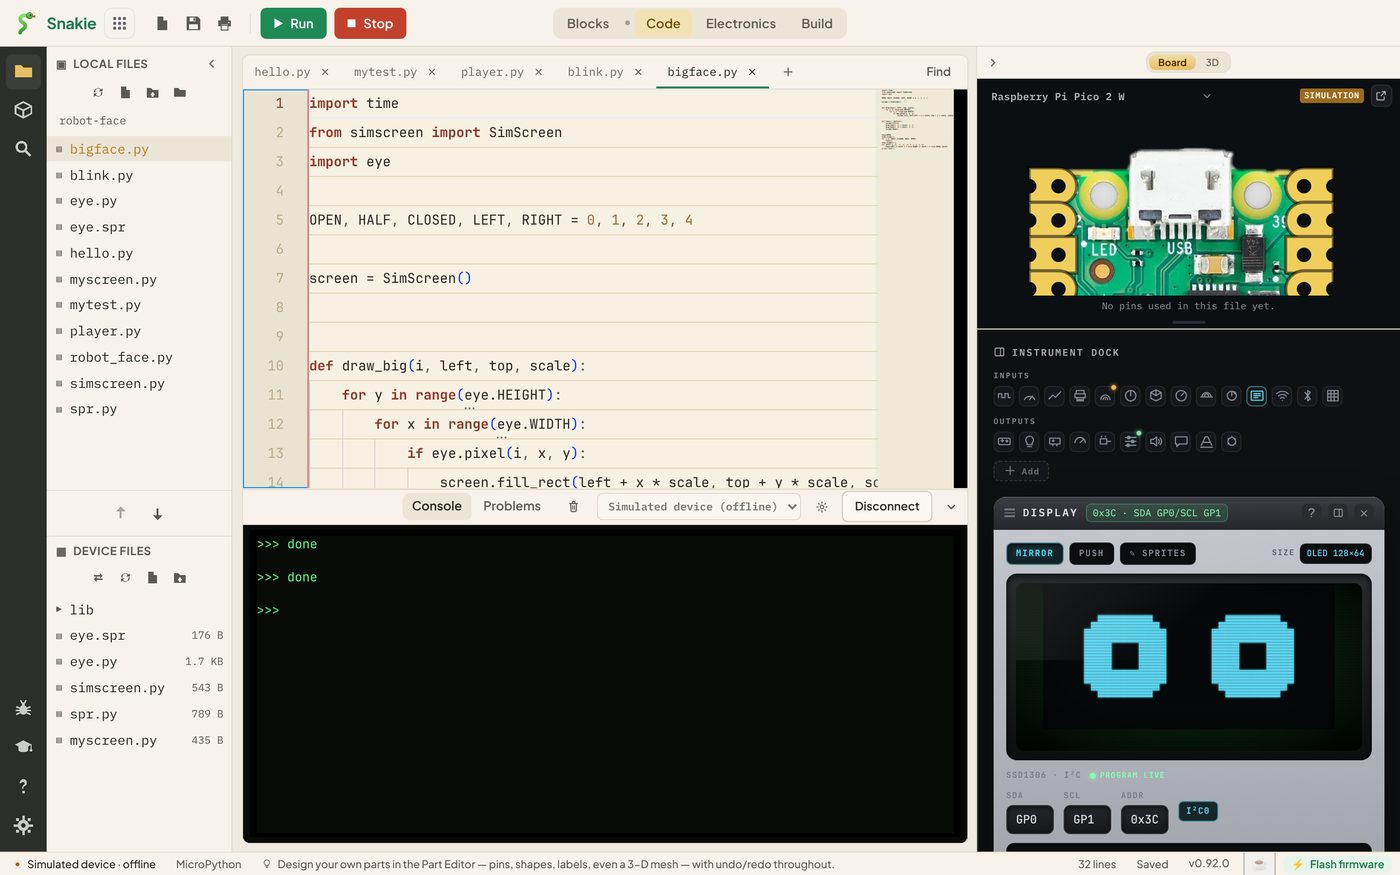
That’s more like it.
The positions come from the same kind of sums as before. Two 48-pixel eyes with an 8-pixel gap are 104 wide, which leaves 12 either side on a 128-pixel screen. So the eyes start at 12 and at 12 + 48 + 8 = 68.
Moving the whole face
face has a second input, shift, which slides both eyes sideways. Add this to the bottom of the file:
for shift in [0, -4, -8, -4, 0, 4, 8, 4, 0]:
    if shift < 0:
        face(LEFT, shift)
    elif shift > 0:
        face(RIGHT, shift)
    else:
        face(OPEN)
Now the pupils move and the eyes lean the same way, which sells the glance much better than the pupils alone.
Changing a sprite’s position a little on every pass of a loop is how all movement works, whether it’s eyes leaning or a spaceship crossing the screen.
A face that reacts
A face gets interesting when it responds to the world. Let’s make the robot sleepy when it’s dark.
A light sensor is read with an ADC, which gives a number from 0 (dark) to 65535 (bright). On Snakie’s simulated device, ADC(26) produces a wave that rises and falls by itself, so you can test this with no hardware.
Make robot_face.py:
import time
import random
from machine import ADC
from simscreen import SimScreen
import eye

OPEN, HALF, CLOSED, LEFT, RIGHT = 0, 1, 2, 3, 4
SLEEPY_BELOW = 20000

screen = SimScreen()
light = ADC(26)


def draw_big(i, left, top, scale):
    for y in range(eye.HEIGHT):
        for x in range(eye.WIDTH):
            if eye.pixel(i, x, y):
                screen.fill_rect(left + x * scale, top + y * scale, scale, scale, 1)


def face(i, message=""):
    screen.fill(0)
    draw_big(i, 12, 0, 3)
    draw_big(i, 68, 0, 3)
    screen.text(message, 0, 56, 1)
    screen.show()


def blink():
    for i in [HALF, CLOSED, HALF, OPEN]:
        face(i)


while True:
    level = light.read_u16()
    if level < SLEEPY_BELOW:
        face(HALF, "sleepy...")
        time.sleep(0.6)
        continue
    face(OPEN, "light " + str(level))
    time.sleep(random.uniform(0.3, 0.9))
    choice = random.randint(0, 3)
    if choice == 0:
        face(LEFT)
        time.sleep(0.4)
    elif choice == 1:
        face(RIGHT)
        time.sleep(0.4)
    else:
        blink()
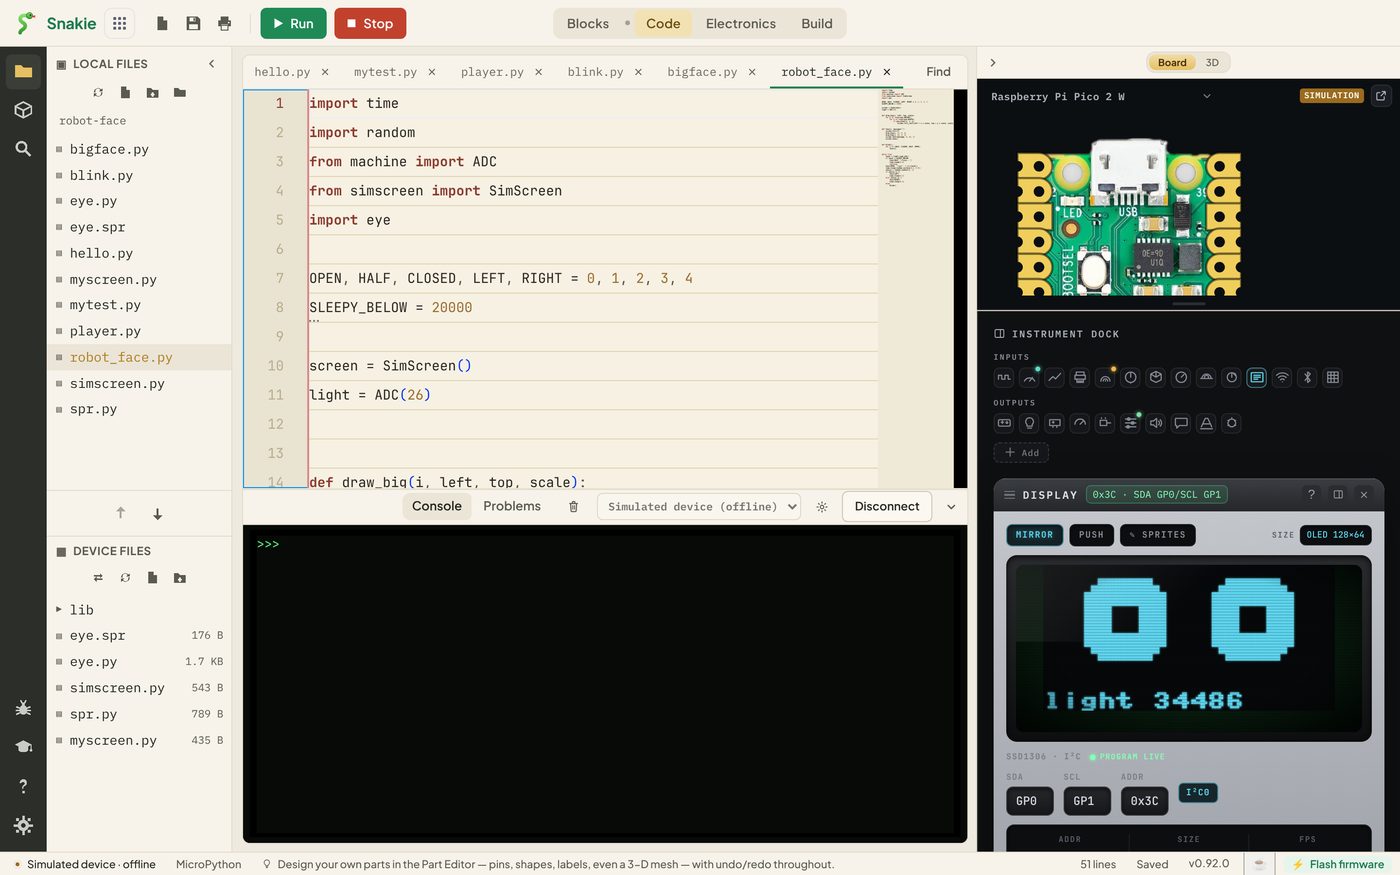
While the light level is high the robot is awake, blinking and looking about, with the reading shown underneath. When the level drops below SLEEPY_BELOW its eyes droop.
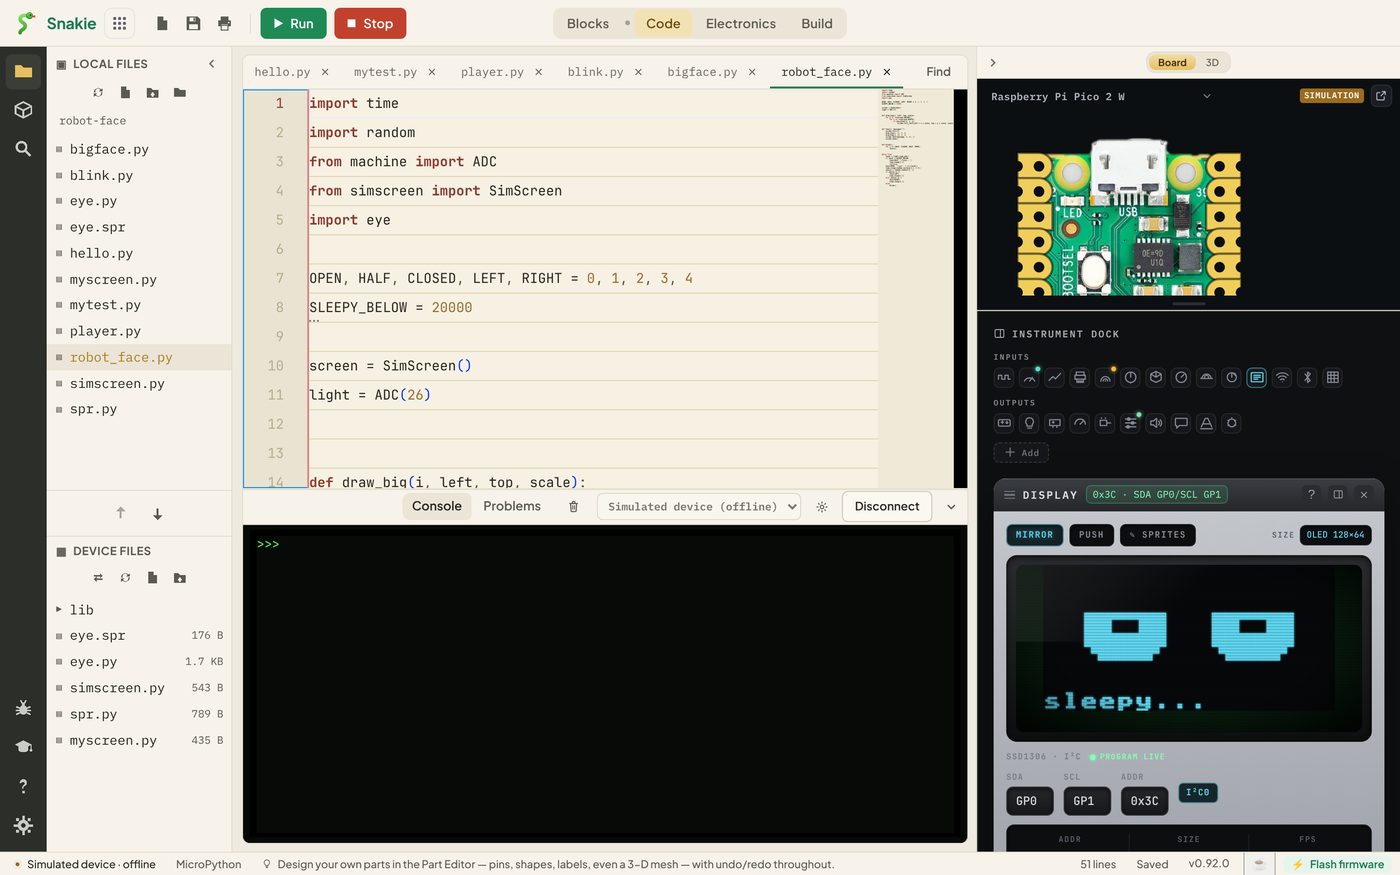
Leave it running and watch it nod off and wake up every few seconds as the simulated light rises and falls.
The eyes have moved up to the top of the screen (top is 0 instead of 8) to make room for a line of text along the bottom.
Try it Yourself
- Change
SLEEPY_BELOWto 40000. The robot should sleep more - Add a third state: fully
CLOSEDwith the messagezzzwhen the level is below 8000 - Swap the light for something else. If you’ve taken Snakie Instruments, try making the eyes glance toward a potentiometer’s position
- Try a scale of 2 and work out new positions to keep the face centred
Common Issues
Problem: The animation is slower than the small version.
Solution: That’s expected. Drop the time.sleep inside the blink, as this lesson’s code does, or use a smaller scale.
Why: draw_big checks 256 pixels per eye in Python, which takes far longer than a single blit.
Problem: The eyes are cut off at the right-hand edge.
Solution: Check left + 16 * scale is no more than 128 for both eyes.
Why: Anything drawn past the edge of the buffer is thrown away.
Problem: The face never gets sleepy.
Solution: Print level and compare it with SLEEPY_BELOW. Raise the threshold if the readings never go that low.
Why: Every sensor has its own range. A threshold that suits the simulator may not suit a real light sensor in your room.
Check your understanding
Quick quiz 1 of 3
How does draw_big make the eye bigger?
Quick quiz 2 of 3
Two 48-pixel eyes with an 8-pixel gap sit centred on a 128-pixel screen. Where does the left eye start?
Quick quiz 3 of 3
Why does the robot check the light level inside the loop?
You can use the arrows ← → on your keyboard to navigate between lessons.
Comments