A Screen in the Simulator
Use MicroPython framebuf to draw shapes and text, and show them on the Display instrument of the simulated device
By Kevin McAleer, 6 Minutes
Page last updated November 21, 2026

Meet framebuf
MicroPython comes with a module called framebuf. It gives you a frame buffer: a block of memory that stands for a screen, plus functions to draw on it.
Nothing appears anywhere while you draw. You’re changing bytes in memory. When the picture is ready, you send the whole buffer to the screen in one go. That’s why a display driver always has a show() function.
Try it here. This box draws into a small 32×12 buffer and prints the result as text:
The drawing functions
The ones you’ll use most:
| Call | Draws |
|---|---|
fb.fill(0) |
Clears everything. fill(1) lights everything |
fb.pixel(x, y, 1) |
One pixel. Leave off the last number to read a pixel instead |
fb.hline(x, y, w, 1) |
A horizontal line w pixels long |
fb.vline(x, y, h, 1) |
A vertical line h pixels long |
fb.line(x1, y1, x2, y2, 1) |
A line between two points |
fb.rect(x, y, w, h, 1) |
The outline of a rectangle |
fb.fill_rect(x, y, w, h, 1) |
A solid rectangle |
fb.text("Hi", x, y, 1) |
Text. Each character is 8×8 pixels |
fb.blit(other, x, y) |
Copies another frame buffer onto this one |
The last number is the colour: 1 for on, 0 for off. Drawing with 0 is how you rub things out.
Go back to the box and add fb.fill_rect(20, 3, 6, 6, 1). Then add fb.line(0, 0, 31, 11, 1).
A pretend OLED
Text art is fine for a quick test, but Snakie can do better. Its Display instrument will show any frame buffer your program sends it, even on the simulated device.
A real display driver gives you an object with drawing functions and a show(). We’ll make our own that behaves the same way, so that swapping in a real screen later takes one line.
In the Snakie app, in your robot-face folder, make a new file called simscreen.py:
"""A pretend 128x64 OLED that shows up in Snakie's Display instrument."""

import binascii
import framebuf
import instruments as inst


class SimScreen(framebuf.FrameBuffer):
    def __init__(self, width=128, height=64):
        self.width = width
        self.height = height
        self.buffer = bytearray(width * height // 8)
        super().__init__(self.buffer, width, height, framebuf.MONO_HLSB)

    def show(self):
        data = binascii.b2a_base64(self.buffer).decode().strip()
        inst.screen_fb(data, self.width, self.height)
It’s short, and it does two things:
SimScreenis a frame buffer, so it hasfill,text,rect,blitand all the restshow()packs the buffer into text and hands it to Snakie’sinstrumentsmodule, which passes it to the Display instrument
You don’t need to understand every line. This file is a tool you write once and then import.
Put it on the board
Your program runs on the device, so simscreen.py has to be there too.
Right-click simscreen.py in the Local Files list and choose Upload to board.
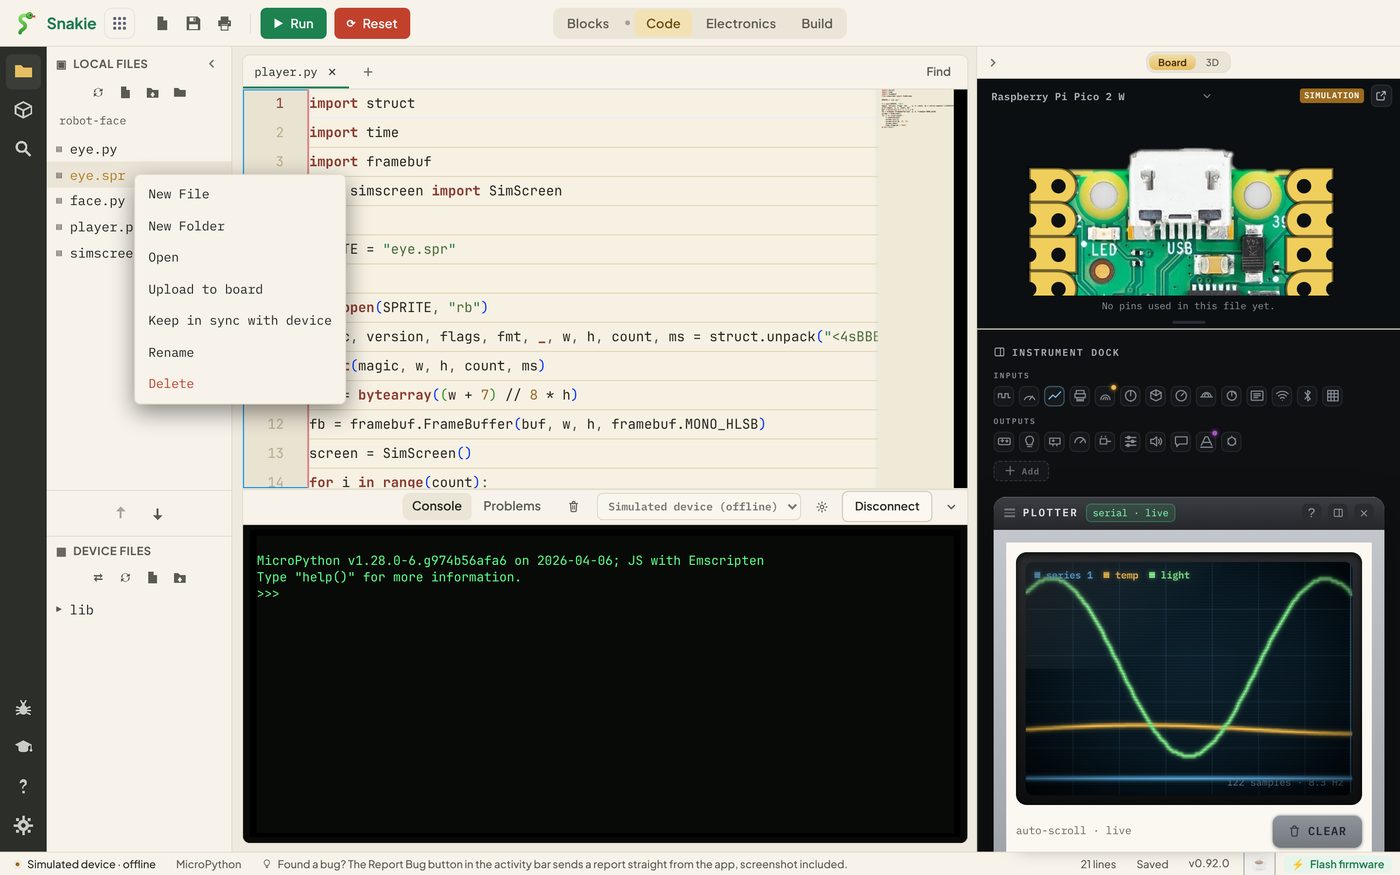
The status bar confirms the upload. Press the refresh button in Device Files and you’ll see it listed.
Hello, screen
Make another file, hello.py:
from simscreen import SimScreen

screen = SimScreen()

screen.fill(0)
screen.rect(0, 0, 128, 64, 1)
screen.text("Hello, robot!", 12, 20, 1)
screen.hline(12, 32, 104, 1)
screen.show()
Make sure the Display instrument is showing, then press Run.
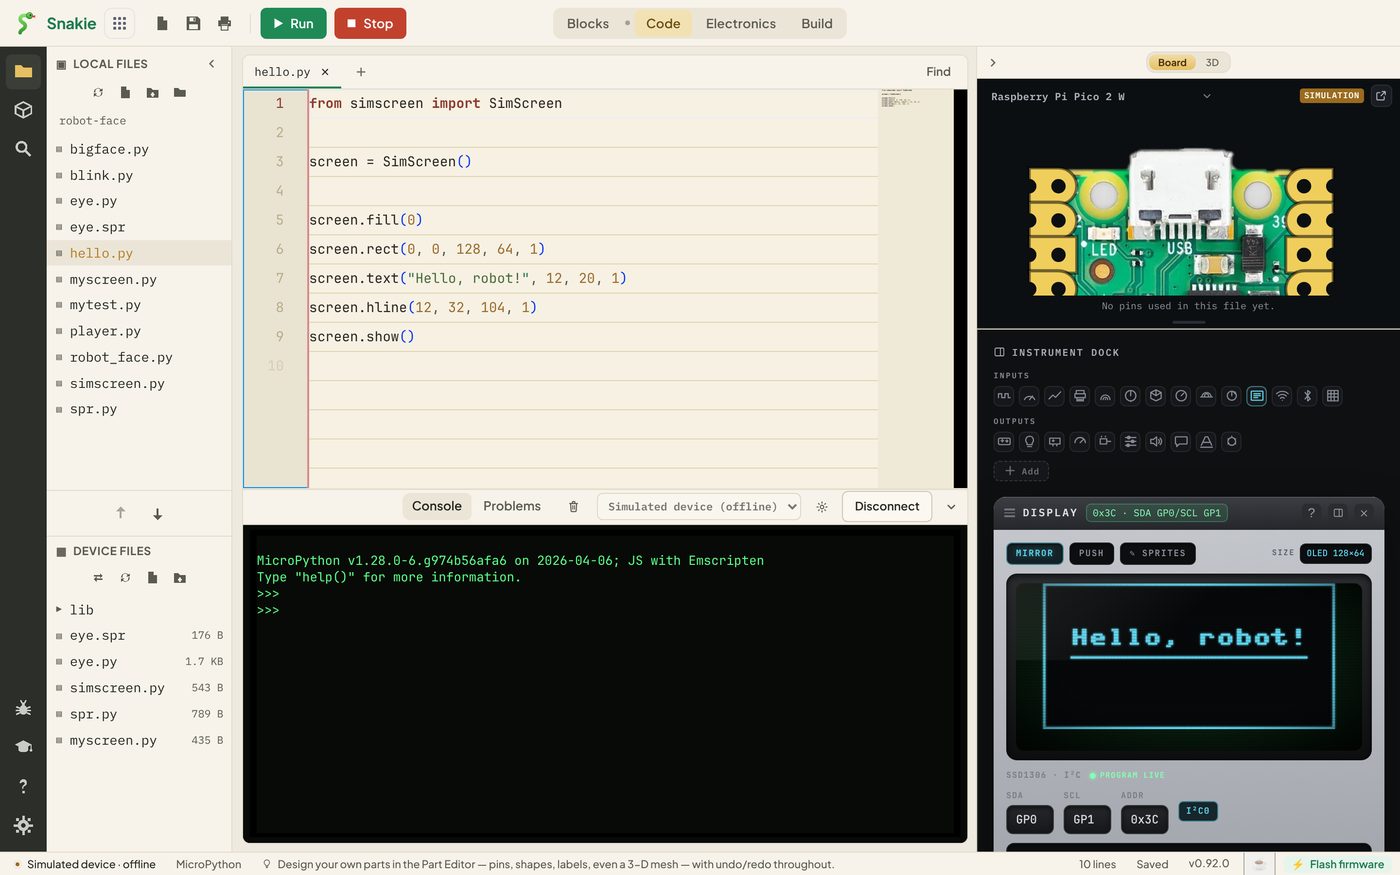
There’s your screen. The line under it reads PROGRAM LIVE while frames are arriving.
Try taking out screen.show() and running it again. Nothing changes on the display, because the drawing never left the board’s memory.
Try it Yourself
- Draw a border two pixels thick. (Two
rectcalls, one inside the other) - Put your name in the centre of the screen. A character is 8 pixels wide, so a 5-letter name is 40 pixels, and it starts at x = (128 - 40) // 2
- Draw a row of ten small squares along the bottom using a
forloop andfill_rect - Add
import time, then make a square slide across the screen by clearing, drawing and showing inside a loop withtime.sleep(0.05)
Common Issues
Problem: ImportError: no module named 'simscreen'.
Solution: Upload simscreen.py to the board with right-click, Upload to board.
Why: import looks for files on the device, and files in your project folder aren’t copied there automatically.
Problem: The Display shows AWAITING FRAMEBUFFER.
Solution: Check your program calls screen.show(), and run it again.
Why: The instrument only draws what a program sends it.
Problem: I changed simscreen.py and nothing is different.
Solution: Save it, upload it again, press Reset, then Run.
Why: The board runs its own copy, and it keeps an imported module in memory until it’s reset.
Problem: A long line of letters appears in the console. Solution: Ignore it and carry on. Clear the console if it bothers you. Why: Each frame travels to Snakie as a line of text, which is normally hidden. Now and then one slips through.
Check your understanding
Quick quiz 1 of 3
When does a drawing actually appear on the screen?
Quick quiz 2 of 3
What does fb.pixel(3, 4) do, with no third number?
Quick quiz 3 of 3
Why do you upload simscreen.py to the board?
You can use the arrows ← → on your keyboard to navigate between lessons.
Comments