Project - Traffic Light
Build a MicroPython traffic light in Snakie, first on the simulator and then on a real Raspberry Pi Pico with three LEDs
By Kevin McAleer, 6 Minutes
Page last updated November 20, 2026

Let’s put everything together and build something: a traffic light that runs the proper UK sequence. You’ll write it on the simulator, watch the pins in the Board view, then wire three LEDs to a real Pico and make it run by itself.
What you’ll use
- New file, Run and Stop
- The Board view, to check your pins
- The REPL, to test each LED
- The Files panel, to save the program as
main.py
Step 1: Plan the pins
We’ll use three pins that sit together at the bottom left corner of the Pico, with a ground pin right between them.
| LED | GP number | Pad |
|---|---|---|
| Green | GP13 | 17 |
| Ground | GND | 18 |
| Amber | GP14 | 19 |
| Red | GP15 | 20 |
Step 2: Write it on the simulator
Make sure you’re connected to the Simulated device (offline). Start a new file and type this first version:
Press Run. The console prints Stop, Go, Get ready to stop, round and round. Turn on Show pin labels in the Board view and check that red, amber and green sit on GP15, GP14 and GP13.
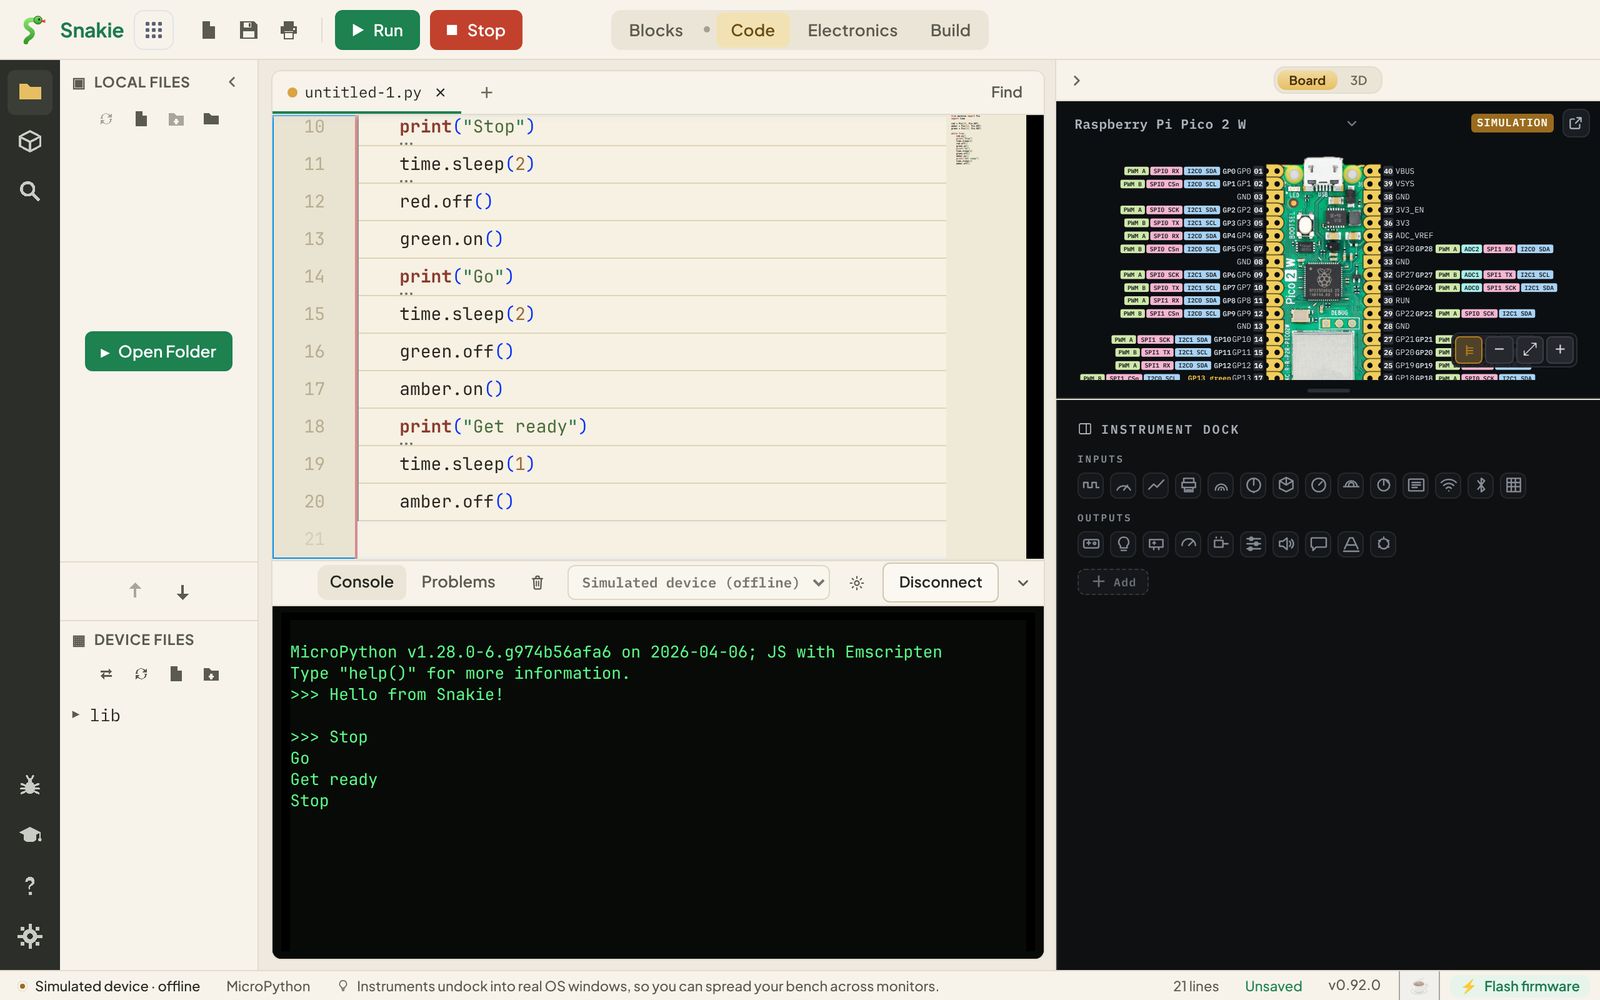
Press Stop when you’ve seen enough.
Step 3: Make it a real sequence
A UK traffic light has four stages, and one of them shows two lights at once: red, then red and amber together, then green, then amber alone.
The first version repeats itself a lot. Let’s write a small function that sets all three lights in one go, and a list that describes the sequence.
Here’s what changed:
show(r, a, g)takes three numbers and sets the three pins.red.value(1)is the same asred.on()SEQUENCEis a list of stages. Each stage is a group of five things: a name, three light values and a time- The
forloop unpacks each stage into five variables and acts on them
Want to change the timing, or add a stage? Edit the list. The code that does the work stays the same. That’s a pattern you’ll use in every robot you build.
Step 4: Wire it up
Unplug the Pico while you wire.
- Push the Pico into the breadboard so it straddles the middle gap.
- For each LED, put the long leg in the row of its GP pin and the short leg in a spare row.
- Connect a 330 ohm resistor from each LED’s short leg to the ground rail.
- Connect the ground rail to pad 18, the GND pin.
The long leg is the positive side. If an LED doesn’t light later, it’s probably in backwards; turn it round.
The resistor limits the current so the LED and the Pico pin are both protected. Never connect an LED straight across a pin and ground.
Step 5: Test each LED from the REPL
Plug the Pico in, Disconnect from the simulator, and connect to your board. Before running the whole program, test one light at a time in the console:
>>> from machine import Pin
>>> red = Pin(15, Pin.OUT)
>>> red.on()
>>> red.off()
Do the same for GP14 and GP13. If one doesn’t light, you’ve found the problem while it’s still easy to fix.
Step 6: Run it, then make it stay
Press Run. Your three LEDs run the sequence.
Now make it permanent:
- Click the down arrow in the Files panel.
- Enter
/main.pyas the device path and click OK. - Press Reset.
The traffic light starts by itself. Unplug the Pico from your computer, plug it into a USB power bank, and it carries on. You’ve built a standalone MicroPython device.
Try it Yourself
- Change the timings so the green light lasts five seconds.
- Add a stage where all three lights flash on together.
- Challenge: add a push button on GP16 for a pedestrian crossing. Read it with
Pin(16, Pin.IN, Pin.PULL_UP); itsvalue()is0while the button is pressed. When it’s pressed during the green stage, cut the green short.
Common Issues
Problem: One LED never lights. Solution: Turn the LED round, and check its resistor reaches the ground rail. Why: LEDs only pass current one way.
Problem: The lights come on in the wrong order. Solution: Compare your wiring with the Board view. Red belongs on GP15, amber on GP14, green on GP13. Why: Two wires one row out is all it takes.
Problem: It works from Run but not from a power bank.
Solution: Check main.py is on the board with Refresh in Device files.
Why: Run doesn’t save the program to the board.
Check your understanding
Quick quiz 1 of 2
What is the resistor for?
Quick quiz 2 of 2
In the second version, how would you add a new stage to the sequence?
You can use the arrows ← → on your keyboard to navigate between lessons.
Comments