Hardware Blocks - LEDs and Buttons
Blink an LED and read a button with Snakie hardware blocks, and understand pins, pull-ups and the forever loop
By Kevin McAleer, 6 Minutes
Page last updated November 20, 2026

Time to leave the screen and control some pins. The LED half of this lesson runs on the simulator. For the button half you’ll want a real Pico, because the simulator has no button to press yet.
The Hardware drawer
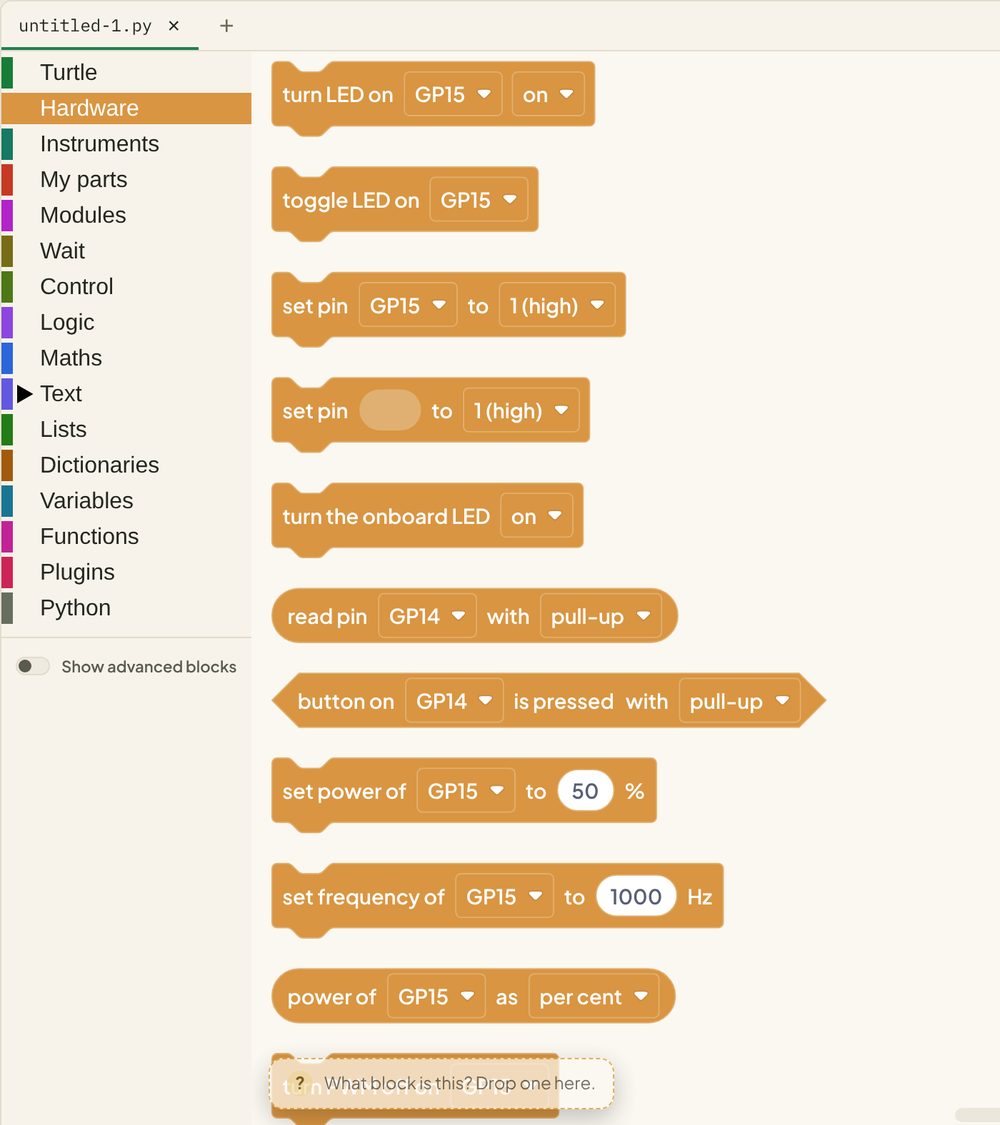
Hardware blocks are orange. Each one has a pin dropdown such as GP15. The dropdown only lists pins your board really has, and only the ones that can do that block’s job. So you can’t pick a pin that doesn’t exist.
Blink an LED
Three blocks make a blink:
- From Control, drag out a forever block.
- From Hardware, put toggle LED on GP15 inside it.
- From Wait, add wait 400 milliseconds.
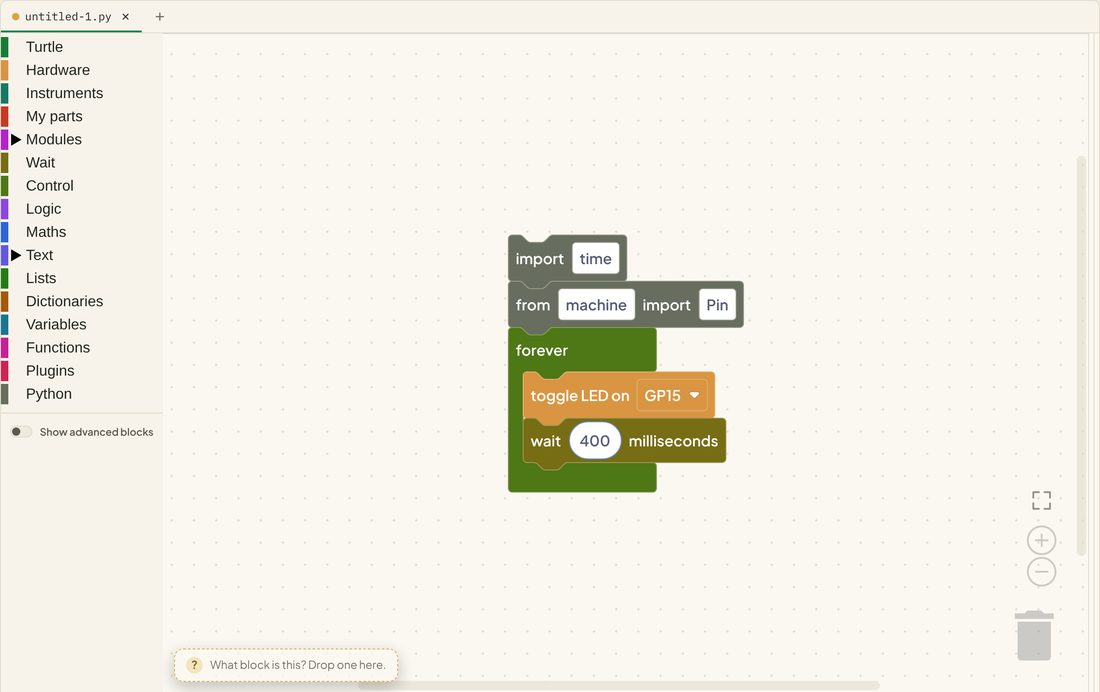
Press Run and watch the board view on the right: GP15 flashes. Press Stop when you’ve seen enough.
Reading the Python
pin_15 = Pin(15, Pin.OUT)is the setup line. It tells the Pico that GP15 is an output. There’s no block for it. Snakie writes it for you the first time a block uses that pinwhile True:is forever.Trueis always true, so the loop never endspin_15.toggle()flips the pin: on becomes off, off becomes ontime.sleep_ms(400)waits 400 milliseconds, which is 0.4 seconds
About the grey blocks: in some screenshots you’ll see grey
importblocks at the top of a program. They appear when a program started life as Python. When you build from the toolbox, Snakie adds the imports to the code without putting blocks on the canvas.
Read a button
A button is an input. The program asks the pin a question instead of telling it what to do.
Build this:
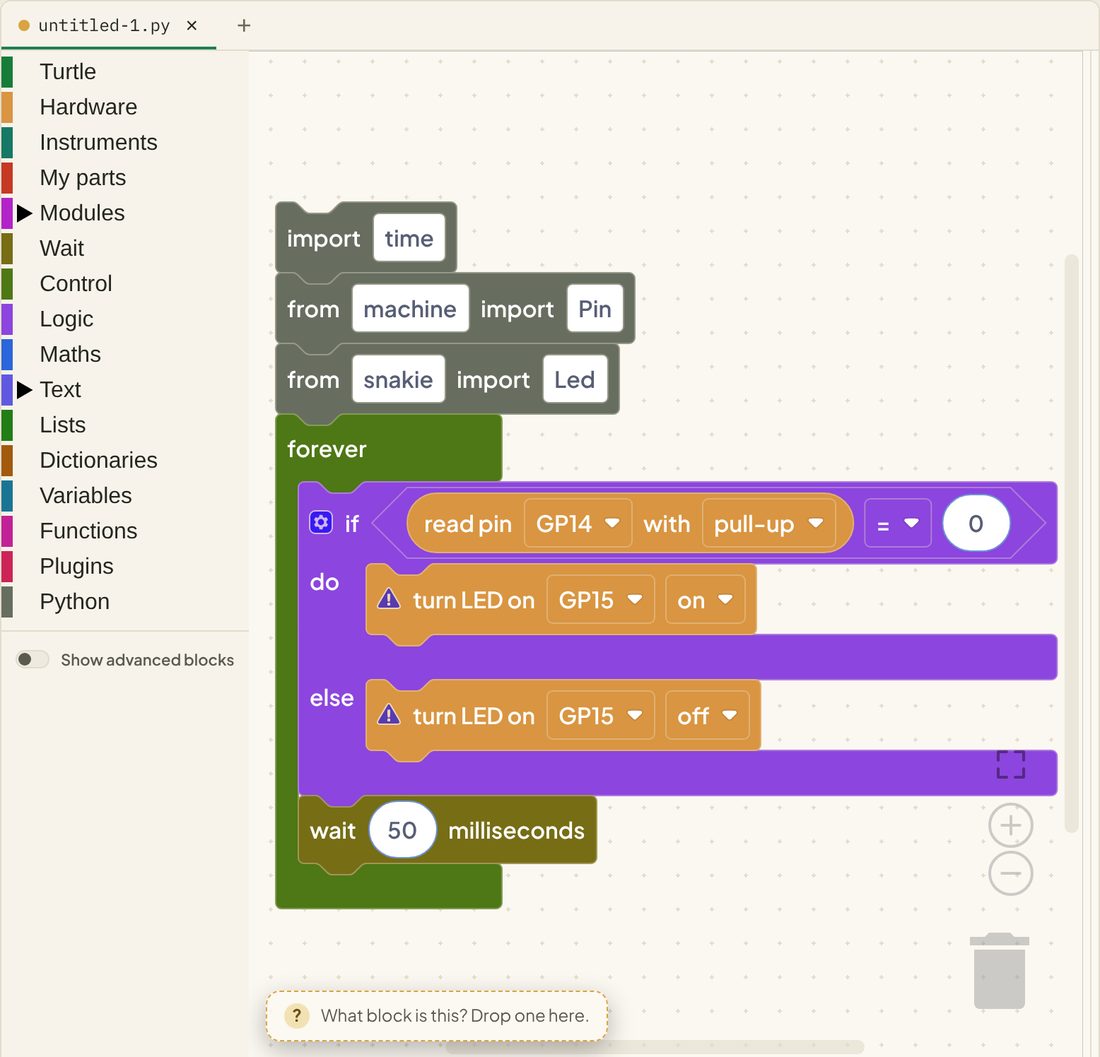
Why does pressed mean 0?
The button block says with pull-up. A pull-up gently holds the pin at 1 when nothing is happening. The button connects the pin to ground, so pressing it drags the pin down to 0.
| Button | Pin reads |
|---|---|
| Not pressed | 1 |
| Pressed | 0 |
On the simulator: a simulated input pin always reads 0, and there’s no way to press it yet. So this program behaves as if the button is held down, and the LED stays on. Wire up a real button to see it switch.
That feels backwards the first time. If you’d rather not think about it, use the button on GP14 is pressed block instead. It gives you True when the button is down, and writes not pin_14.value() in the Python for you.
Two kinds of LED block
turn LED on GP15 on uses a small helper, Led, from Snakie’s own library. toggle LED and set pin talk to the pin directly. Both are fine. The helper reads more like English, and the direct way is what you’ll see in most MicroPython tutorials.
The warning badge
Notice the little warning triangles on the two LED blocks. Snakie adds one whenever two blocks use the same pin. Here that’s exactly what we want, since both blocks control the same LED. The badge only means “have a look at this”, so you can ignore it when the sharing is on purpose.
On a real Pico
To try this for real, connect an LED (with a 330Ω resistor) between GP15 and GND, and a button between GP14 and GND. Connect to your board as you did in Getting Started with Snakie, then press Run. The same program, no changes.
Try it Yourself
- Make the LED blink twice as fast.
- Swap toggle LED for the turn the onboard LED on blocks so the Pico’s own LED blinks.
- Flip the button program so the LED is on until you press the button.
- Challenge: make the LED blink quickly while the button is held, and stay off otherwise.
Common Issues
Problem: The LED stays on, or never lights. Solution: Check the wait block is inside the forever loop. Why: With no wait, the pin flips thousands of times a second and looks permanently dim or lit.
Problem: The button works backwards.
Solution: With a pull-up, compare with 0 for pressed. Or use the button is pressed block.
Why: The pull-up holds the pin at 1 until the button pulls it to ground.
Problem: On the simulator the LED is always on. Solution: Try it on a real Pico with a button. Why: The simulator’s input pins read 0, which with a pull-up means pressed.
Problem: On a real board, nothing happens. Solution: Check the LED is the right way round (long leg towards GP15) and the pin in the block matches your wiring. Why: An LED only lets current through one way.
Check your understanding
Quick quiz 1 of 3
What Python does the “forever” block write?
while True: repeats for as long as True is true, which is always.Quick quiz 2 of 3
With a pull-up, what does a pressed button read?
Quick quiz 3 of 3
Where does the line pin_15 = Pin(15, Pin.OUT) come from?
You can use the arrows ← → on your keyboard to navigate between lessons.
Comments