KevsRobots Learning Platform
Overview
Setting up the Raspberry Pi 4 environment
Setting Docker for ROS
Build the ROS2 Container
Setting up VSCode
First ROS2 Program
ROS2 Python Packages
Docker and X11
RViz2
Rviz2 Displays
Let's learn about RViz2 Displays and setting it up for Laser scans
By , Minute
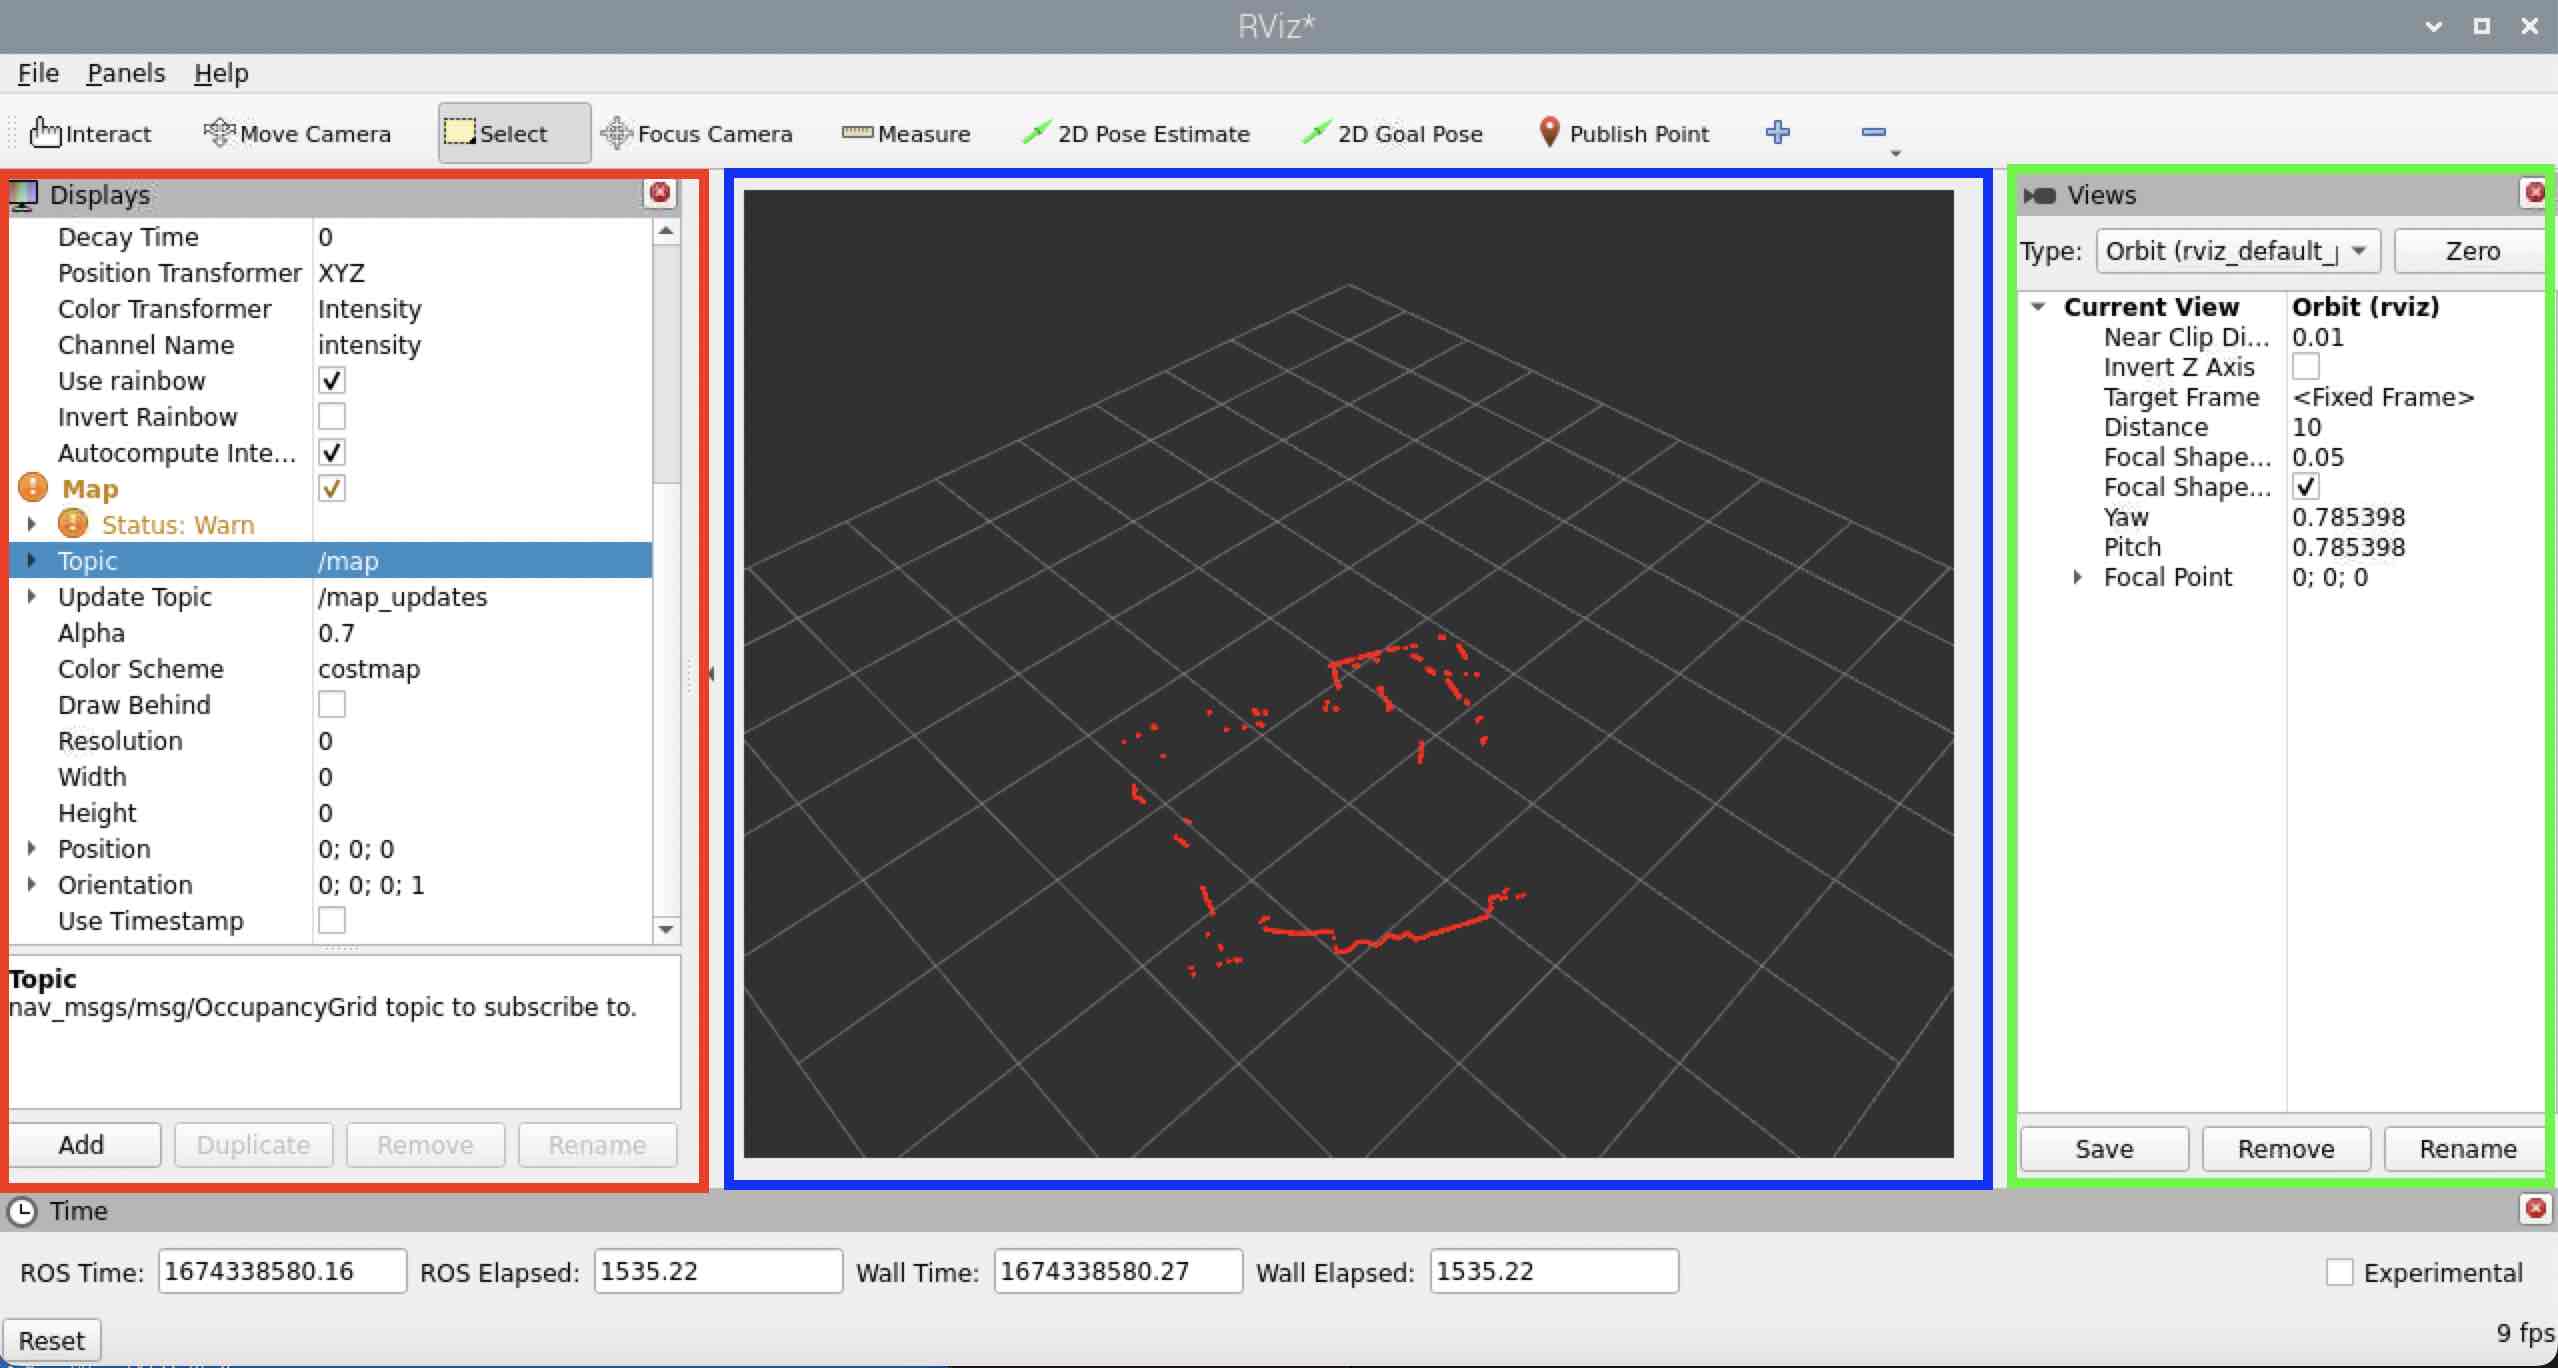
RViz2 Screen Layout
RViz has 3 main panels by default, and you can add additional panels to suit your needs (it’s very flexible).

In the screenshot above you can see the main areas of the screen:
- The Displays panel (outlined in Red)
- The Main Camera Display (outlined in Blue)
- The Views panel (outlined in Green)
RPLidar Laser scanner
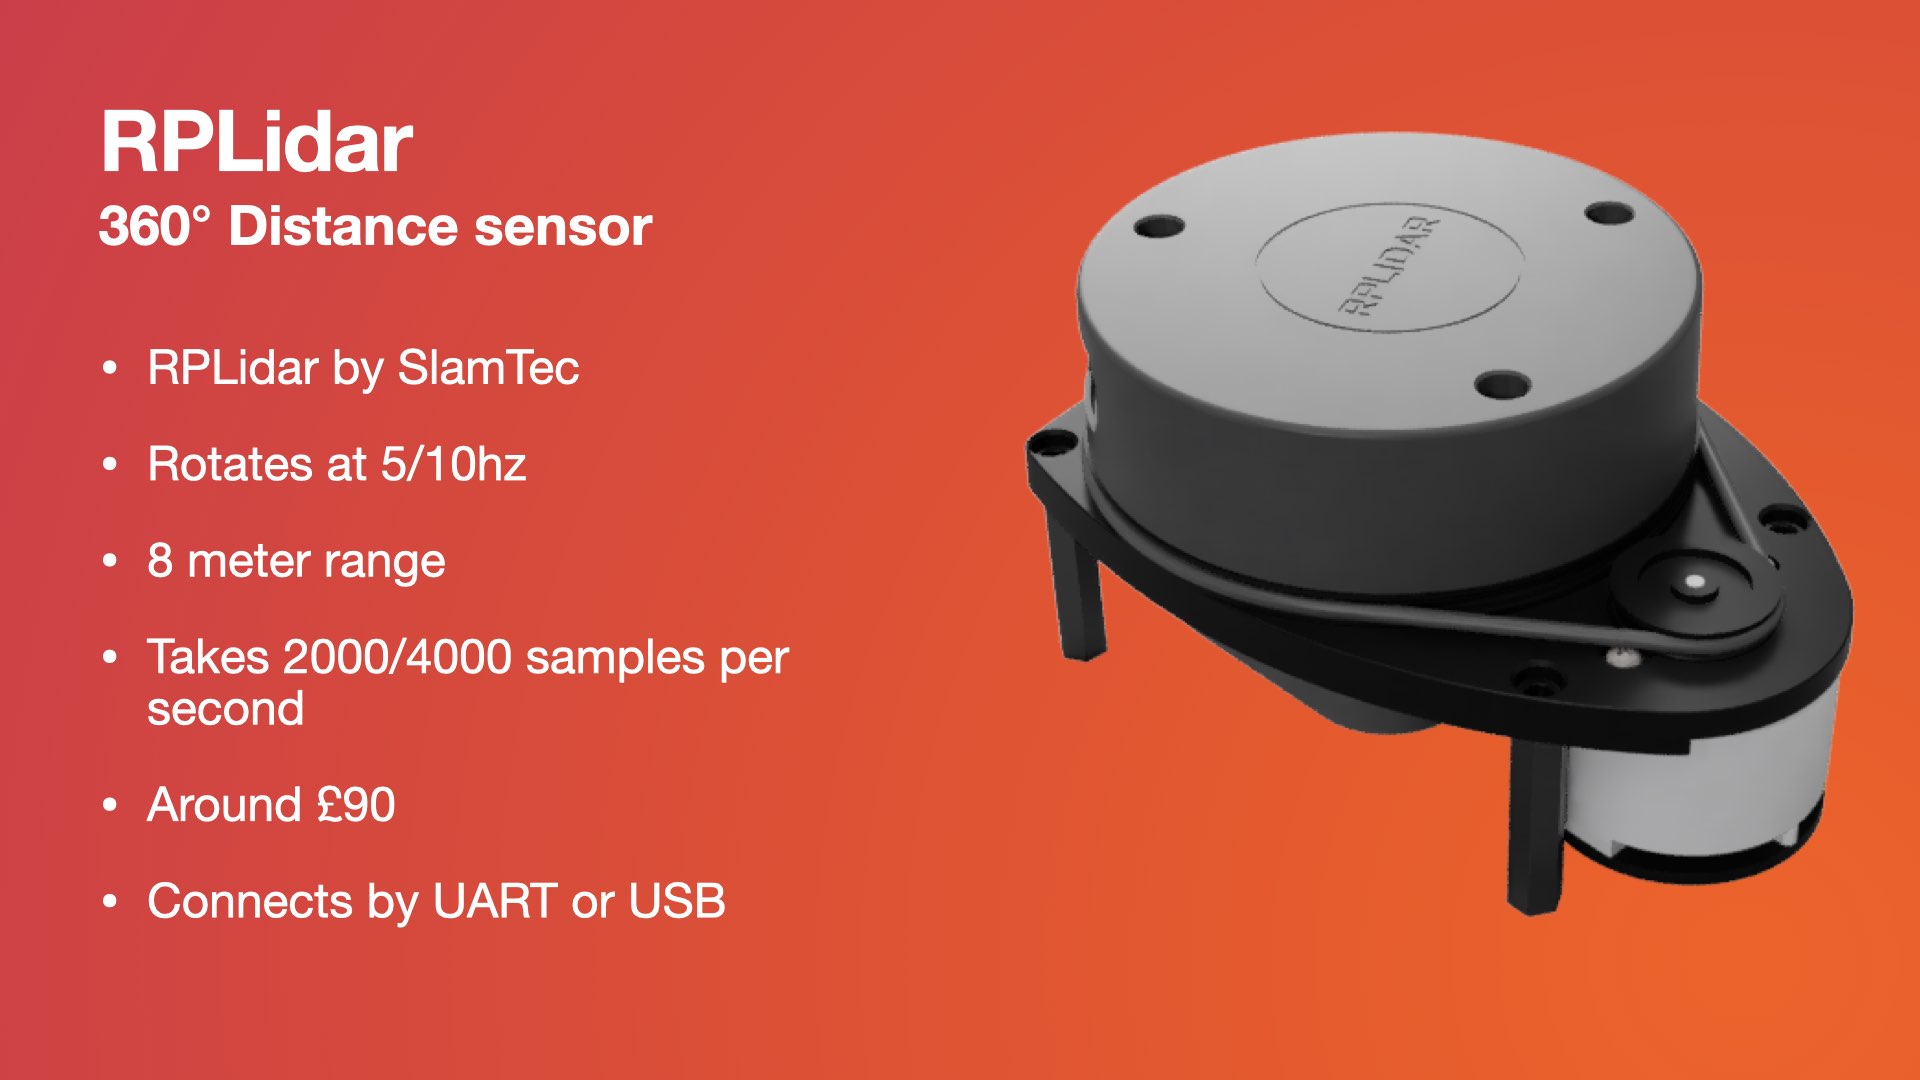
The SlamTec RPLidar A1 is an affordable laser scanner, ideal for use with robotics, and costs less than £99. We will use this in our tutorial.
Adding our LiDAR Laser Scan
To view our LiDAR data in Rviz2 we need to do a couple of actions:
- Download and compile the RPLidar_ros code
- Start the RPLidar node
- Start a transformation node to translate the
laser_scancoordinates to theWorldcoordinates - Start
rviz2and add the laser_scan display
Download and compile the RPLidar_ros code
- Download RPLidar code - From the Raspberry Pi terminal, type:
cd ~/cubie-1
git clone https://github.com/babakhani/rplidar_ros2
Slamtec now maintain their own ROS 2 driver, sllidar_ros2, which also supports their newer LiDARs. It’s started with
ros2 launch sllidar_ros2 view_sllidar_a1_launch.py.
The
rplidar_ros2folder needs to be inside thecubie-1folder, which appears as/ros2inside the container.
- Compile the RPLidar code - From the container, type:
cd /ros2/rplidar_ros2
colcon build
source install/setup.bash
Start the RPLidar node
We can now start the Laser scanner node.
- Start a new container terminal session - from the Raspberry Pi terminal, type:
cd ~/cubie-1/docker-full
docker compose exec ros2 bash
- Start the Laser Scanner - from the container, type:
cd /ros2/rplidar_ros2
source install/setup.bash
ros2 run rplidar_ros rplidar_composition
The RPLidar will momentarily stop and then restart, and you will see some output on the terminal showing that the LiDAR is now up and running
Check the scan data topic exists
We can check that the /scan topic exists by using the ros2 topic list command. Let’s open a new terminal and check we can see it.
- Start a new container terminal session - from the Raspberry Pi terminal, type:
cd ~/cubie-1/docker-full
docker compose exec ros2 bash
- Ros2 topic list - from the container, type:
ros2 topic list
There should be three topics listed:
/parameter_events
/rosout
/scan
If the /scan topic is visible, this means the LiDAR is successfully sending data to the Ros topic named /scan.
Start RViz2
Let’s start RViz2.
- Start RViz2 - from the container, type:
rviz2
We will configure RViz in the next section.
You can use the arrows ← → on your keyboard to navigate between lessons.
Comments