
Why are Bus Servos better?
Bus servos like the Feetech STS3215 daisy chain over a single data wire, give you full position feedback, and make robot wiring a dream. Here's how to wire them up and control them with MicroPython on a Raspberry Pi Pico.
19 April 202612 minute read
By Kevin McAleer
Share this article on
Table of Contents
- The Problem with Hobby Servos
- How Bus Servos are Different
- Bill of Materials
- Wiring it Up
- Installing the MicroPython Library
- Moving Your First Servo
- Changing a Servo’s ID
- Setting Position Limits
- Two Servos, One Cable — The Wave Demo
- Torque On, Torque Off — Teach by Demonstration
- Gearing Matters: Choosing the Right STS3215
- Where This is All Going — The Robot Arm
- Troubleshooting
- Links
Why are Bus Servos better?
Bus servos like the Feetech STS3215 daisy chain over a single data wire, give you full position feedback, and make robot wiring a dream. Here's how to wire them up and control them with MicroPython on a Raspberry Pi Pico.
Video
For every project I create, I often make a corresponding YouTube video. Sometimes, there might be more than one video for a single project. You can find these videos in this section.
Explore more through this this dedicated video.
Ahoy there makers,
Two servos running off a single data wire, daisy chained together. I can read back exactly where each one is at any moment. No jitter, no guessing. If you’ve ever wrestled a handful of hobby servos into a robot arm and wished there was a better way — there is. They’re called bus servos, and once you’ve used them you won’t want to go back.
This week I’m diving into the Feetech STS3215 bus servo, wiring a pair of them to a Raspberry Pi Pico, and driving them with MicroPython. By the end of this post you’ll have a servo moving, reading its own position back, and you’ll see exactly why these are such a big deal for robotics projects.
The Problem with Hobby Servos
If you’ve done any maker project with servos, you’ve almost certainly used a PWM (Pulse Width Modulation) servo — the classic SG90, MG90 or MG996R. You send a pulse, it moves to a position. Simple enough, but there are a couple of real problems:
- Every servo needs its own signal wire back to the microcontroller. Six servos? Six GPIO pins.
- The servo can’t tell you where it actually is. You tell it where to go and just have to trust it got there.
Bus servos fix both of these problems.
How Bus Servos are Different
The Feetech STS3215 uses serial communication instead of PWM. Commands go over a single wire using half-duplex UART — the same wire handles both sending and receiving.
Because it’s a bus, you can daisy chain as many servos as you like on a single cable. Each servo has a unique ID and you address it by number. Instead of wiring every servo back to a separate pin, connect them all to one pin and chain them together.
Here’s the really good bit though — because communication is two-way, you can ask the servo where it is and it will tell you. Position feedback, load, temperature, voltage — the servo becomes a sensor as well as an actuator.
| Feature | PWM Servo | STS3215 Bus Servo |
|---|---|---|
| Signal type | Pulse width | Serial (half-duplex UART) |
| Wires per servo | One signal pin each | One bus, daisy chained |
| Position feedback | None | Full closed-loop feedback |
| Range | ~180° | Full 360° (continuous capable) |
| Resolution | Analogue pulse | 12-bit (0–4095 steps) |
| Extra data | — | Load, temperature, voltage |
| Approx. cost | ~£1–£3 | ~£10–£14 |
Bill of Materials
| Component | Purpose | Approximate Cost |
|---|---|---|
| Raspberry Pi Pico | Microcontroller | ~£4 |
| Waveshare Bus Servo Driver Board | UART + half-duplex conversion + power | ~£10 / $15 |
| Feetech STS3215 servo (x2 or more) | The star of the show | ~£10 / $14 each |
| 7.4V power supply (or 2S LiPo) | Powers the servo bus | Varies |
| Jumper wires | UART + GND to the Pico | A few pence |
I bought my STS3215s on AliExpress for about $10 each — much cheaper than buying through Amazon.
Wiring it Up
The Waveshare driver board handles the voltage regulation and half-duplex conversion for you, which makes life much easier.
- Power the Waveshare board from a 7.4V supply (the STS3215 runs at 7.4V, so a 2S LiPo or bench PSU is ideal).
- Connect the Pico to the driver board over UART, and share a common ground with the Pico:
- Pico GP0 (TX) → Waveshare RX
- Pico GP1 (RX) → Waveshare TX
- Pico GND → Waveshare GND (this shared ground is essential — without it the UART signals have no common reference and you’ll get garbled data)
- Set both yellow jumpers on the Waveshare board to the “UART to servo” position (labelled A on the silkscreen). This routes the Pico’s UART through to the servo bus. The alternative position (B, “USB to servo”) instead routes the board’s onboard USB-to-serial chip to the bus, which is useful if you want to drive the servos from a PC instead of a microcontroller.
- Plug the first STS3215 into either JST-style connector on the board.
- Daisy chain additional servos by plugging a cable from the second port of the first servo into the next servo, and so on.
Power and data both run through that single chain. Neat, tidy, and no stretching wires across a moving robot arm.
Never power servos from your microcontroller. The STS3215 can pull a lot of current under load — let your bench supply or battery do the heavy lifting.
Installing the MicroPython Library
Waveshare provide a MicroPython driver for the STS3215. I’ve bundled a copy along with all the demo code used in this post on GitHub:
Copy sts3215.py (or whatever your version is called) onto the Pico using Thonny or mpremote.
Heads up: the STS3215 default baud rate is 1,000,000 baud (1 Mbaud). The library handles this for you, but if you ever need to configure UART manually or talk to the servo from another tool, remember it’s not a typical 9600/115200 setup.
Moving Your First Servo
Out of the box, every STS3215 ships with ID 1. That’s fine for a single servo — let’s get one moving.
from sts3215 import STS3215

servo = STS3215(uart_id=0, tx_pin=0, rx_pin=1)

# Ping to check it's alive
if servo.ping(1):
    print("Servo 1 found")

# Move to the middle of the range (servo_id, position, speed, acc)
servo.move(1, 2048, speed=2400, acc=50)
Exact method names will depend on the version of the library you’re using — check the repo README for the full API.
Positions range from 0 to 4095 (12-bit resolution across the full 360°), so 2048 is the midpoint.
Now the fun part — reading the position back from the servo:
position, speed = servo.read_pos_speed(1)
print(f"Position: {position}  Speed: {speed}")
That’s closed-loop control in three lines. No guessing.
Changing a Servo’s ID
Before you can daisy chain more than one servo, each one needs a unique ID. They all arrive set to ID 1, so the trick is to connect them one at a time and reassign them.
from sts3215 import STS3215

servo = STS3215(uart_id=0, tx_pin=0, rx_pin=1)

# Change ID 1 → ID 2
servo.set_id(current_id=1, new_id=2)

print(servo.ping(1))  # False — no longer on ID 1
print(servo.ping(2))  # True  — now responding on ID 2
Once each servo has a unique ID, plug them all into the bus and they’ll happily live together on one data line.
Setting Position Limits
It’s a really good idea to set minimum and maximum position limits on your servos — especially when they’re bolted into a mechanism with a cable run or a hard stop. The simplest approach is to clamp your target position in code before sending it:
MIN_POS = 1024
MAX_POS = 3072

def safe_move(servo, servo_id, target, speed=2400, acc=50):
    target = max(MIN_POS, min(MAX_POS, target))
    servo.move(servo_id, target, speed=speed, acc=acc)
The STS3215 also stores min/max angle limits in its own EEPROM control table, so once you’re comfortable with register-level writes you can push those down into the servo itself and have it enforce the limits regardless of what your code tells it to do.
Two Servos, One Cable — The Wave Demo
Let’s chain two servos together and get them moving in a smooth wave-like motion, with the second one lagging the first by a few steps.
import math, time
from sts3215 import STS3215

CENTER = 2048
AMPLITUDE = 1000     # ~88° either side of centre
STEPS = 60           # samples per sweep
STEP_DELAY = 0.04    # 40 ms between steps
LAG = 6              # servo 2 follows 6 steps behind
SPEED = 2400
ACCEL = 50

bus = STS3215(uart_id=0, tx_pin=0, rx_pin=1)

# Build a list of sine-wave target positions
targets = [
    int(CENTER + AMPLITUDE * math.sin(2 * math.pi * i / STEPS))
    for i in range(STEPS)
]

# Enable torque on both servos
bus.set_torque(1, True)
bus.set_torque(2, True)

# Park both at centre
bus.move(1, CENTER, SPEED, ACCEL)
bus.move(2, CENTER, SPEED, ACCEL)
time.sleep(0.5)

try:
    i = 0
    while True:
        t1 = targets[i % STEPS]
        t2 = targets[(i - LAG) % STEPS]
        bus.move(1, t1, SPEED, ACCEL)
        bus.move(2, t2, SPEED, ACCEL)

        p1, _ = bus.read_pos_speed(1)
        p2, _ = bus.read_pos_speed(2)
        print(f"Target1: {t1:>4}  Pos1: {p1:>4}   Target2: {t2:>4}  Pos2: {p2:>4}")

        i += 1
        time.sleep(STEP_DELAY)

except KeyboardInterrupt:
    print("Stopping — releasing torque")
    bus.move(1, CENTER, SPEED, ACCEL)
    bus.move(2, CENTER, SPEED, ACCEL)
    time.sleep(0.5)
    bus.set_torque(1, False)
    bus.set_torque(2, False)
The two servos sweep back and forth with that beautifully smooth sinusoidal motion, six steps out of phase. Because we’re reading the positions back, we can print live feedback and see exactly where each one is.
Torque On, Torque Off — Teach by Demonstration
One of my favourite features of bus servos: you can switch torque off and still read the position back. That means you can physically move a robot arm into a pose by hand, record the positions, and play them back later.
bus.set_torque(1, False)   # Go limp — free to move by hand
pos, _ = bus.read_pos_speed(1)
print("Recorded position:", pos)
bus.set_torque(1, True)    # Re-energise
That’s the basis of a “teach mode” — and I’ll be doing a dedicated video on exactly that in a future post.
Gearing Matters: Choosing the Right STS3215
Look on the back of the STS3215 box and you’ll see a model code like STS3215-C001 or STS3215-C044. Those numbers indicate the gearing ratio, which trades speed for torque.
For my robot arm project I’m using:
- Higher torque, lower speed for the shoulder and elbow joints (where the mechanical load is greatest)
- Lower torque, higher speed for the gripper and wrist (where the load is small)
Pick the right gearing for the right joint — the robot will thank you.
Where This is All Going — The Robot Arm
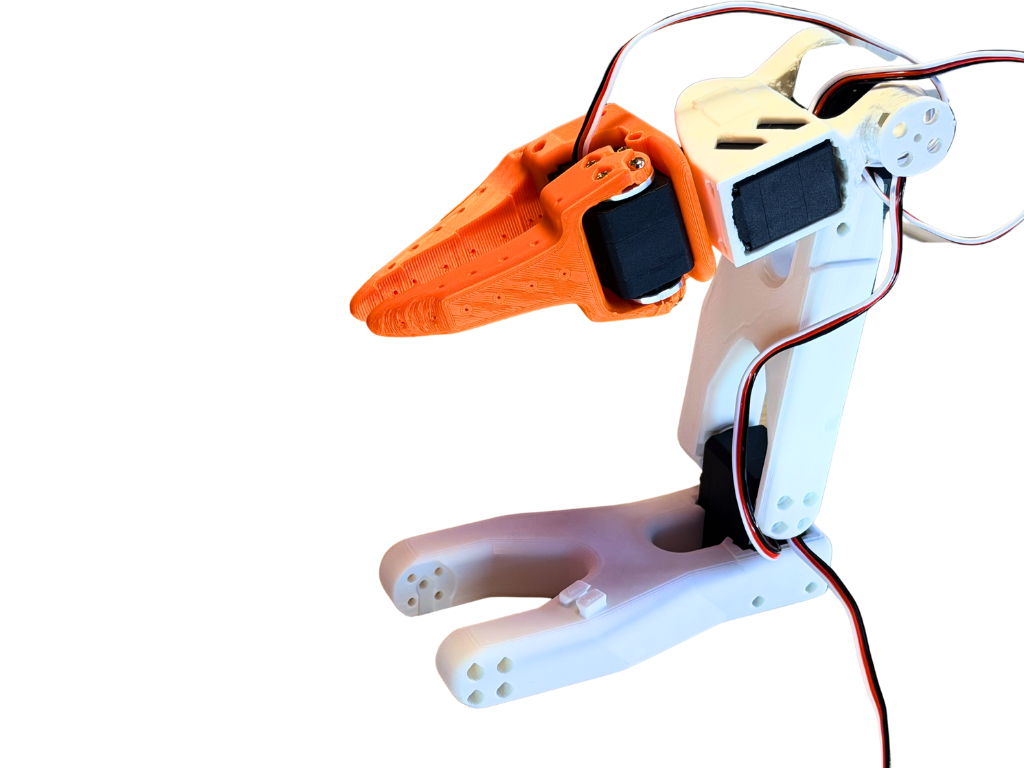
All of this is feeding into a 6-DOF robot arm project I’m currently building. I started from some files on Printables but wasn’t happy with the look and fit, so I’ve been remodelling the whole thing in Fusion 360 — including a full model of the STS3215 itself, so I can design mounts around it properly.
The arm uses six STS3215s running on a single data and power cable from base to gripper. That’s the real magic of bus servos — the wiring is almost invisible.
I’m not going to promise a date for the arm, but if you’d like to follow along with the build make sure you’re subscribed to the channel.
Troubleshooting
- Servo doesn’t respond — Double check the UART wiring (TX→RX, RX→TX), that both Waveshare jumpers are in the UART-to-servo (top, position A) position, and that the 7.4V supply is connected.
- Nothing moves when I chain two servos — Both servos are probably still on ID 1. Connect them one at a time and change one to ID 2 before chaining.
- Garbled data / random disconnects — Check GND is shared between the Pico and Waveshare board, and that the baud rate in the library matches the servo (default is 1,000,000 baud).
- Servo twitches or stalls — Check your power supply can deliver enough current. A bench PSU is much happier than a battery on its last legs.
Links
- Full demo code (STS3215 on Pico): https://www.github.com/kevinmcaleer/sts3215
- Waveshare Serial Bus Servo Driver Board: https://www.waveshare.com/wiki/Bus_Servo_Adapter_(A)
- Feetech STS3215 product page: https://www.feetechrc.com/
- Raspberry Pi Pico documentation: https://www.raspberrypi.com/documentation/microcontrollers/
- Qubit Robot Arm: https://github.com/0xaiwhisperer/qubit?tab=readme-ov-file#hardware
If you’ve been using PWM servos and you’ve been frustrated by the lack of feedback, the messy wiring and the jitter — give the STS3215s a try. Yes, they’re about 10x the price of an SG90, but you really do get what you pay for. That position feedback alone makes all the difference.
If you found this useful, watch the video, give the video a thumbs up — it really does help the channel.
See you next time. Bye for now.
This page is awesome - Show some love!


Comments